The first step to any successful training initiative is seamlessly integrating your learners into the system, but this can be a challenge during periods of high growth. Adding each person manually can be tedious and time-consuming, but SmarterU LMS has a better solution. Our powerful user import tool is designed to help you add hundreds, or even thousands, of users at once, so you can save time and focus on what matters most: providing a great learning experience.
Want SmarterNews delivered to your inbox? Subscribe today!
What is the User Import Tool?
The user import tool lets you create multiple new user accounts efficiently using a single CSV (Comma-Separated Values) file. A CSV file is a spreadsheet you can open and edit with Microsoft Excel or Google Sheets.
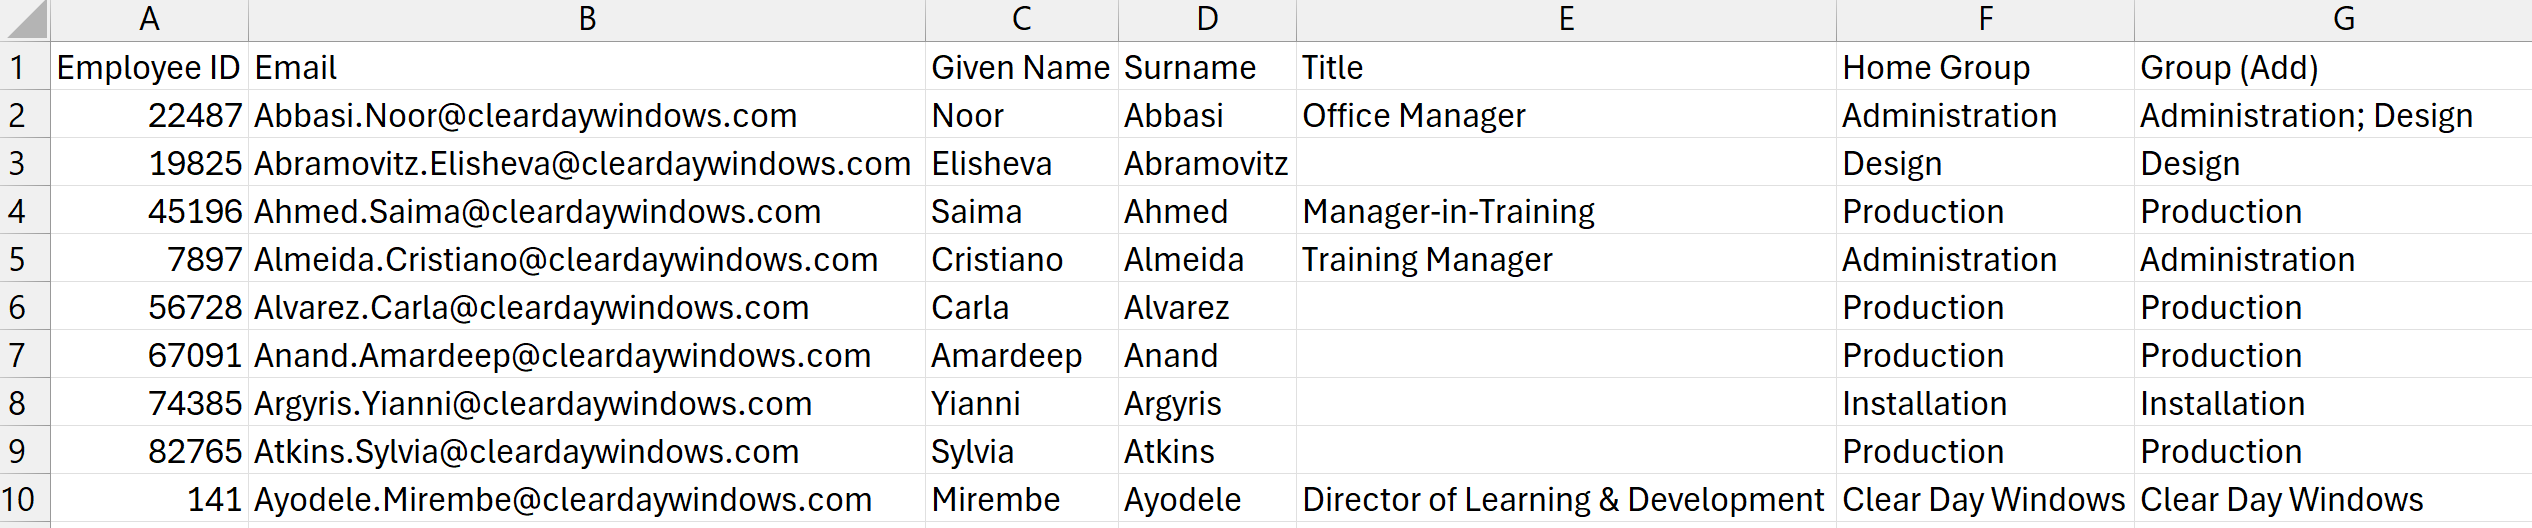
Instead of creating each user profile individually, you can gather all the necessary information, place it into a spreadsheet, and upload it to create all your users simultaneously. This is perfect when you need to add a lot of users quickly.
You can also use the user import tool to update existing users or manage user access. For example, you can use the tool to deactivate users or change their permissions. We’ll cover this in more detail in our next post.
For security, the user import tool cannot be used to add or update account administrators or owners.
The User Import Template: Your Blueprint to Success
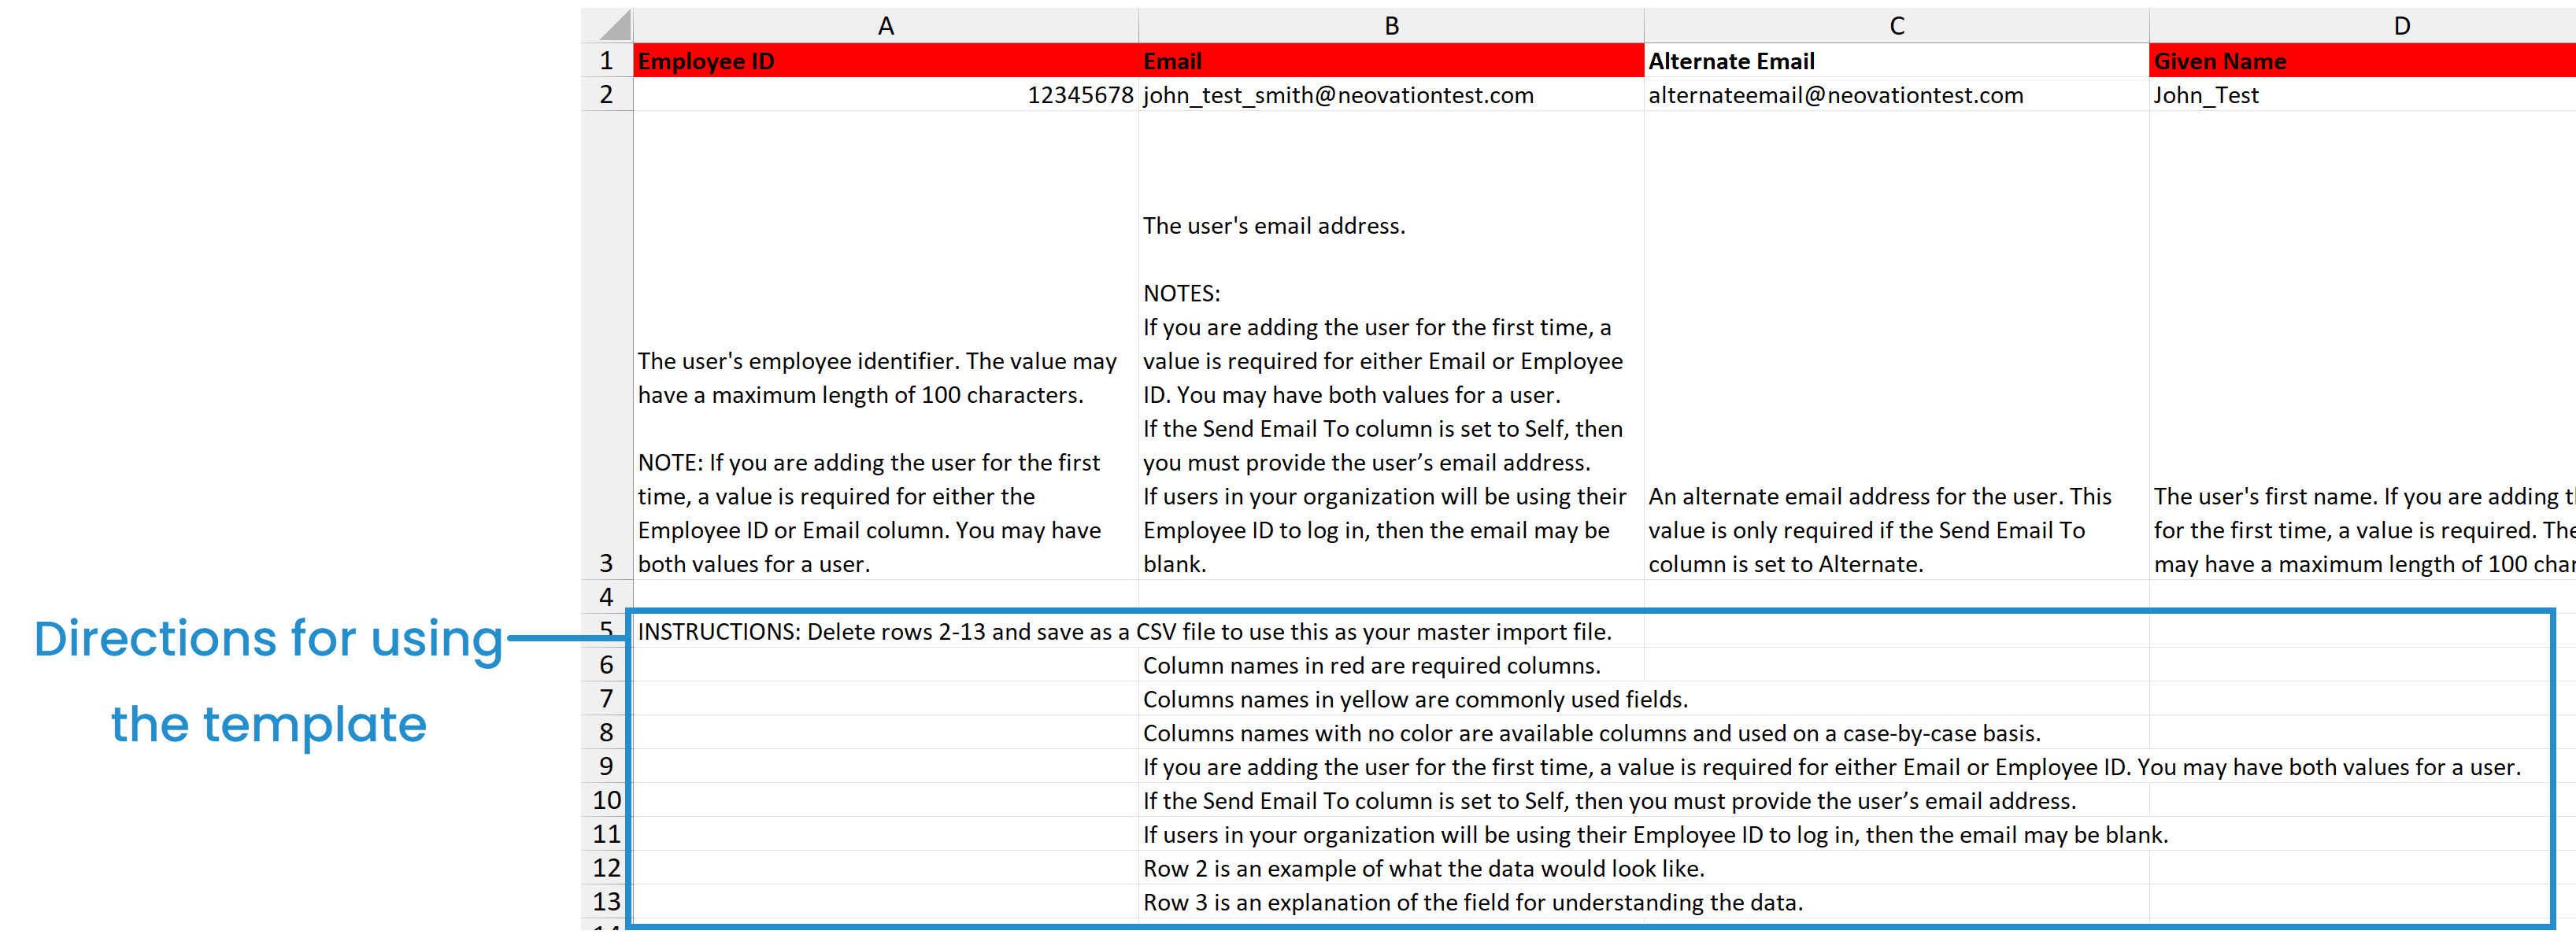
To simplify the process, SmarterU provides a downloadable template to help you prepare your user data for import. This template contains the fields you’ll most likely need when adding new users, allowing you to focus on simply entering your users’ information. Using the template saves you time and ensures that your information is added to the right place in SmarterU.
Want to include additional information about your users, such as their supervisors or teams? You can add columns to your CSV file or download the User Import All Columns template which includes every possible field you can import into SmarterU.
Let’s take a closer look at the user import template. The template has built-in directions for easy reference.
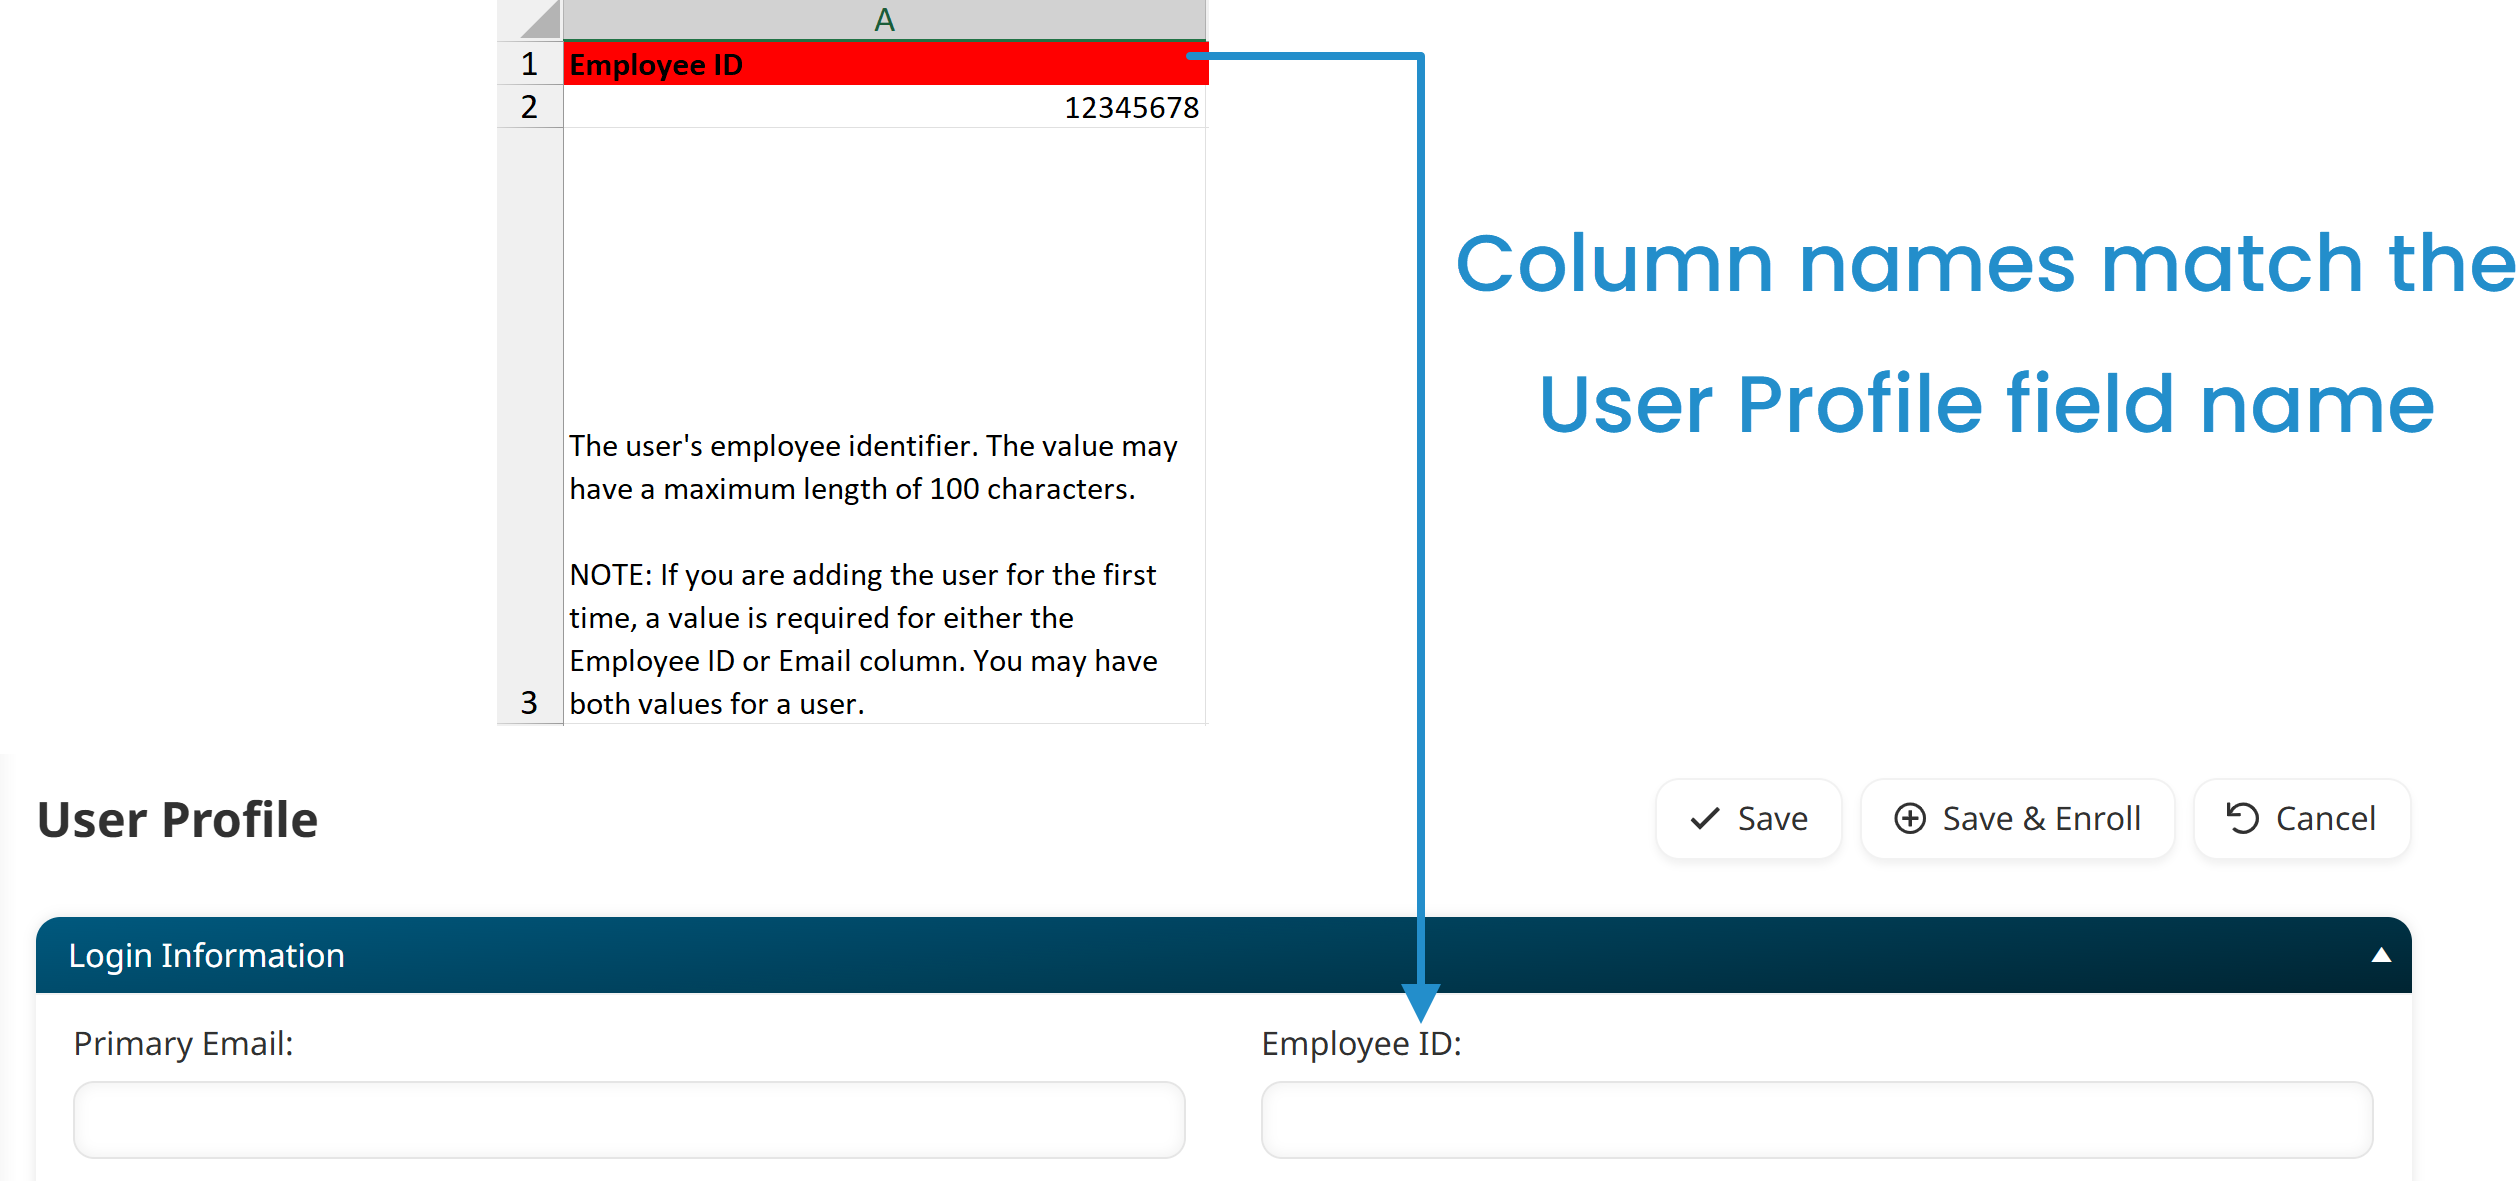
The column names in the first row match the fields in the User Profile workscreen, so it’s easy to tell where your information will be added in SmarterU LMS.
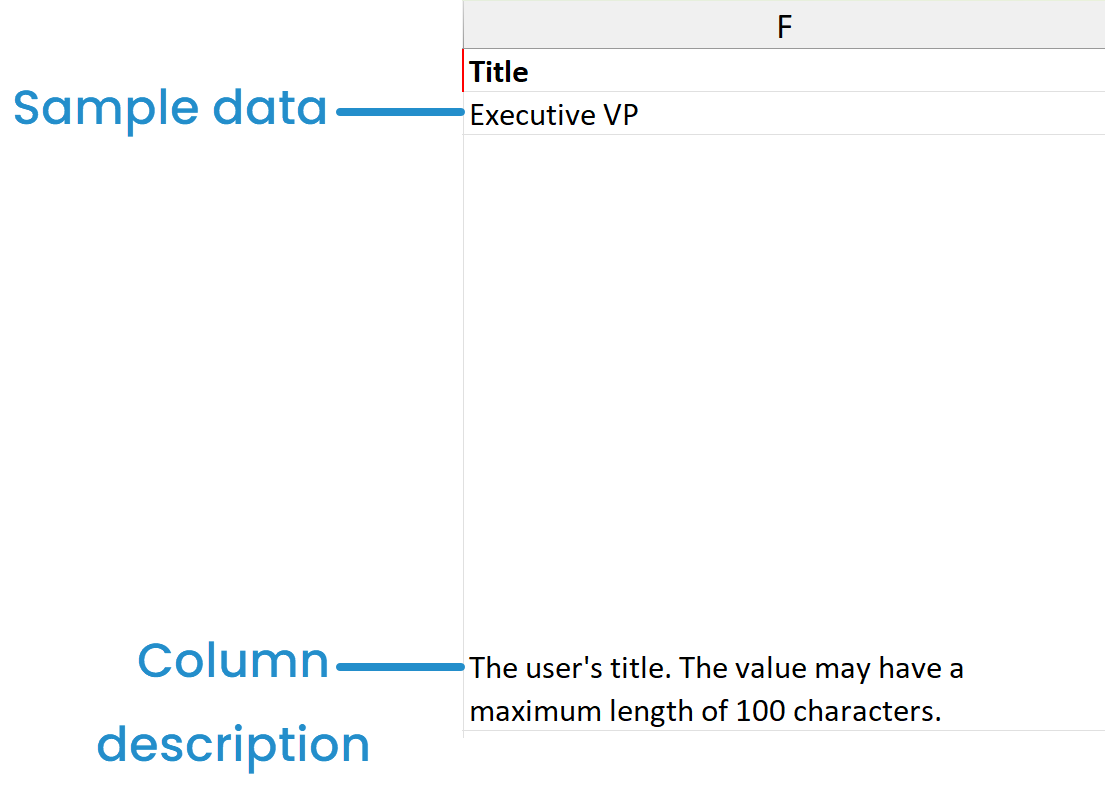
Each column includes sample data and a description of what you should provide.
Further, columns are color-coded so you can see what information is required and what’s optional. For example, red column headers indicate that you must enter that information for each user. The image below shows that Email, Given Name, and Surname are required fields.

When adding information to your CSV file, be sure to check for typos, extra spaces, or incorrect formatting. You may also want to consider standardizing your names for titles and departments. For example, will you use “HR” or “Human Resources”? Will you use “VP” or “Vice President”? This consistency across your users keeps your data tidy and is crucial for accurate filtering and reliable reporting.
How to Use the Import Tool
After adding your information to the template, you’re ready to upload it to SmarterU.
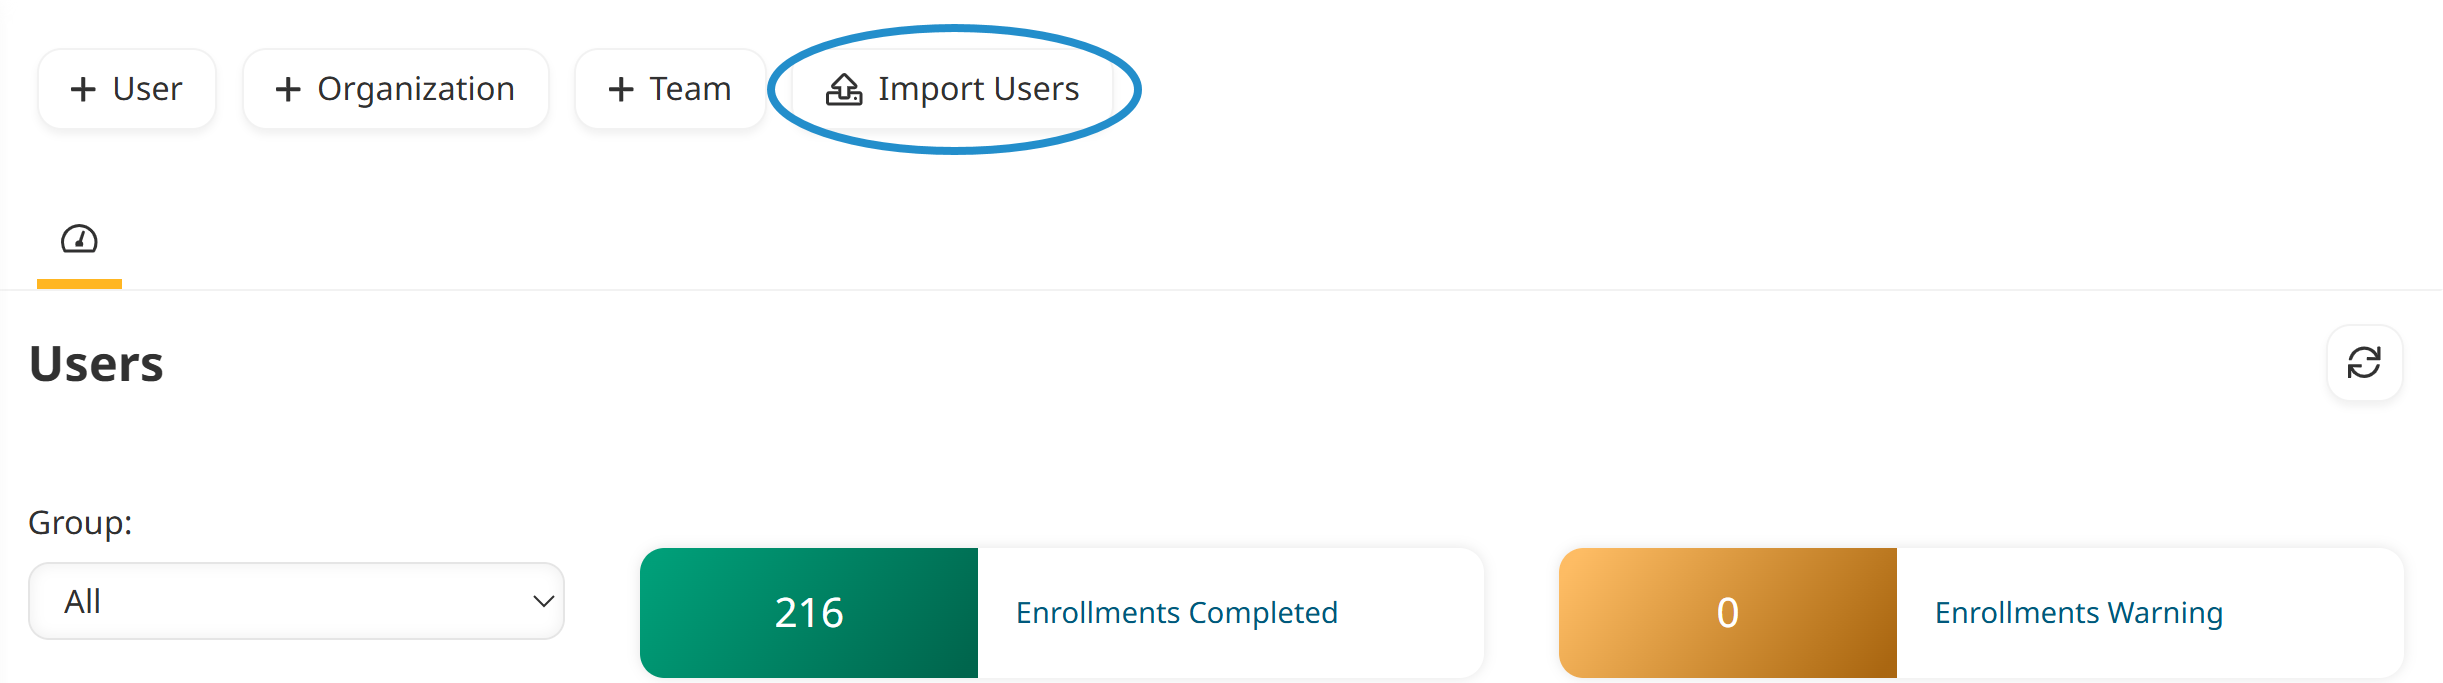
Navigate to the Users Dashboard.
Click Import Users.
Click Select File, select your CSV file, then click Open.
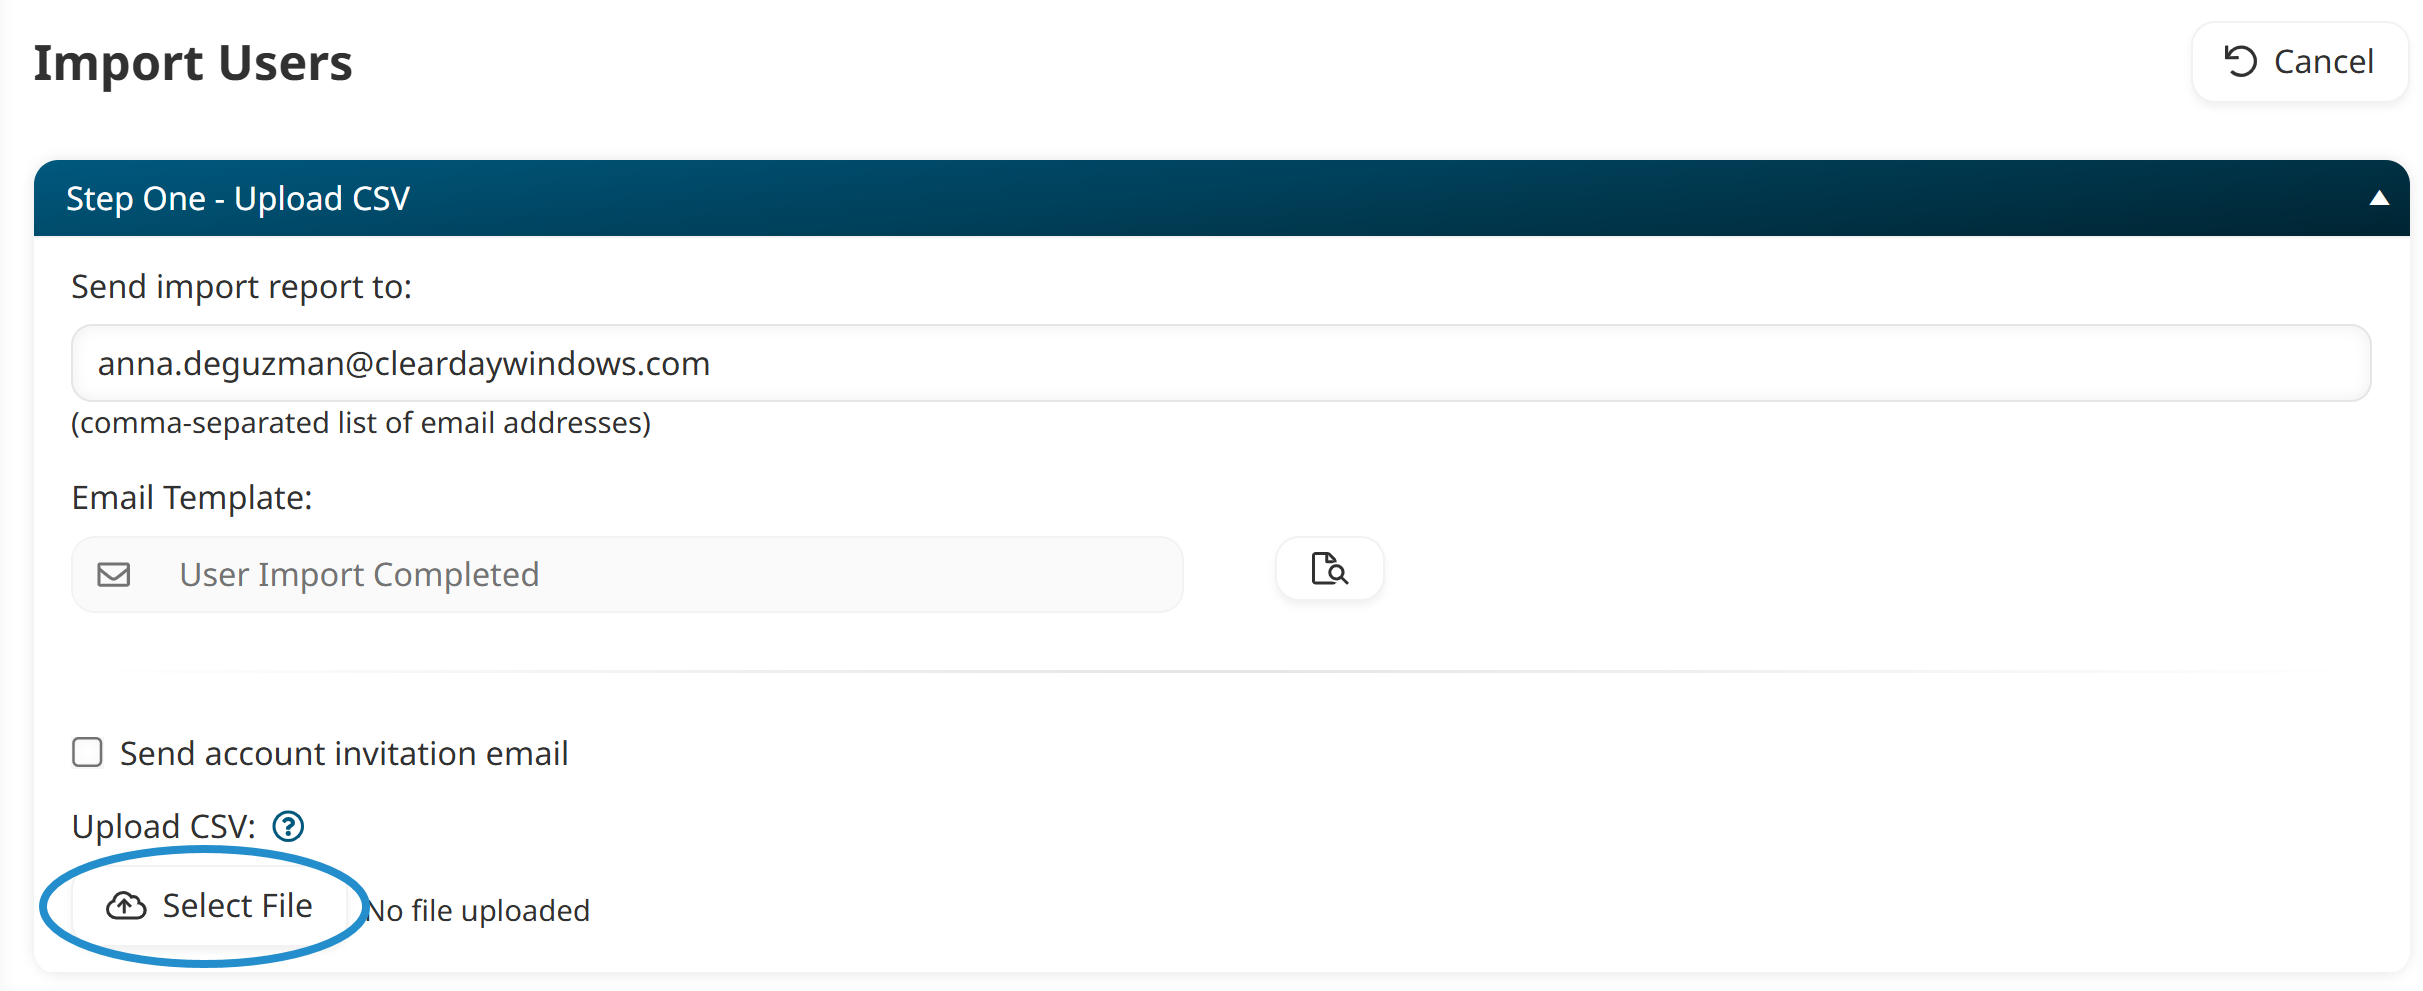
You can also enter the email address where you want the User Import Report sent. This report provides a detailed list of the users who were added and those who were not (along with the reason why).
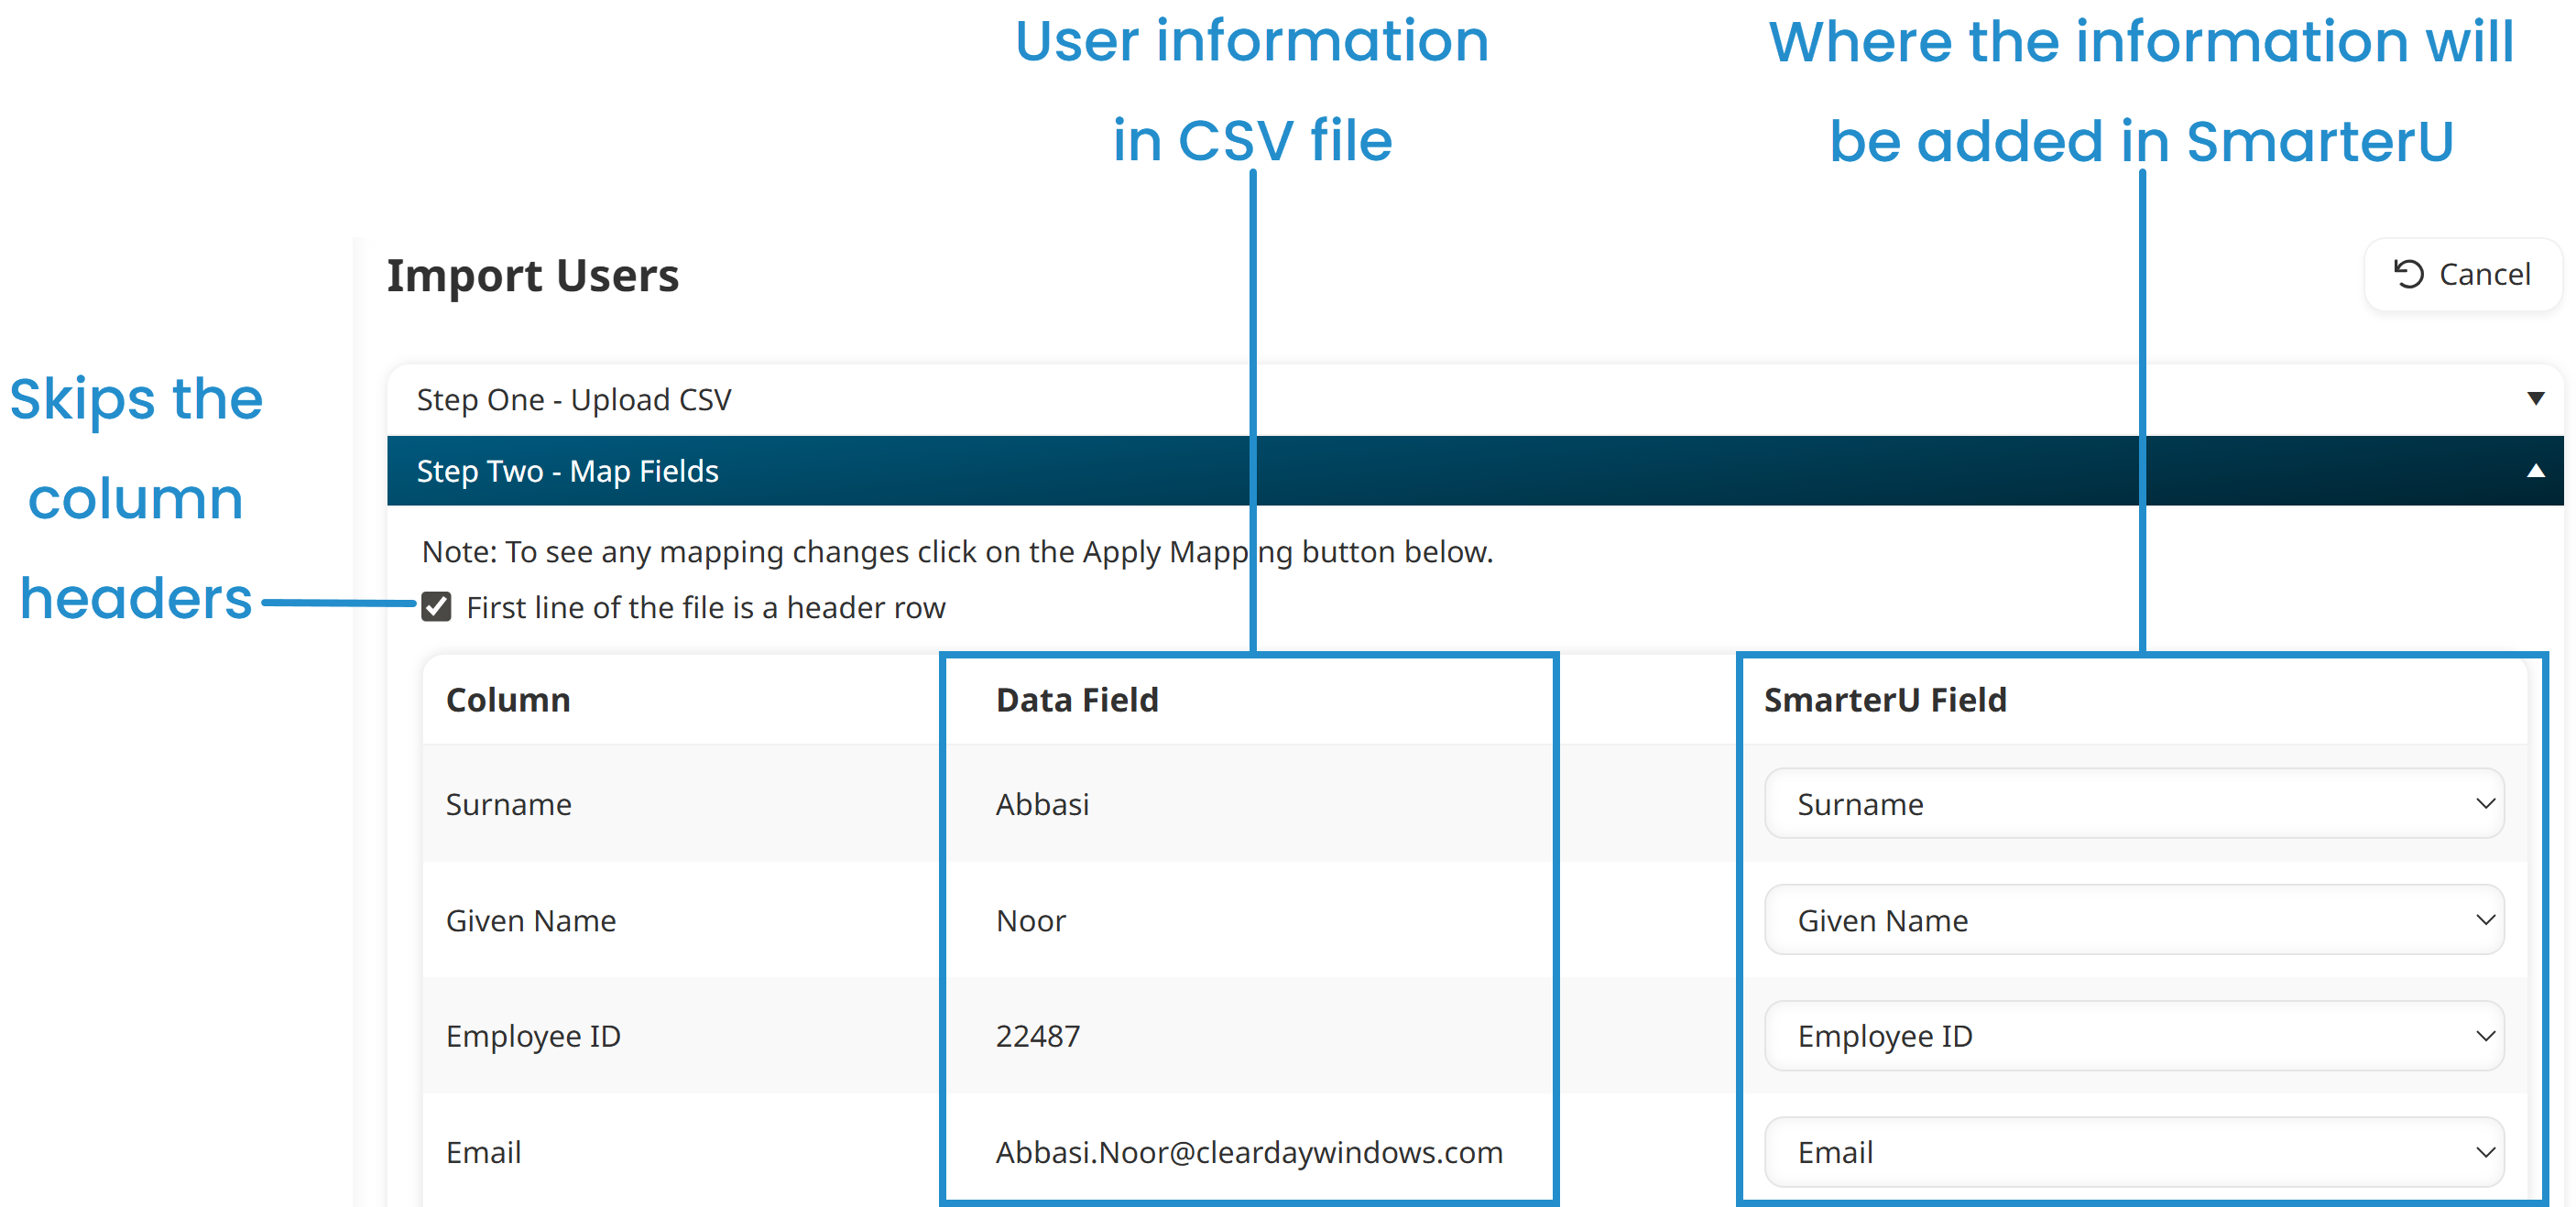
Map your import file. "Mapping" is like telling the import tool where your information should be added in SmarterU. Select the First Line of the File is a Header Row checkbox to skip importing the row with your column headers.
The Data Field column shows a user’s information in your CSV file, and the SmarterU Field column shows where the import tool will add the information in SmarterU.
Click Apply Mapping.
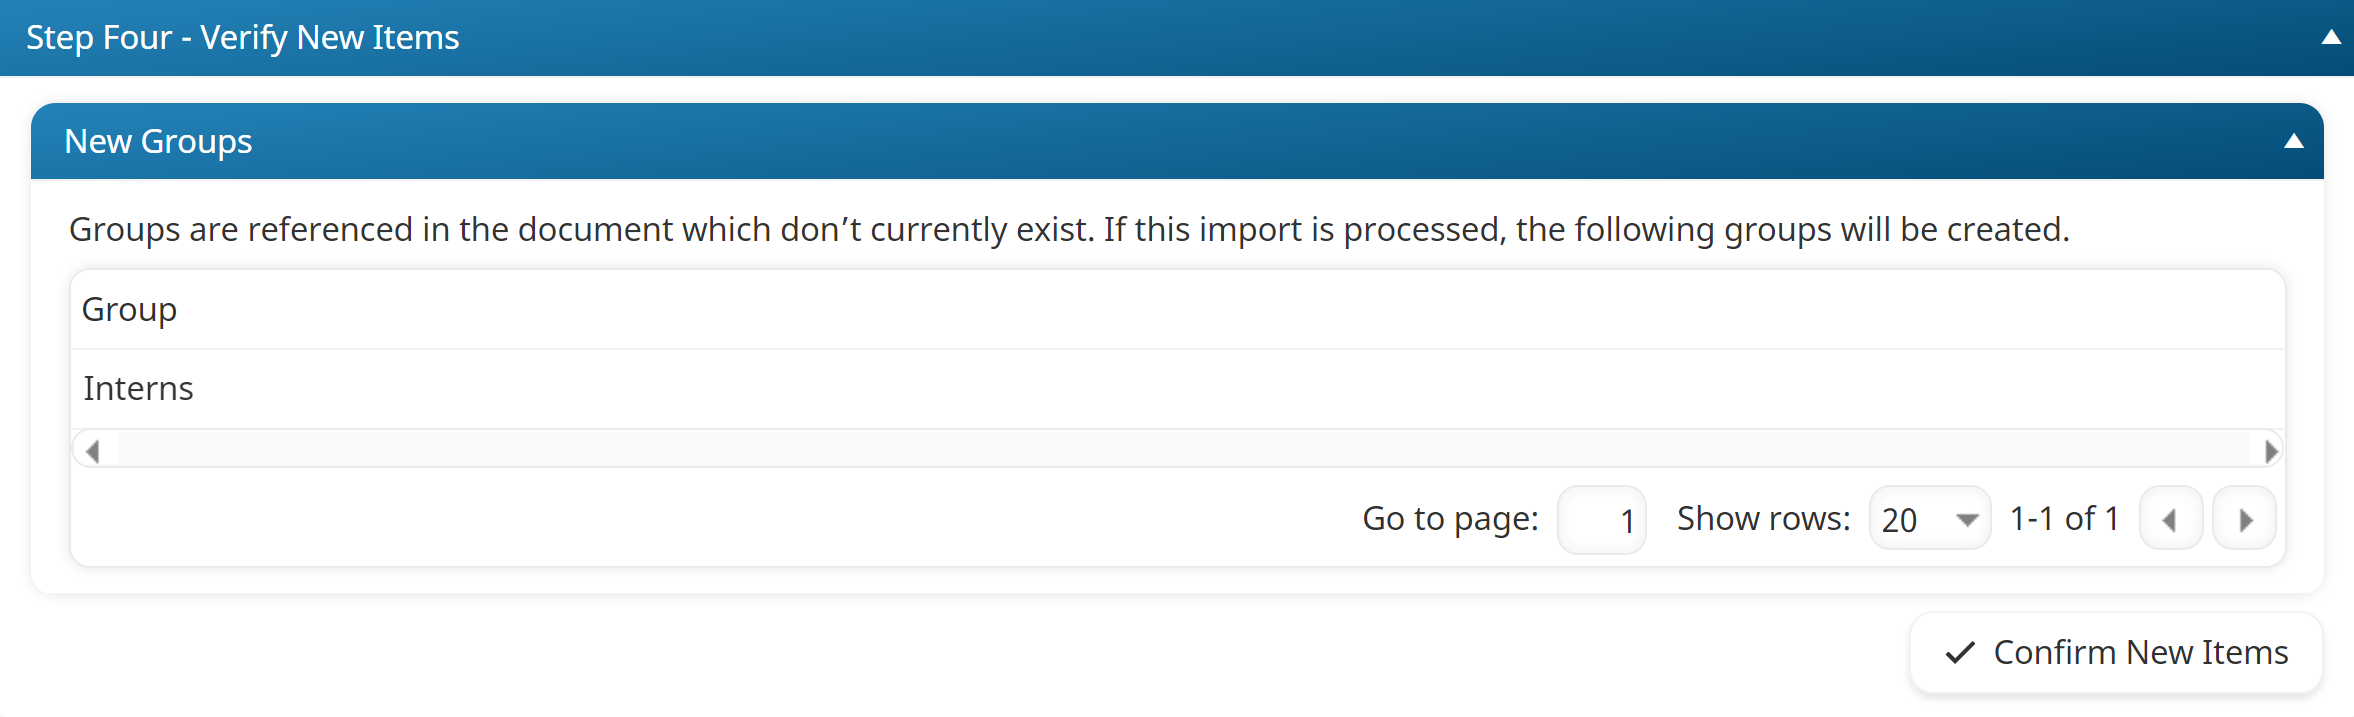
If your CSV file contains new groups or organizations, click Confirm New Items to tell SmarterU that you want to create them in your account.
Preview your import. This preliminary check gives you one last opportunity to review the users SmarterU will create, check for potential errors, and confirm that the data looks correct.

Check the Unsuitable Rows tab to learn why a user can’t be created so that you can correct your CSV file.
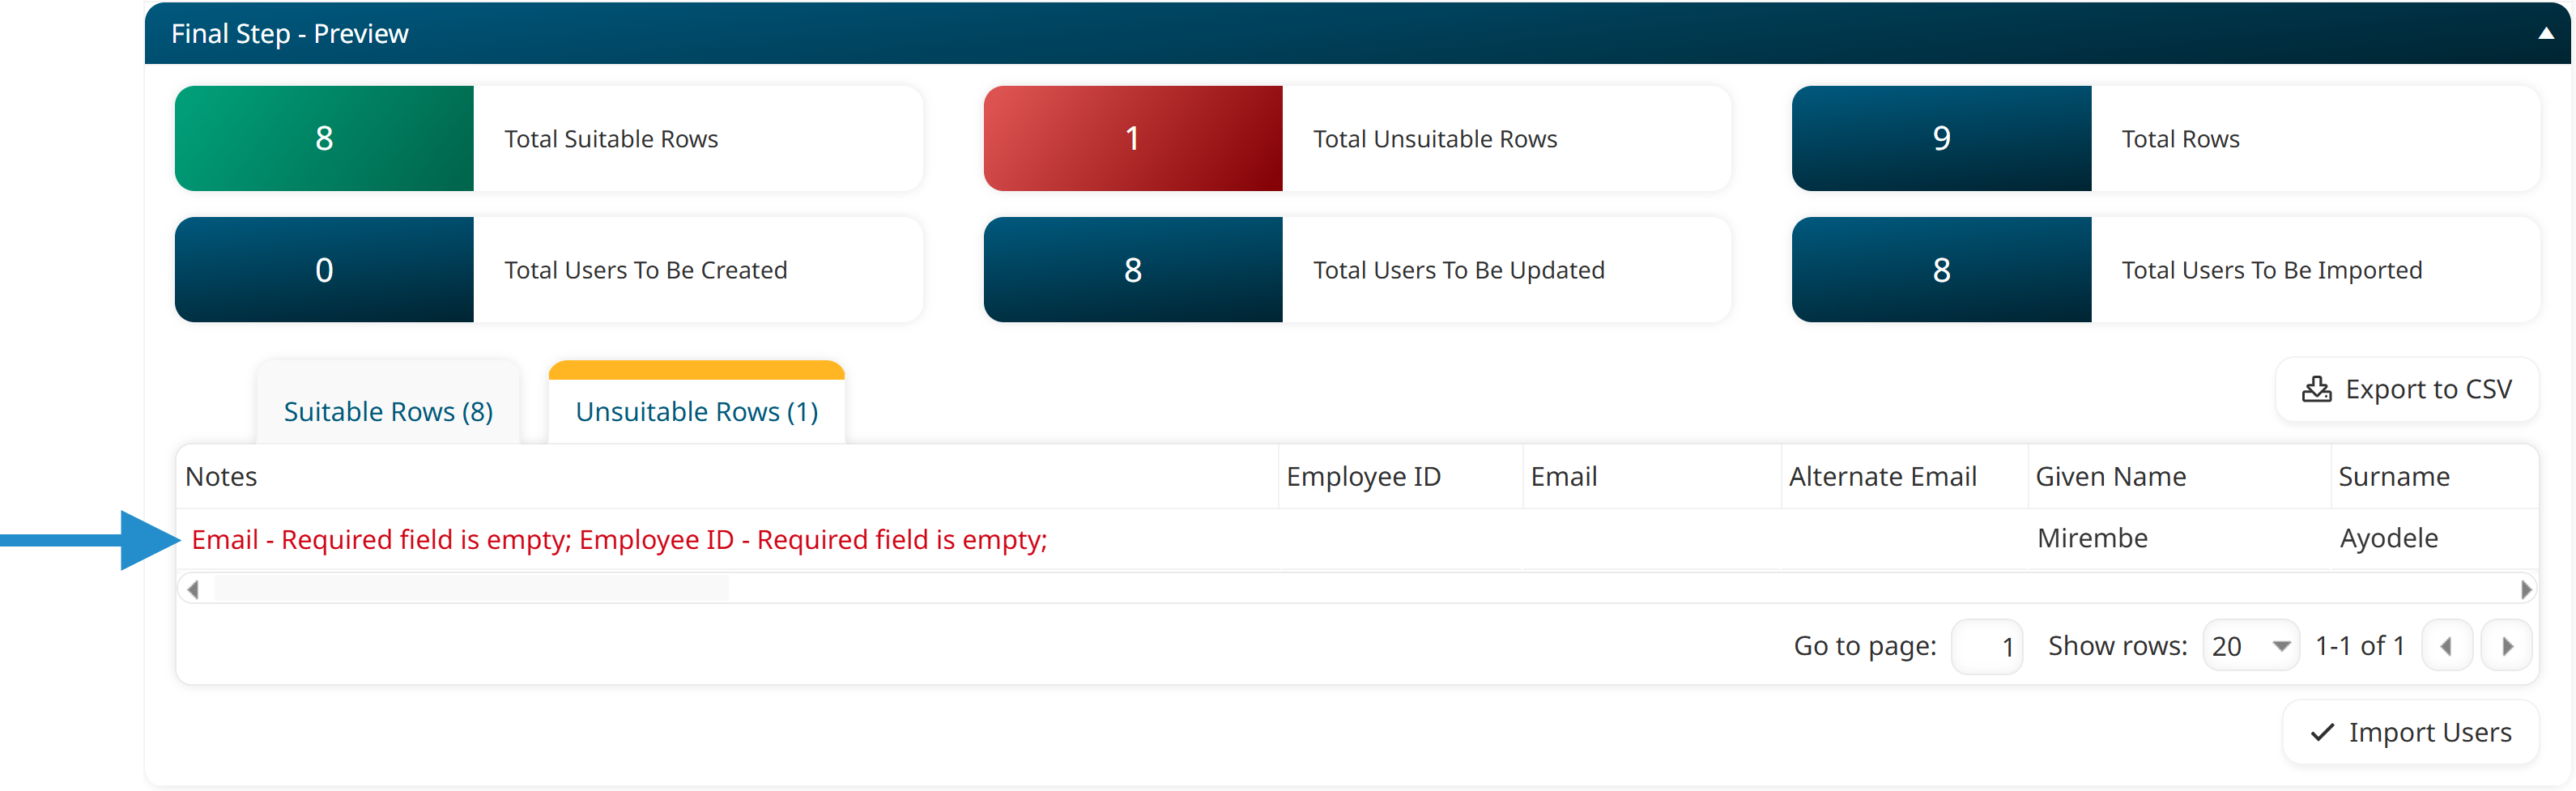
The import process cannot be stopped or reversed, so we recommend previewing your data carefully to ensure everything looks right.
Click Import Users.
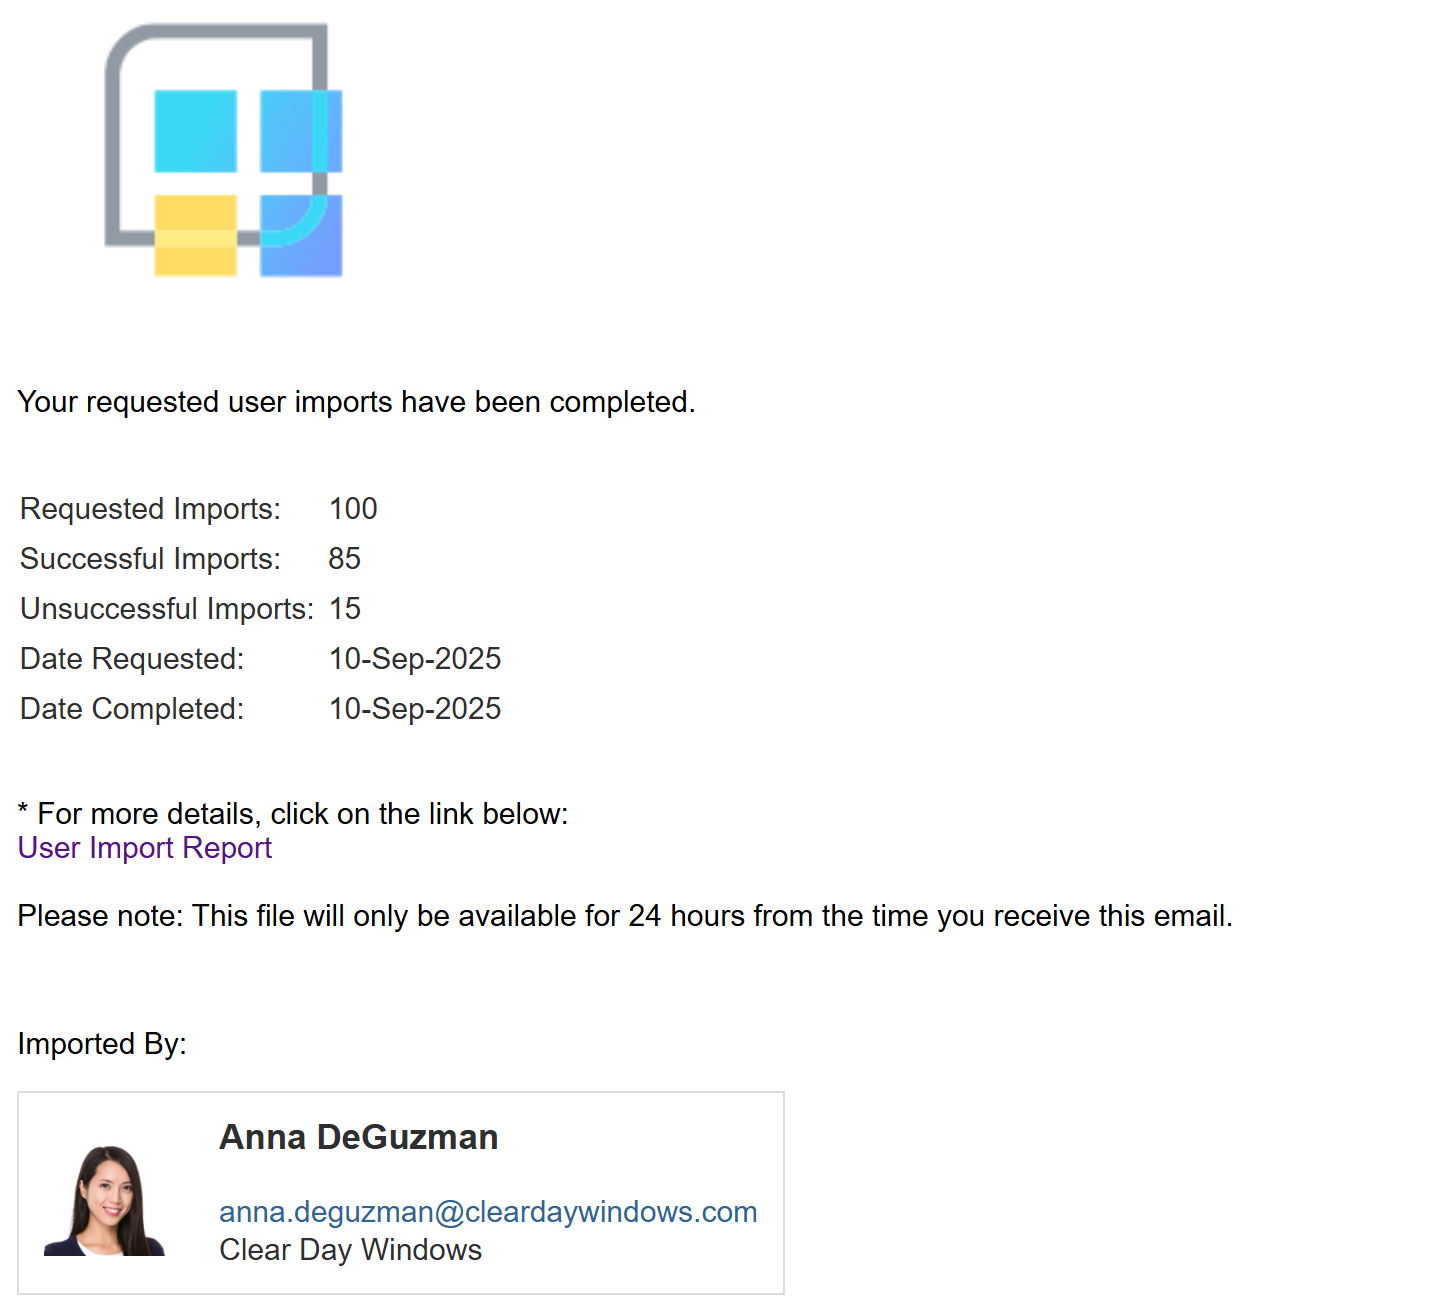
When the import completes, SmarterU sends the User Import Report to your specified email address. As we mentioned earlier, this report shows which users were (or were not) successfully added.
If the import tool did not add certain users, you can review the report to learn why.
Once the import is complete, your new learners will be in SmarterU and ready to access their training and explore all your resources.
The user import tool is a powerful feature designed to simplify your life as an administrator, especially when you need to add many users. Our templates guide you through the process and ensure your data is formatted correctly for a successful import.
Questions? Contact our Success Desk.