The WYSIWYG image editor makes it easy for you to resize images that you've added to your online course's content slides, knowledge base articles, and other SmarterU workscreens that use the WYSIWYG editor. You can also use the WYSIWYG image editor to upload GIFs.
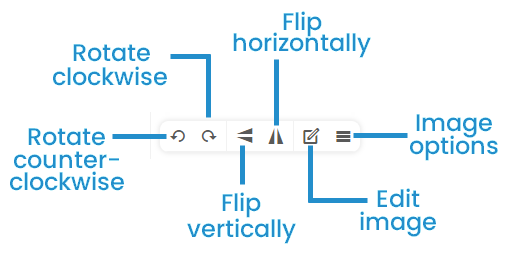
The image editing toolbar displays when you click an image in your content. The toolbar enables you to rotate and flip your image, and provides access to other editing options.
Moving an Image
To move an image:
- Click the image.
- Drag and drop it to the desired location.
Rotating an Image
Rotating an image turns it 90° in the selected direction.
To rotate an image to the left (i.e., counter-clockwise), click  .
.
To rotate an image to the right (i.e., clockwise, click  .
.
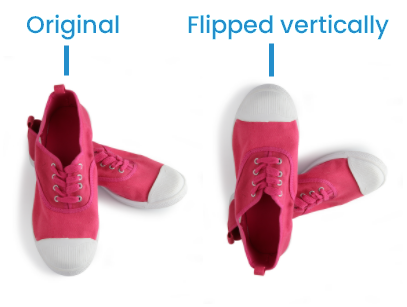
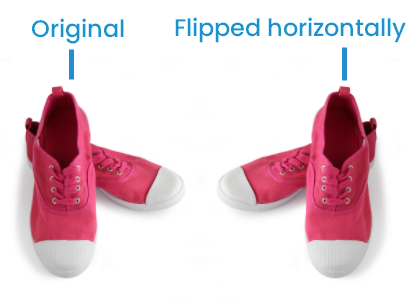
Flipping an Image
Flipping an image turns the image over so as to create a mirror image on the selected axis (i.e., vertical or horizontal).
To flip an image vertically, click  on the image editing toolbar.
To flip an image horizontally, click  on the image editing toolbar.
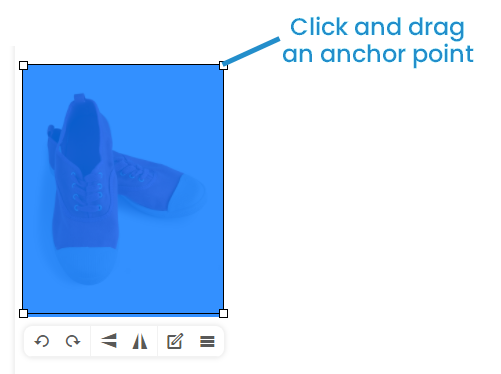
Resizing an Image
To resize an image proportionally:
- Click on the image.
- Drag the image's anchor points (i.e., the squares displayed at the image's corners).
If you do not want to keep the proportions of the image, or want to specify the exact dimension:
- Click the image. The image editing toolbar displays.
- Click
 . The Insert/Edit Image window displays.
 - Adjust the size of the image by entering the desired size in the Dimensions fields.
- To resize the image proportionally, ensure that the Constrain Proportions checkbox is selected. Otherwise, uncheck the checkbox if you do not want to resize the image proportionally.
- Click OK.
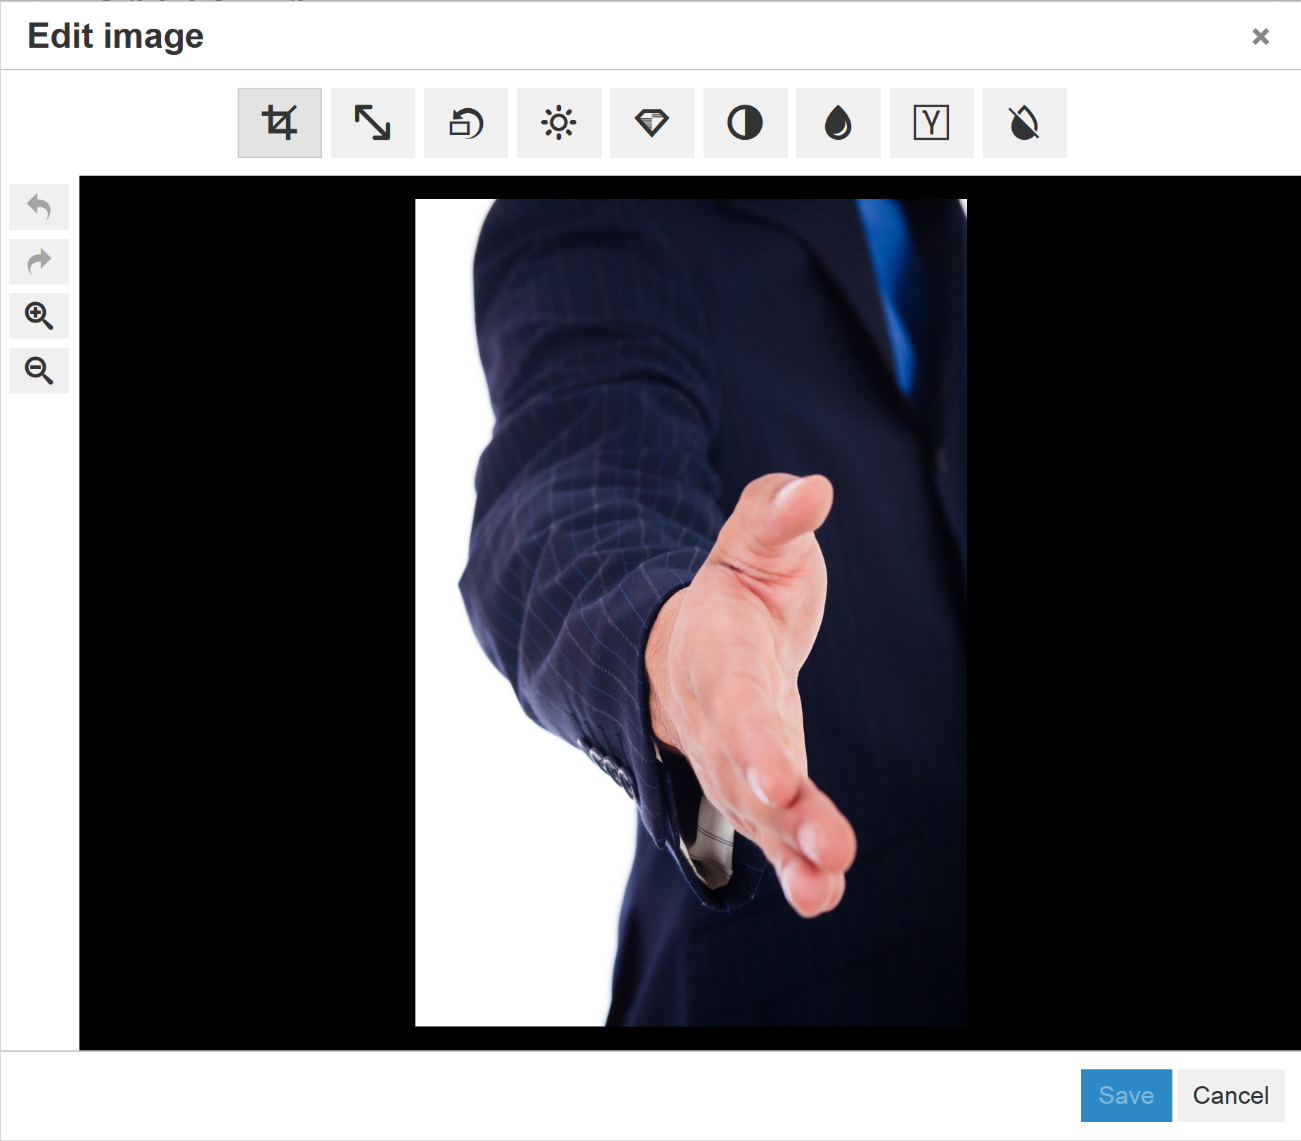
Advanced Editing Options
The Image Editing Toolbar's edit image button provides access to advanced editing functions.
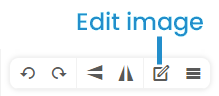
From the Edit Image window you can crop, change the orientation, and adjust the image's brightness, contrast, and other features.