These scheduled report settings are locating in the Main accordion of the Add/Edit Scheduled Report workscreen.
Settings
Be sure to click Save after changing these settings.
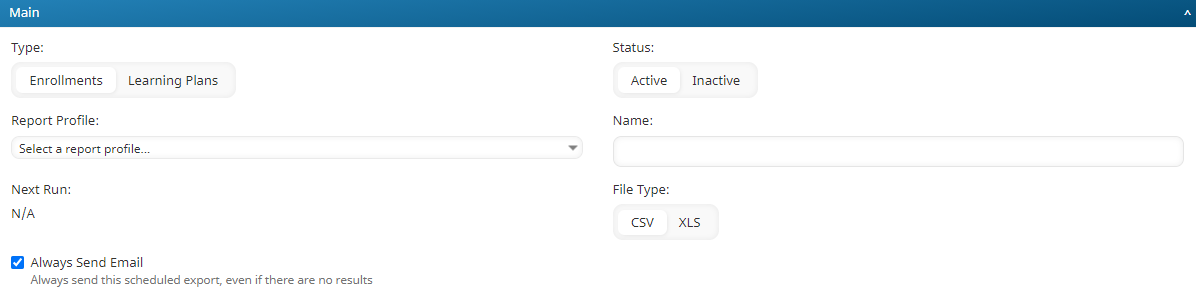
Type
The type of report you would like to schedule (i.e., Enrollments or Learning Plans).
Status
Select the status of the scheduled report:
- Active - the report will run at the specified frequency.
- Inactive - the report will not run at the specified frequency.
Report Profile
The Report Profile list displays the account, group, and private reports that you have access to. Select the report you would like to schedule from the list. If you've just run the report, the Report Profile is set to the report's name.
Name
Enter a name for the scheduled report.
File Type
Select the report's file type:
- CSV - Comma-delimited file
- XLS - Excel spreadsheet
Always Send Email
If checked, the Queued Exports Notification email is sent to the specified recipients (i.e., email addresses in the To, CC, or BCC fields) even if the report has no results.