Although SmarterU includes a default course and certification completion certificate, you can upload a custom certificate to match your branding and display the images, text, and data (e.g., learner's name, course name, completion date) that you want to include.
BEFORE YOU BEGIN
- You'll need Adobe Acrobat Pro to customize your certificate. Adobe offers a free, seven day trial.
- Refer to our SmarterU File Uploads article for specifications for course completion certificates and certification completion certificates.
To create a custom completion certificate:
- Be sure that your certificate's background image is saved as either a PDF or JPG. If your certificate's background image is in another format, you may be able to save it as a JPG.
You'll need to use Adobe Acrobat Pro to complete steps 2-6.
- In Adobe Acrobat Pro, create a new form from your PDF or image file.
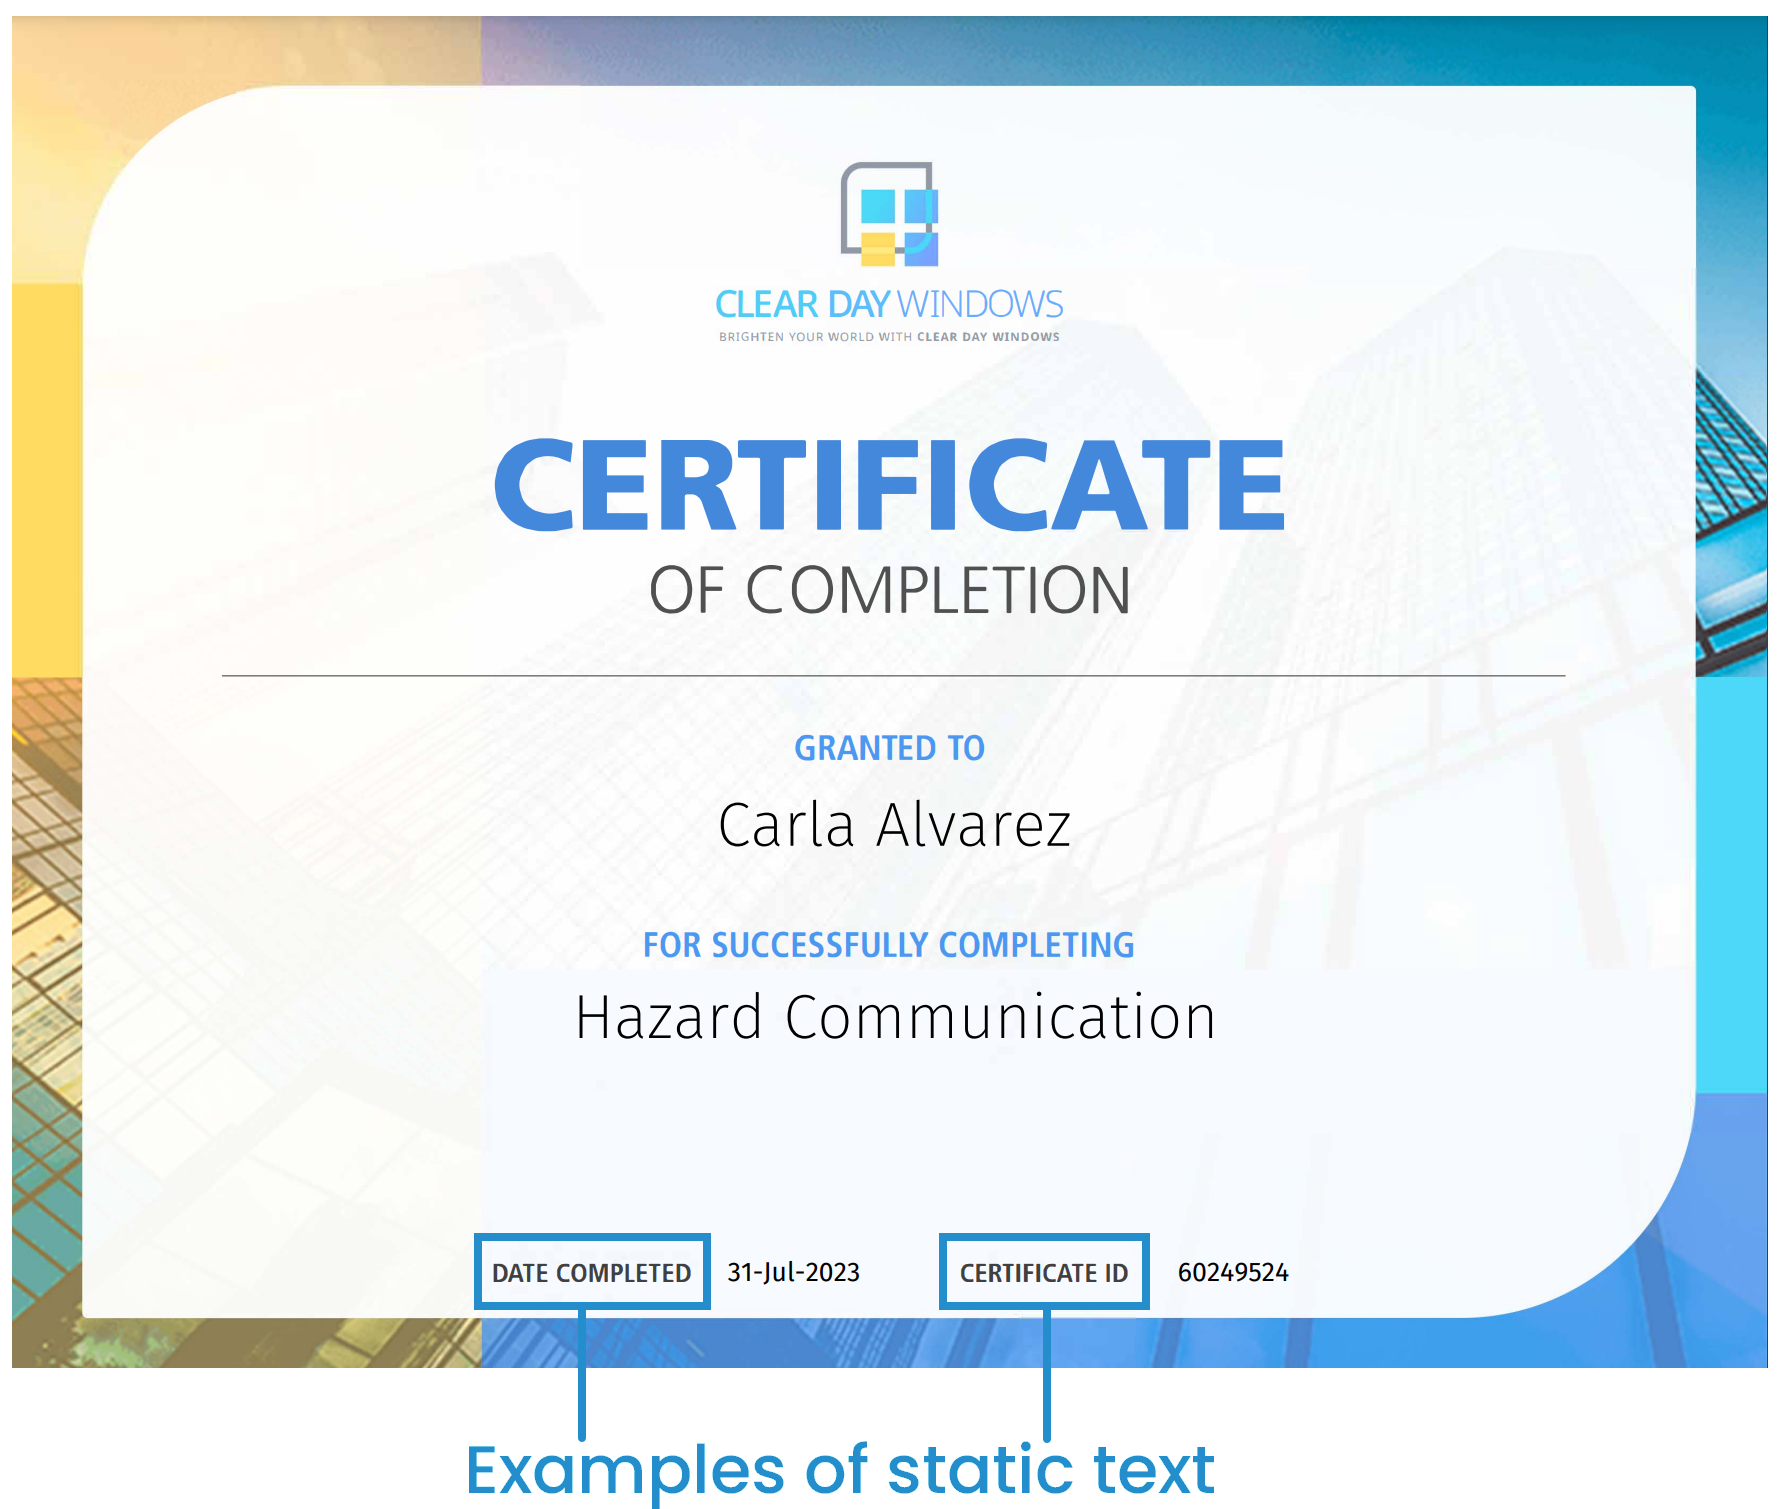
- If you need to add static text to your certificate, use Acrobat’s add text tool. Static text can be used to describe the value that follows it. In the example below, Date Completed and Certificate ID are examples of static text.
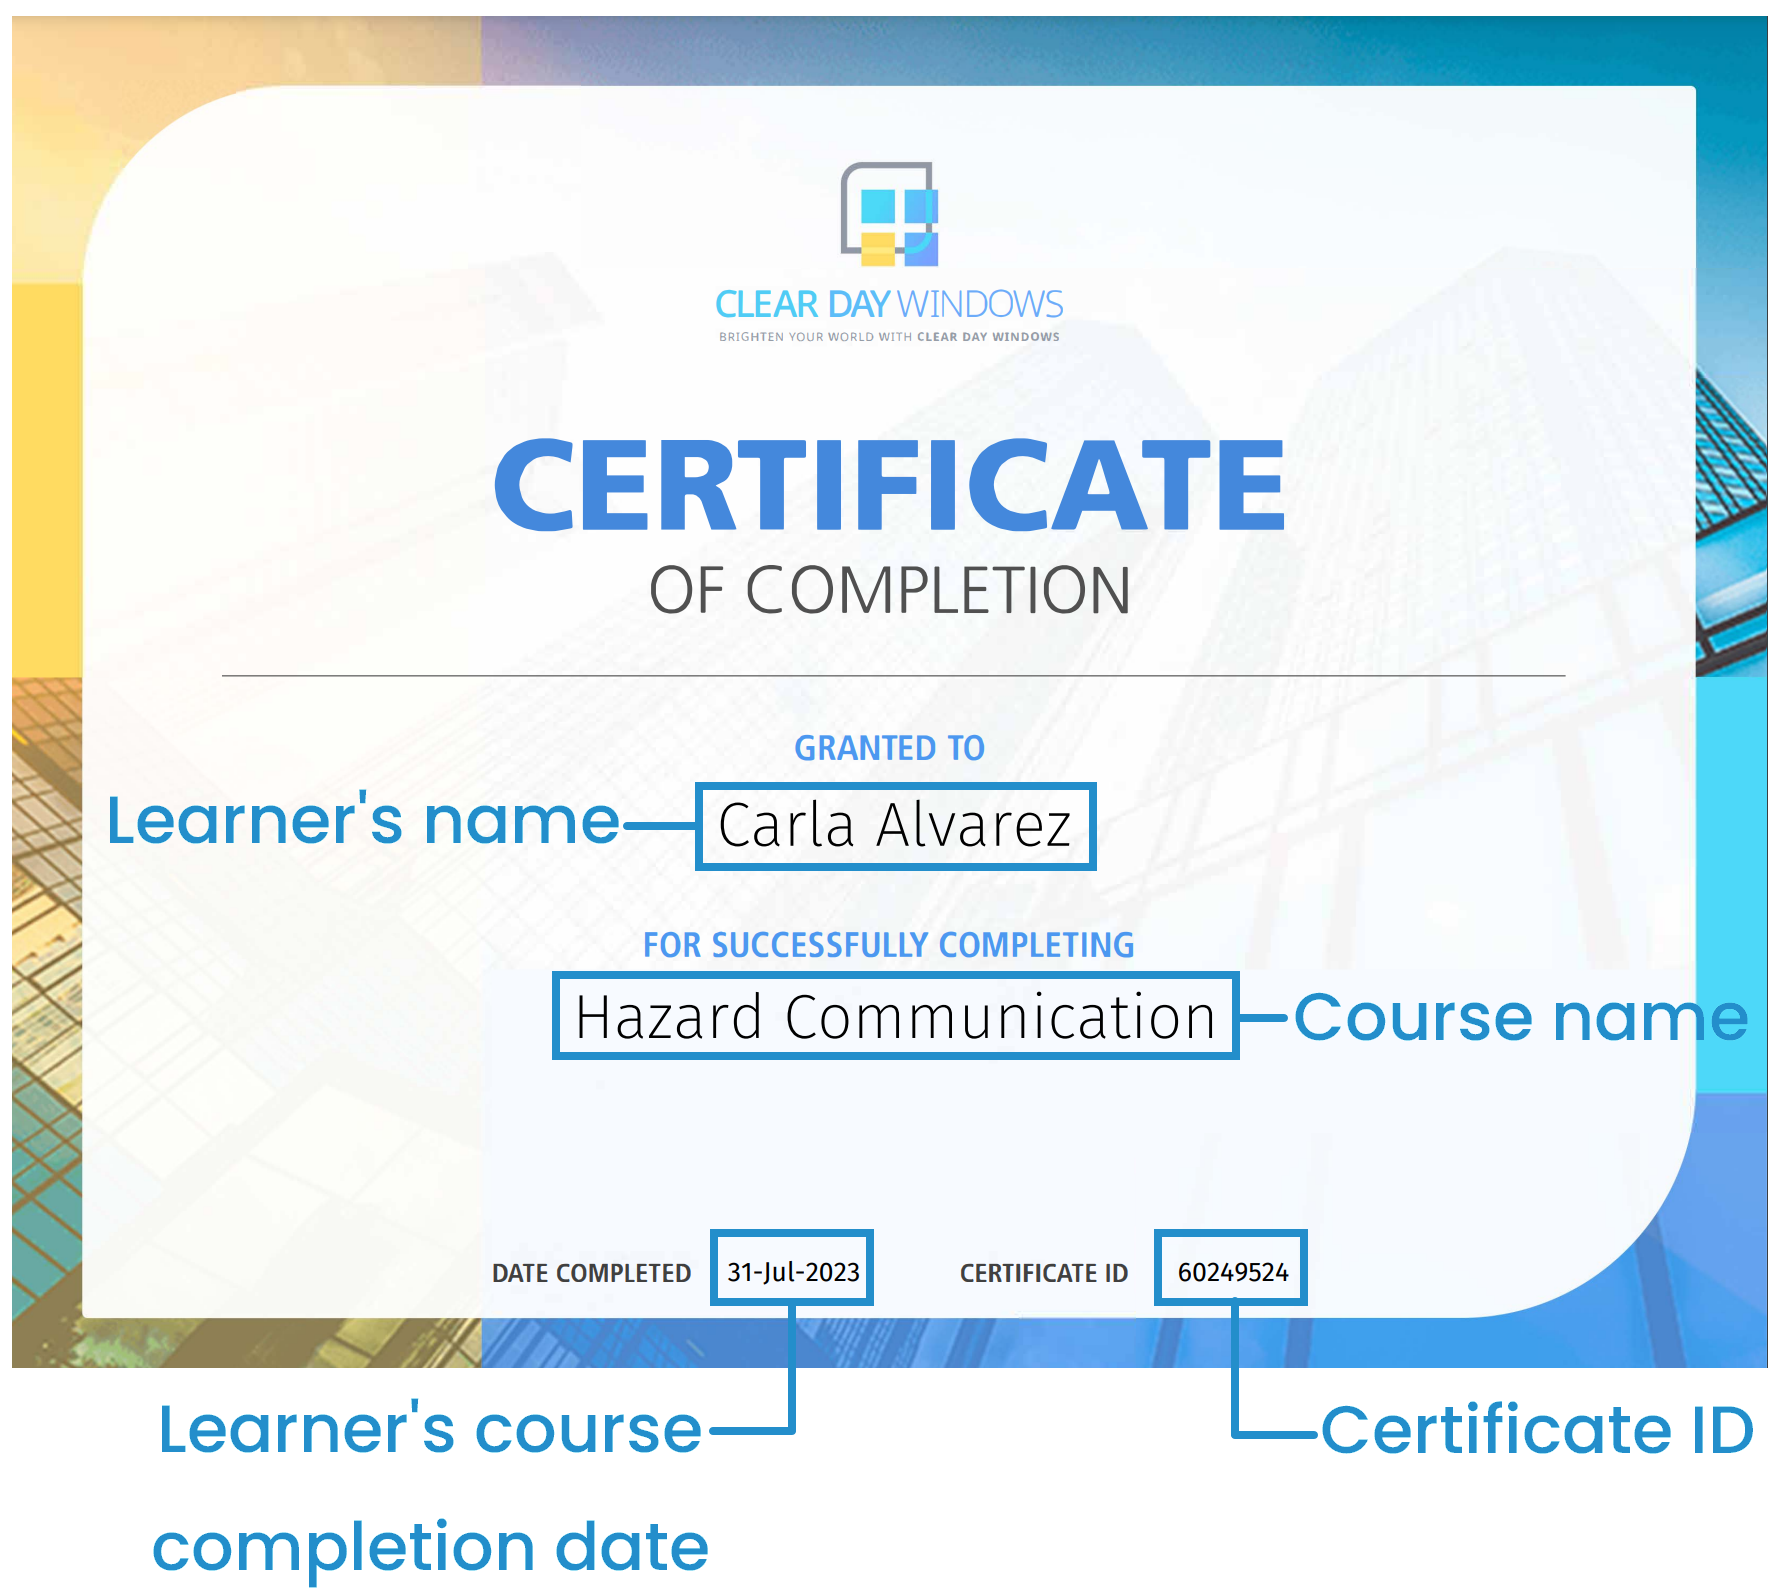
- Add a text field to the Acrobat form. Text fields tell SmarterU what data to display in the certificate. In the example below, text fields were added to display the learner's name, course name, course completion date, and certificate ID.
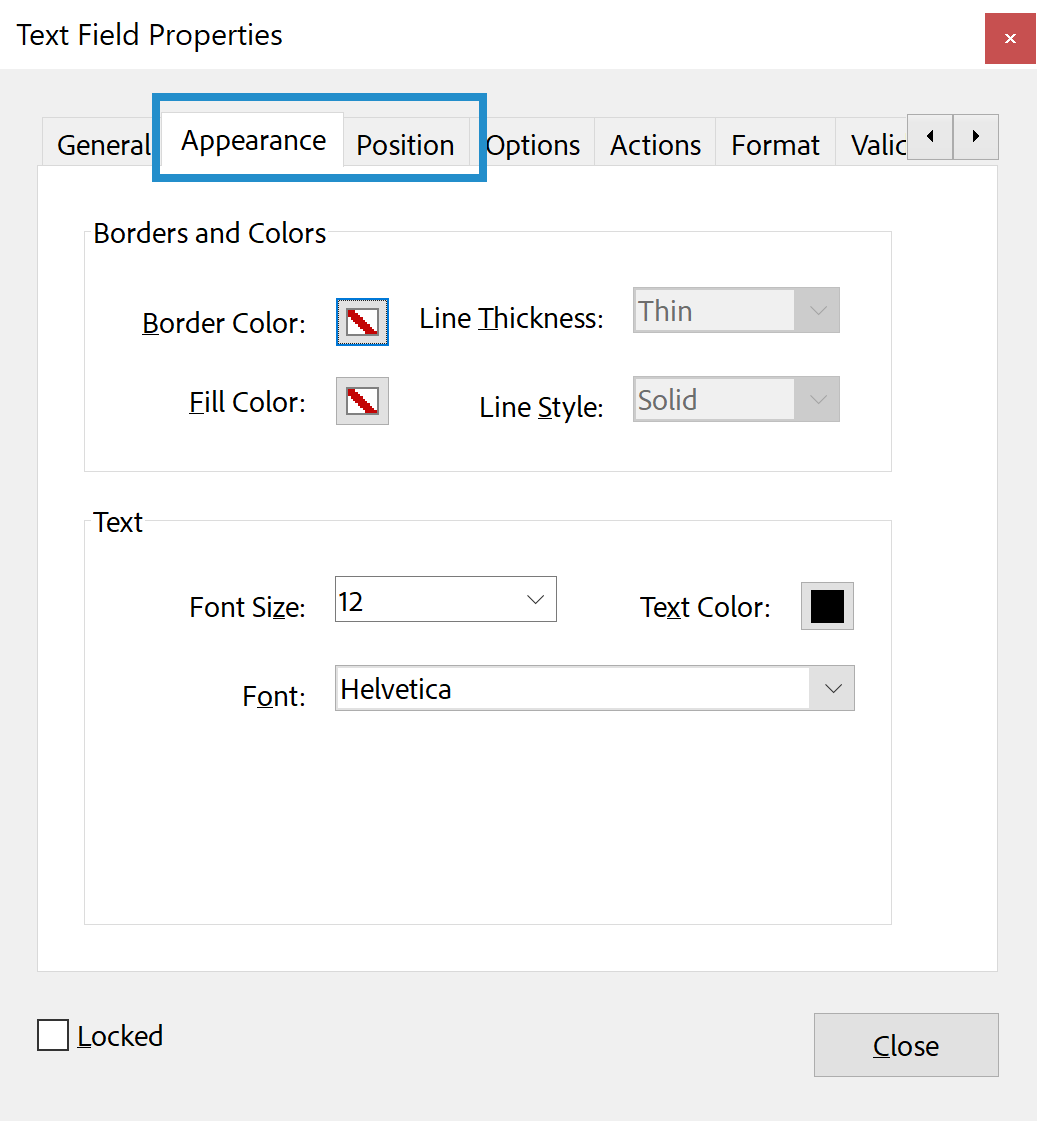
- Specify the text field's properties:
- Set the text field’s name to the course certificate variable or certification certificate variable. Variables are placeholders for information you want to include in the certificate. This might include the learner’s name, course or certification name, and completion date.
Be sure to add at least one variable to your certificate. Certificates containing only images and text will not display.
- Select the Read-Only checkbox.
You can format the text field's appearance from the Appearance and Position tabs. We recommend enabling the Multi-line option to accommodate lengthy values.
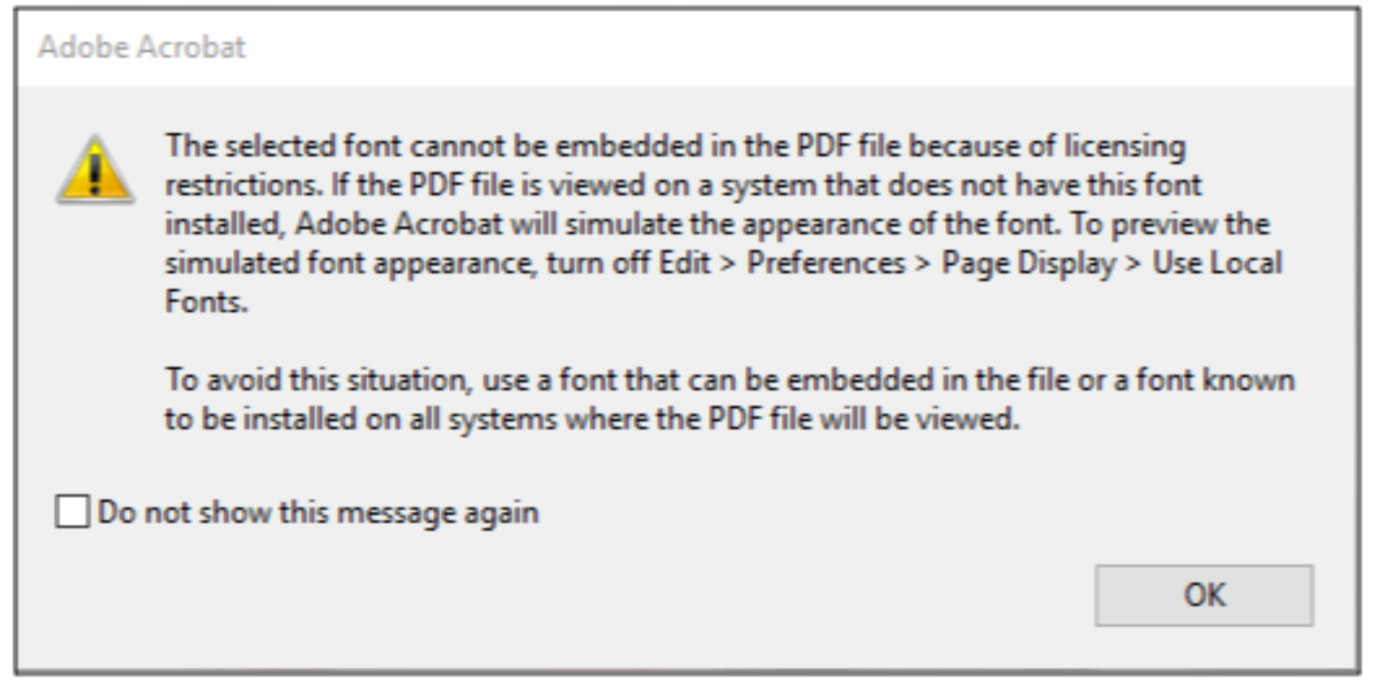
If you change the font and see the following error, your selected font will NOT display correctly and will be replaced with another font.
 If your learners do not have the font you've selected for your certificate installed, the certificate will display using a different font.
If your learners do not have the font you've selected for your certificate installed, the certificate will display using a different font.- Save the Acrobat file in a PDF format.
- Upload the custom certificate to your online, SCORM, or instructor-led course, or your certification.
If you have any questions, contact our Success Desk.