These steps enable you to integrate Azure Active Directory (AD) B2C using OpenID. Azure AD B2C allows you to use social providers such as Google, Facebook, and your organization's email for single sign-on (SSO).
To set up Azure Active Directory B2C with SmarterU:
- Complete the following steps in Azure Active Directory B2C:
- Configure Azure AD B2C OpenID in SmarterU.
Registering a New Application in Azure
To register a new application in your Azure tenant, follow the steps detailed here: https://docs.microsoft.com/en-us/azure/active-directory-b2c/tutorial-register-applications?tabs=applications.
In step 7, use the following address as the endpoint:
https://integrations.smarteru.com/Integrations/ADB2C/This endpoint was created to handle requests and will be used for authentication before logging users into SmarterU.
NEXT STEP: Create a sign-in user flow.
Creating a Sign-In User Flow
To create a sign-in user flow in Azure, follow the steps detailed here: https://docs.microsoft.com/en-us/azure/active-directory-b2c/tutorial-create-user-flows.
In step 8 of the Create a Sign-Up and Sign-In User Flow section, check the following attributes and claims:
| Collect Attribute | Return Claim | |
|---|---|---|
Display Name | ✔ | ✔ |
Email Address | ✔ | ✔ |
Given Name | ✔ | ✔ |
Identity Provider Access Token |
| ✔ |
Surname | ✔ | ✔ |
User is New |
| ✔ |
User's Object ID |
| ✔ |
NEXT STEP: Create an identity provider.
Creating an Identify Provider
To create the identity provider in Azure, follow the steps detailed here: https://docs.microsoft.com/en-us/azure/active-directory-b2c/identity-provider-generic-openid-connect.
You'll need to have the client ID and secret key from the Registering a New Application in Azure section.
NEXT STEP: Determine the application ID and issuer.
Determining the Application ID and Issuer
In this part of the process you'll determine the application ID and issuer that are needed in the next section (i.e., Configuring Azure AD B2C in SmarterU).
To determine the application identifier and issuer in Azure:
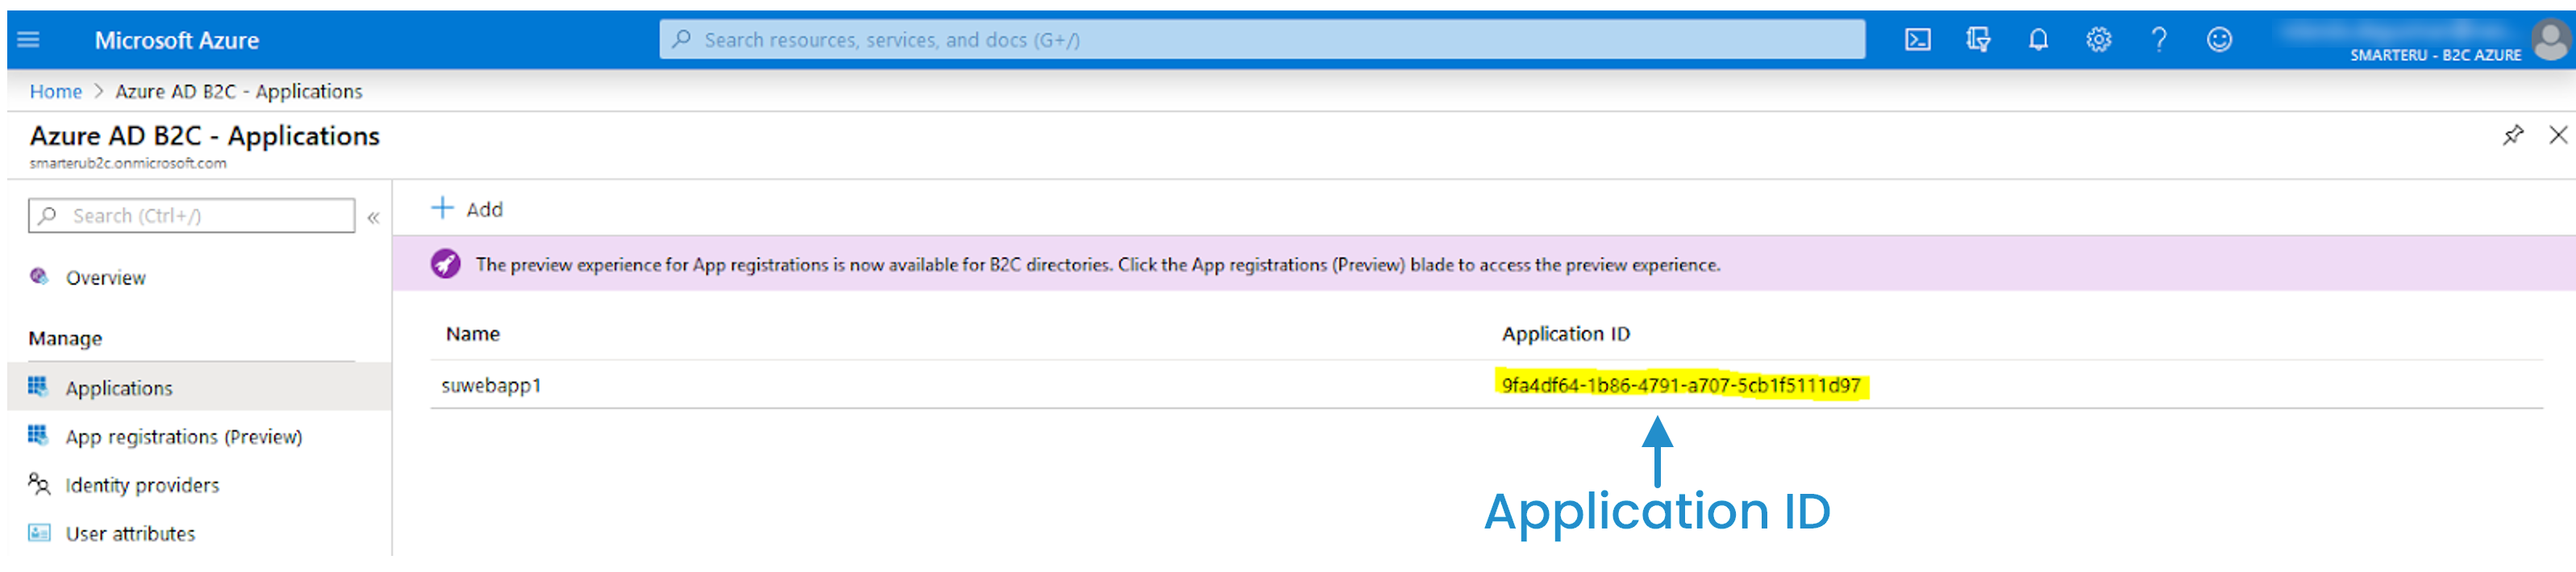
- From the Home > Azure AD B2C page, select Applications. The application ID displays in the right panel.
- From the Home > Azure AD B2C page, select User Flows.
- Select the sign-in user flow that you created in the Creating a Sign-In User Flow section.
- Click Run User Flow.

A panel displays on the right.
- Click the link that's displayed at the top of the panel.
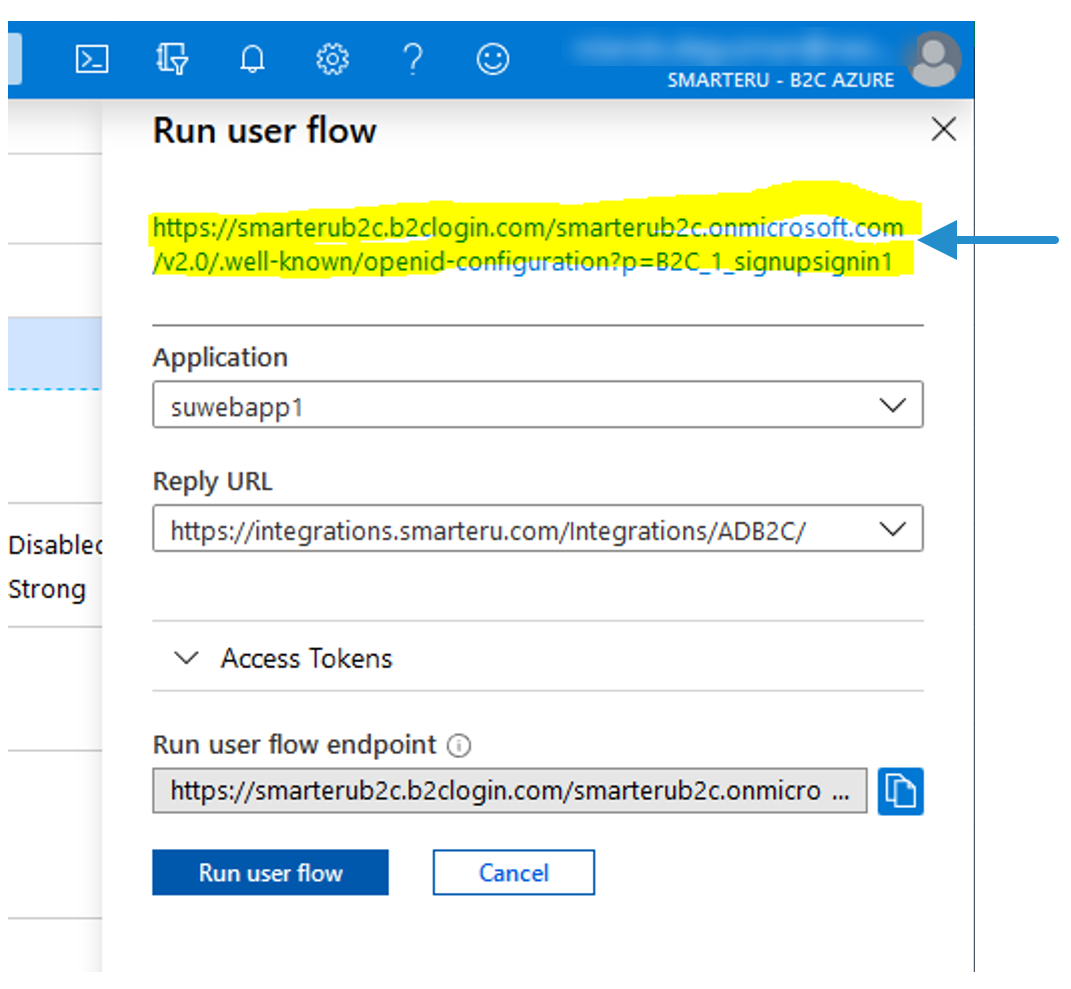
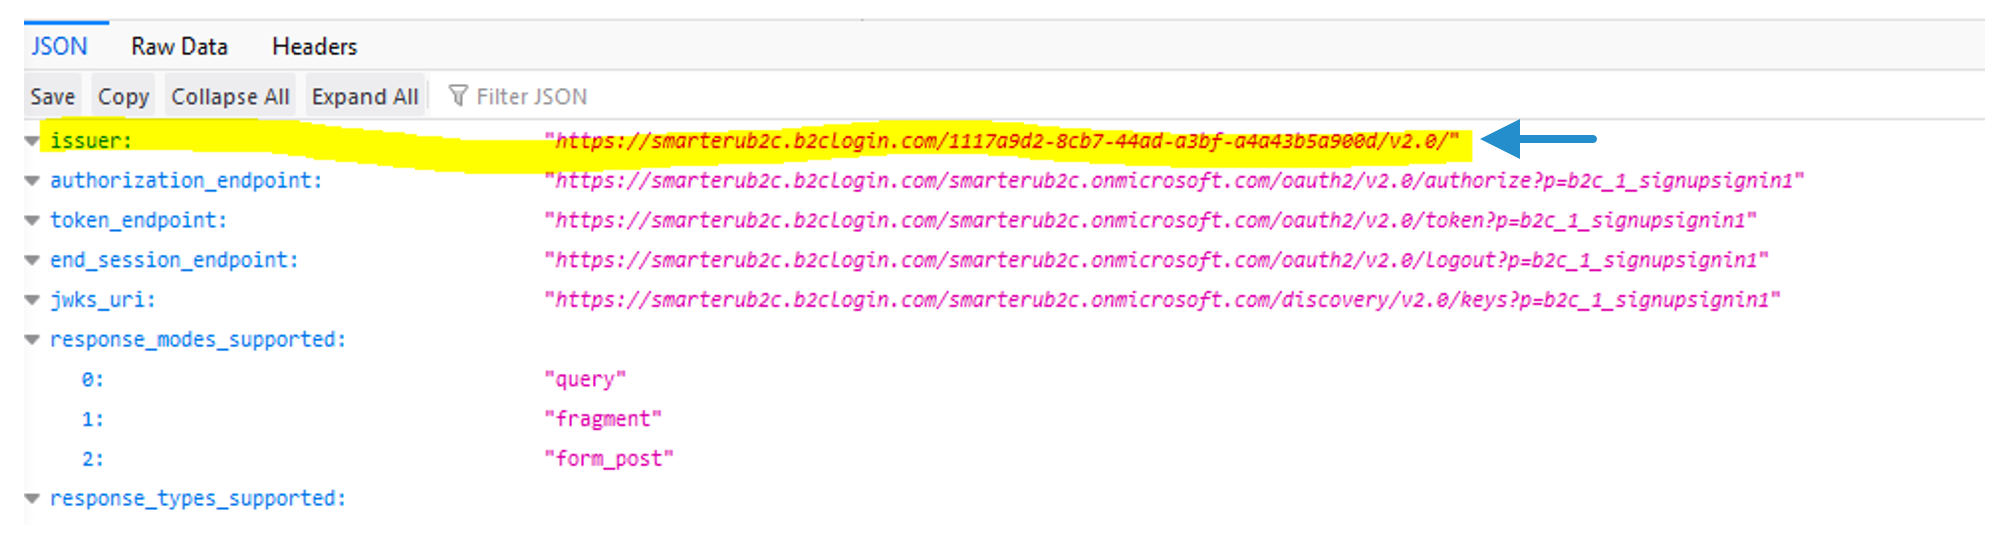
The issuer displays.
NEXT STEP: Configure Azure AD B2C in SmarterU.
Configuring Azure AD B2C in SmarterU
To set up Azure Active Directory with SmarterU:
- Enable external authorization for your SmarterU account.
- Select Enable External Authorization.
- Expand the Azure AD B2C OpenID section.

- Specify the following settings:
| Setting | Value |
|---|---|
Enable Azure AD B2C OpenID | Check to enable Azure Active Directory for SmarterU. |
Application Identifier | Enter the application ID from the Determining the Application ID and Issuer section. |
Issuer | Enter the issuer from the Determining the Application ID and Issuer section. |
- Click Save.
Troubleshooting
If your users are having trouble logging in, refer to our Troubleshooting User Accounts page for common issues.