The process for setting up ADFS SSO consists of five steps:
- Download and edit the metadata file.
- Modify the web.config file.
- Add a Relying Party Trust.
- Edit the Claim Rules.
- Provide Federation Metadata to SmarterU.
Downloading and Editing the Metadata File
To download and edit the metadata file:
- Navigate to https://integrations.smarteru.com/resources/saml/smarterumetadata.xml.
- Right click on the page and save the file.
- Open the file using Notepad.
- Replace the existing entityID value with:
https://integrations.smarteru.com/<AccountID>Where <AccountID> is replaced with your account's ID.
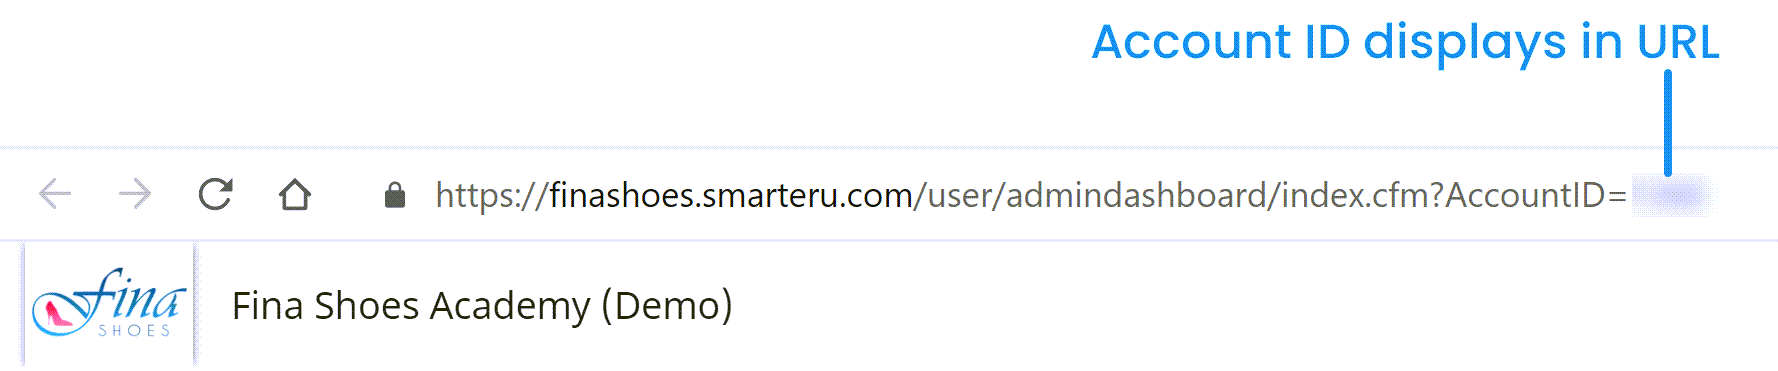
For example, if your account's ID is 1234, your metadata file would look as follows.

- Save the changes to the file.
Modifying web.config File
To modify the web.config file:
- Navigate to the /adfs/ls/ directory on IIS web server.
- Verify that <useRelayStateForIdpInitiatedSignOn enabled="true" /> exists as a child element to <microsoft.identifyServer.web>.
Adding a Relying Party Trust
To add a relying party trust, do the following from AD FS 2.0:
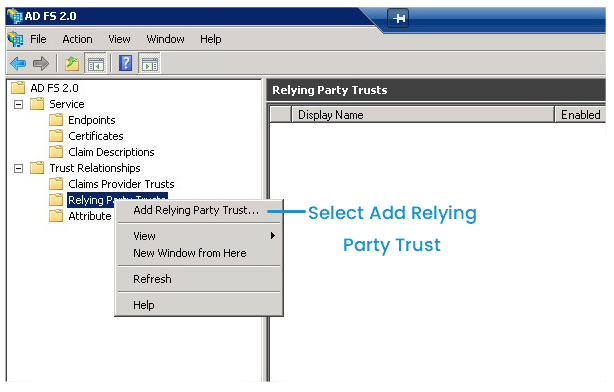
- Right-click on Relying Party Trusts.
- Select Add Relying Part Trust.
- Click Start.
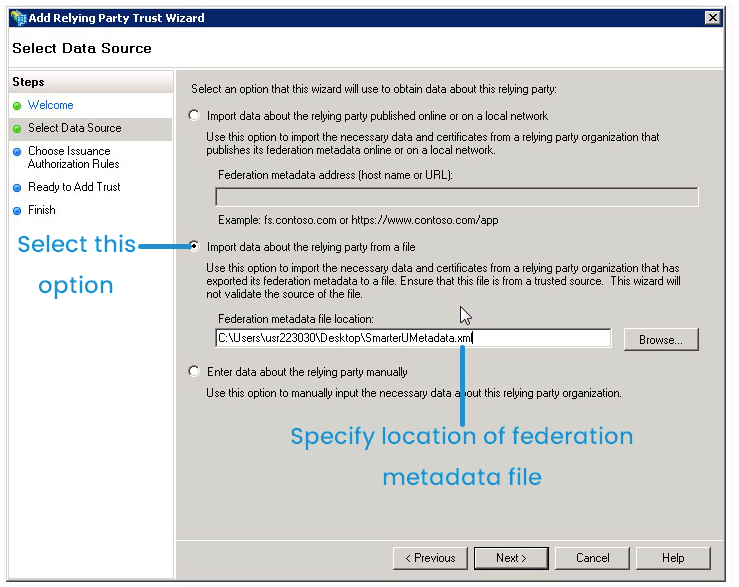
- At the Select Data Source step:
- Select the Import data about the relying party from a file option.
- Click Browse.
- Navigate to the location of the metadata file that you downloaded in the Downloading and Editing the Metadata File step.
- Click Next.
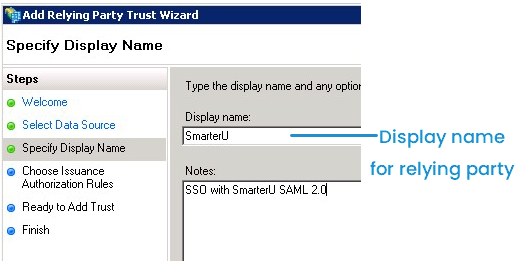
- At the Specify Display Name step:
- In the Display Name field, enter a display name for the relying party.
- In the Notes field, enter a description for the relying party.
- Click Next.
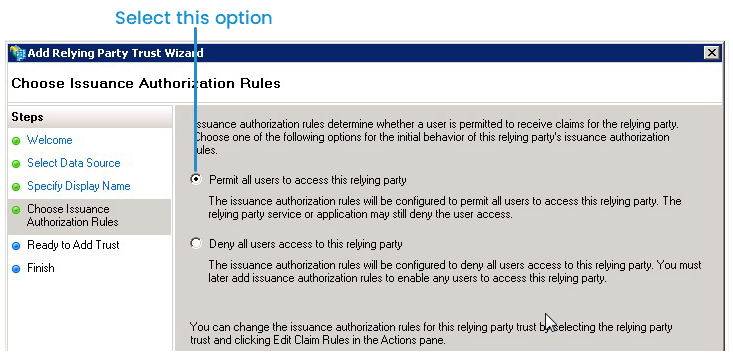
- At the Choose Issuance Authorization Rules step:
- Select the Permit all users to access this relying party option.
- Click Next.
- At the Ready to Add Trust step, click Next.
- At the Finish step:
- Ensure that Open the Edit Claim Rules dialog for this relying party trust when the wizard closes is selected.
- Click Close. The Edit Claim Rules for SmarterU window displays.
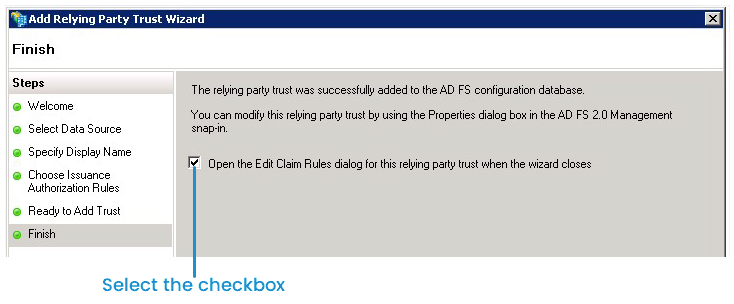
- Continue to the Editing the Claim Rules section.
Editing the Claim Rules
To edit the claim rules for SmarterU:
- Click Add Rule. The Add Transform Claim Rule Wizard window displays.
- From the Claim Rule Template list, select Send LDAP Attributes as Claims.
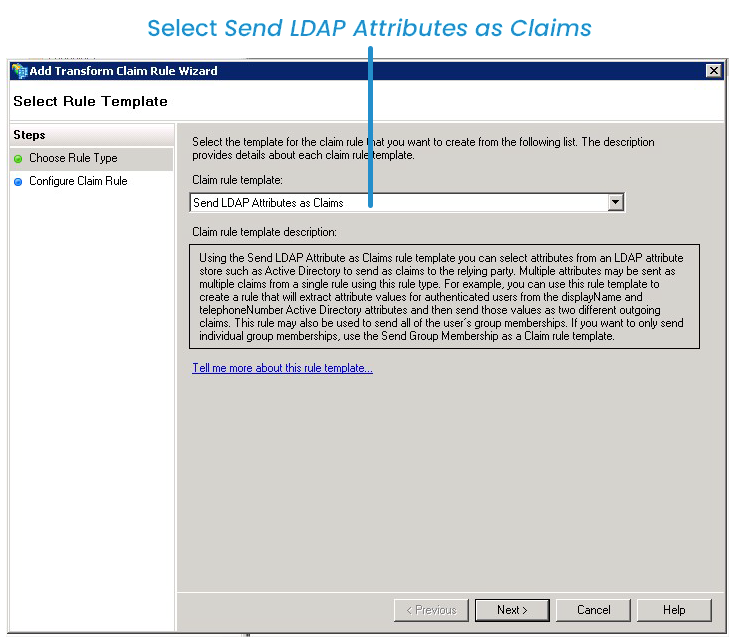
- Click Next.
- In the Claim Rule Name field, enter a name for the claim rule.
- From the Attribute Store list, select Active Directory.
- In the Mapping of LDAP Attributes to outgoing claim types section, specify the following:
LDAP Attribute | Outgoing Claim Type |
|---|---|
E-Mail-Addresses | Name ID |
GivenName | Given Name |
Surname | Surname |
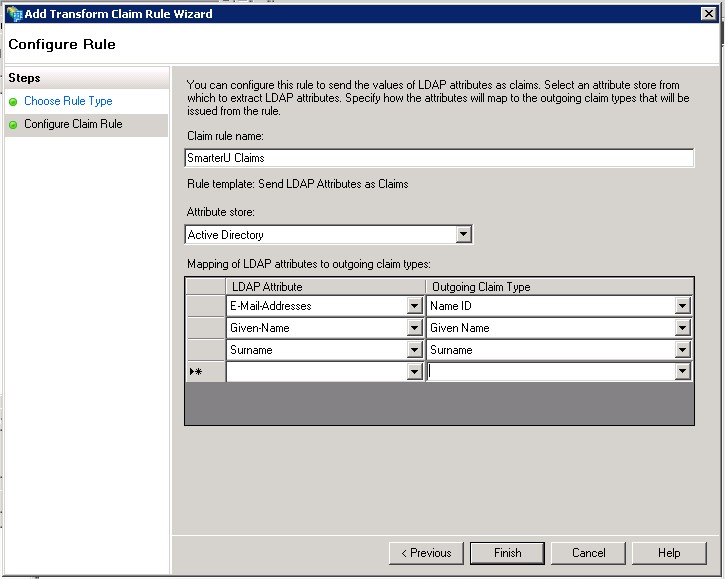
- Click Finish.
- Click OK.
At this point, your system should be ready to use SAML SSO with SmarterU. You may need to add SmarterU to your trusted sites to prevent the browser from prompting for credentials.
Providing Federation Metadata to SmarterU
SmarterU does not currently have an interface where you can complete the setup independently.
To provide your federation metadata to SmarterU:
- Navigate to /federationmetadata/2007-06/federationmetadata.xml on the webserver.
- Copy the source code of this page to your SmarterU SAML 2.0 settings.
After setup is complete on SmarterU, your users will be able to use SSO by navigating to:
https://{YOUR_WEBSITE}/adfs/ls/idpinitiatedsignon.aspx?RelayState=RPID%3Dintegrations.smarteru.com%26RelayState%3Dhttps%253A%252F%252Fintegrations.smarteru.com%252Fintegrations%252FADFS%252FSSO%252FThe URL has been double URL encoded to contain the relying party identifier and end point. If you've changed the identifier, re-generate the URL.