How It Works
Customers browse your courses from your website and add courses they are interested in to their shopping cart. They can then go through PayPal's checkout to pay for their courses.
After the customer's payment is confirmed, PayPal sends the customer's information and SKUs to SmarterU. SmarterU creates a user account for the customer and enrolls them in the course(s). SmarterU then sends the customer an email with the SmarterU login page's URL and their login information. The customer logs into SmarterU and begins their course(s).
Setting Up an External Storefront with PayPal
To set up an external storefront with PayPal:
- Add a subscription to SmarterU that includes the courses you would like to sell.
- Add a variant to the subscription; be sure to specify a SKU for variant. To sell a learning plan, enter the SKU in the Learning Plan ID field and contact our Success Desk to let them know which learning plan you'd like to sell.
- Find your secure merchant account ID in PayPal.
- Add an external storefront to SmarterU.
- Set up the Instant Payment Notification (IPN) in PayPal.
- For each product you want to sell, create a product button and add it to your website.
Finding Your Secure Merchant Account ID
As part of the process of adding your external storefront to SmarterU, you'll need to enter your secure merchant account ID. To find your secure merchant account ID:
- Log into PayPal.
- Select the My Account tab.
- Click Profile.
- Copy your secure merchant account ID.
- In your SmarterU external storefront, enter the secure merchant account ID in the Merchant ID field.
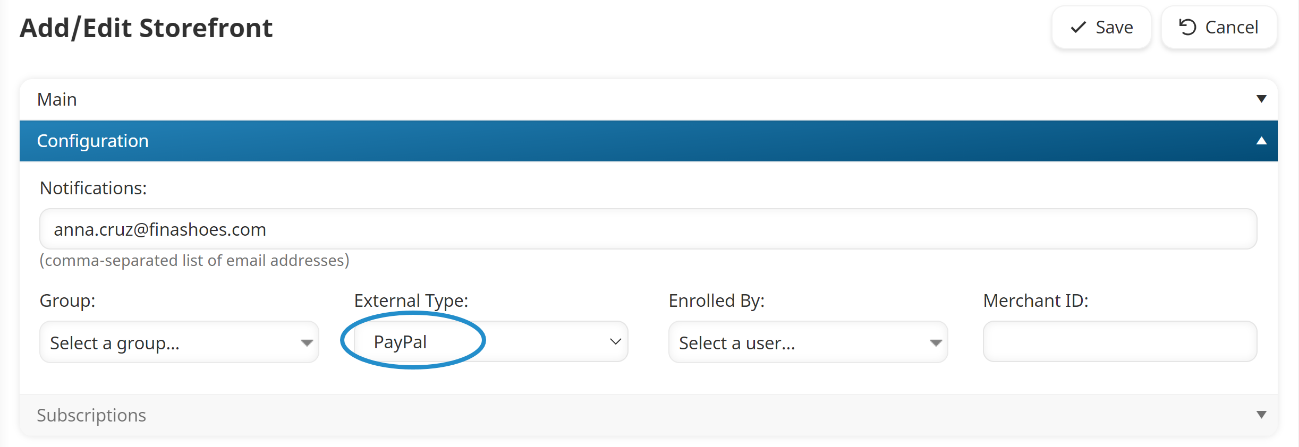
Adding an External Storefront to SmarterU
Before you add an external storefront to SmarterU, be sure you have the secure merchant account ID from PayPal.
Refer to Adding an External Storefront for details. Be sure to set the storefront's External Type setting to PayPal.
Setting Up the Instant Payment Notification (IPN)
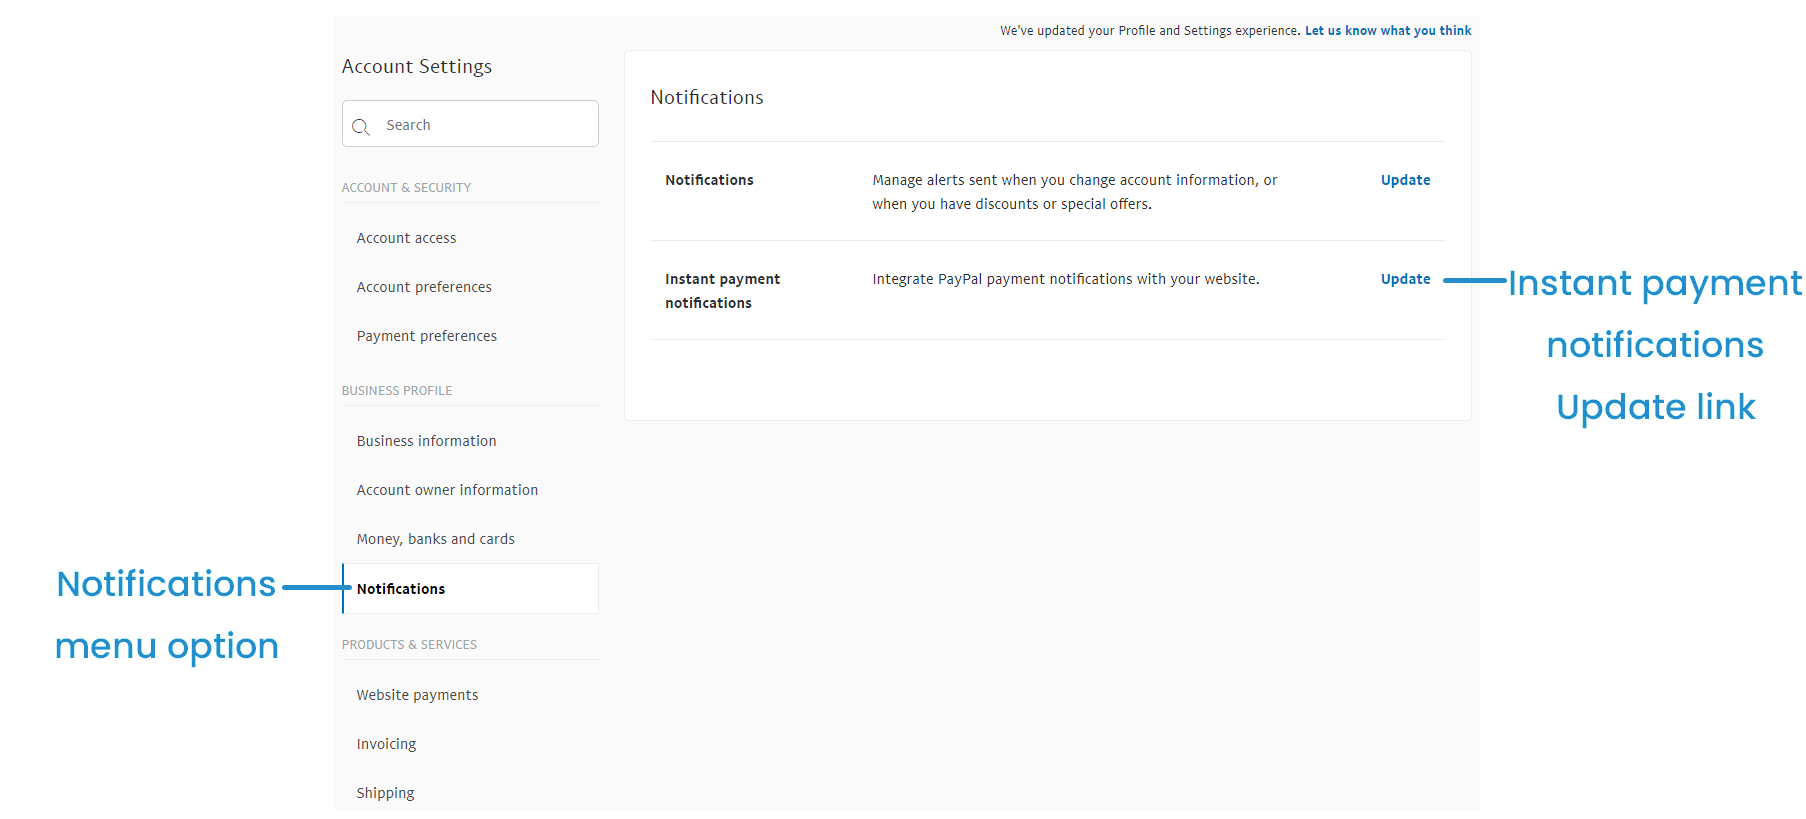
To set up Instant Payment Notification (IPN), do the following from PayPal:
- Click the settings icon at the top of the PayPal account page.
- Click Account Settings.
- From the menu on the left, click Notifications.
- Click the Update link beside Instant Payment Notifications.
The Instant Payment Notification (IPN) page displays.
- Click Edit Settings.
- In the Notification URL field, enter:
https://app.smarteru.com/eCommerce/paypal/index.cfm- Select the Receive IPN Messages (Enabled) option.
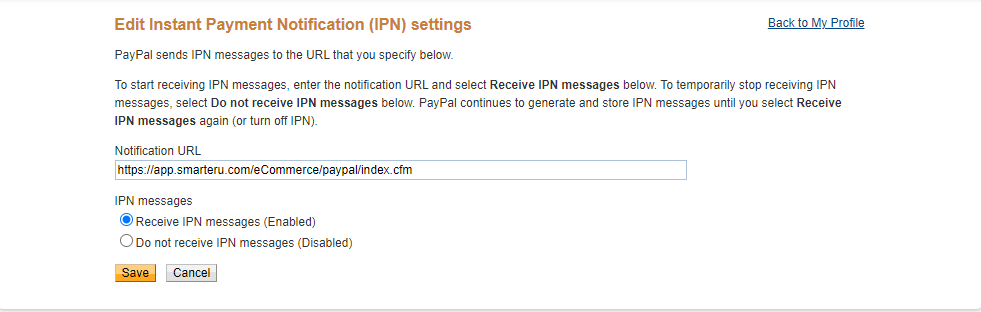
- Click Save.
Creating a Product Button
To create a button for your product, do the following from PayPal:
- Click the Pay & Get Paid menu option at the top of the page.
- Click PayPal Buttons.
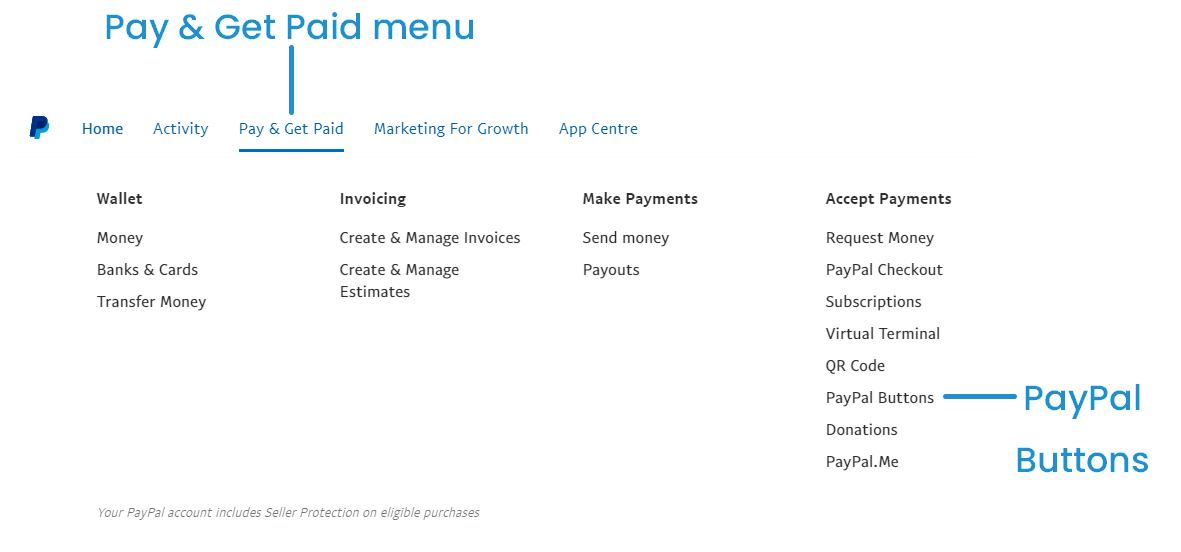
- Click Buy Now or Add to Cart.
The Create PayPal Payment Button page displays.
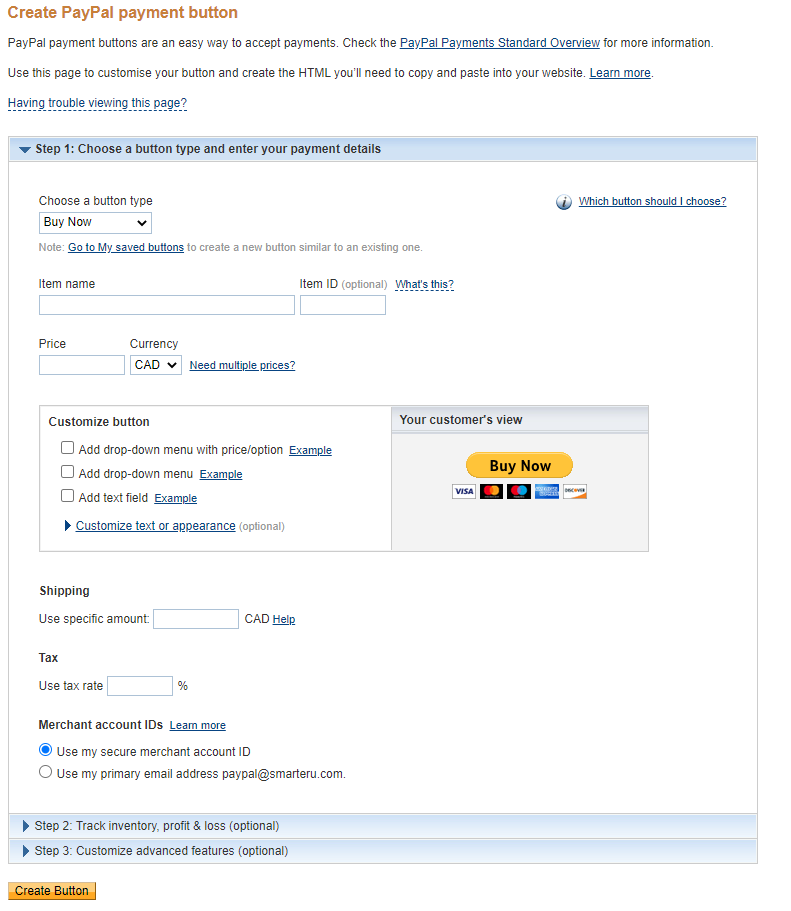
- From the Choose a Button Type list, select either Buy Now or Shopping Cart.
- In the Item ID field, enter the SKU of the matching SmarterU subscription variant.
- Edit the remaining settings as needed.
- Click Create Button.
- Copy the button's HTML code to your website.