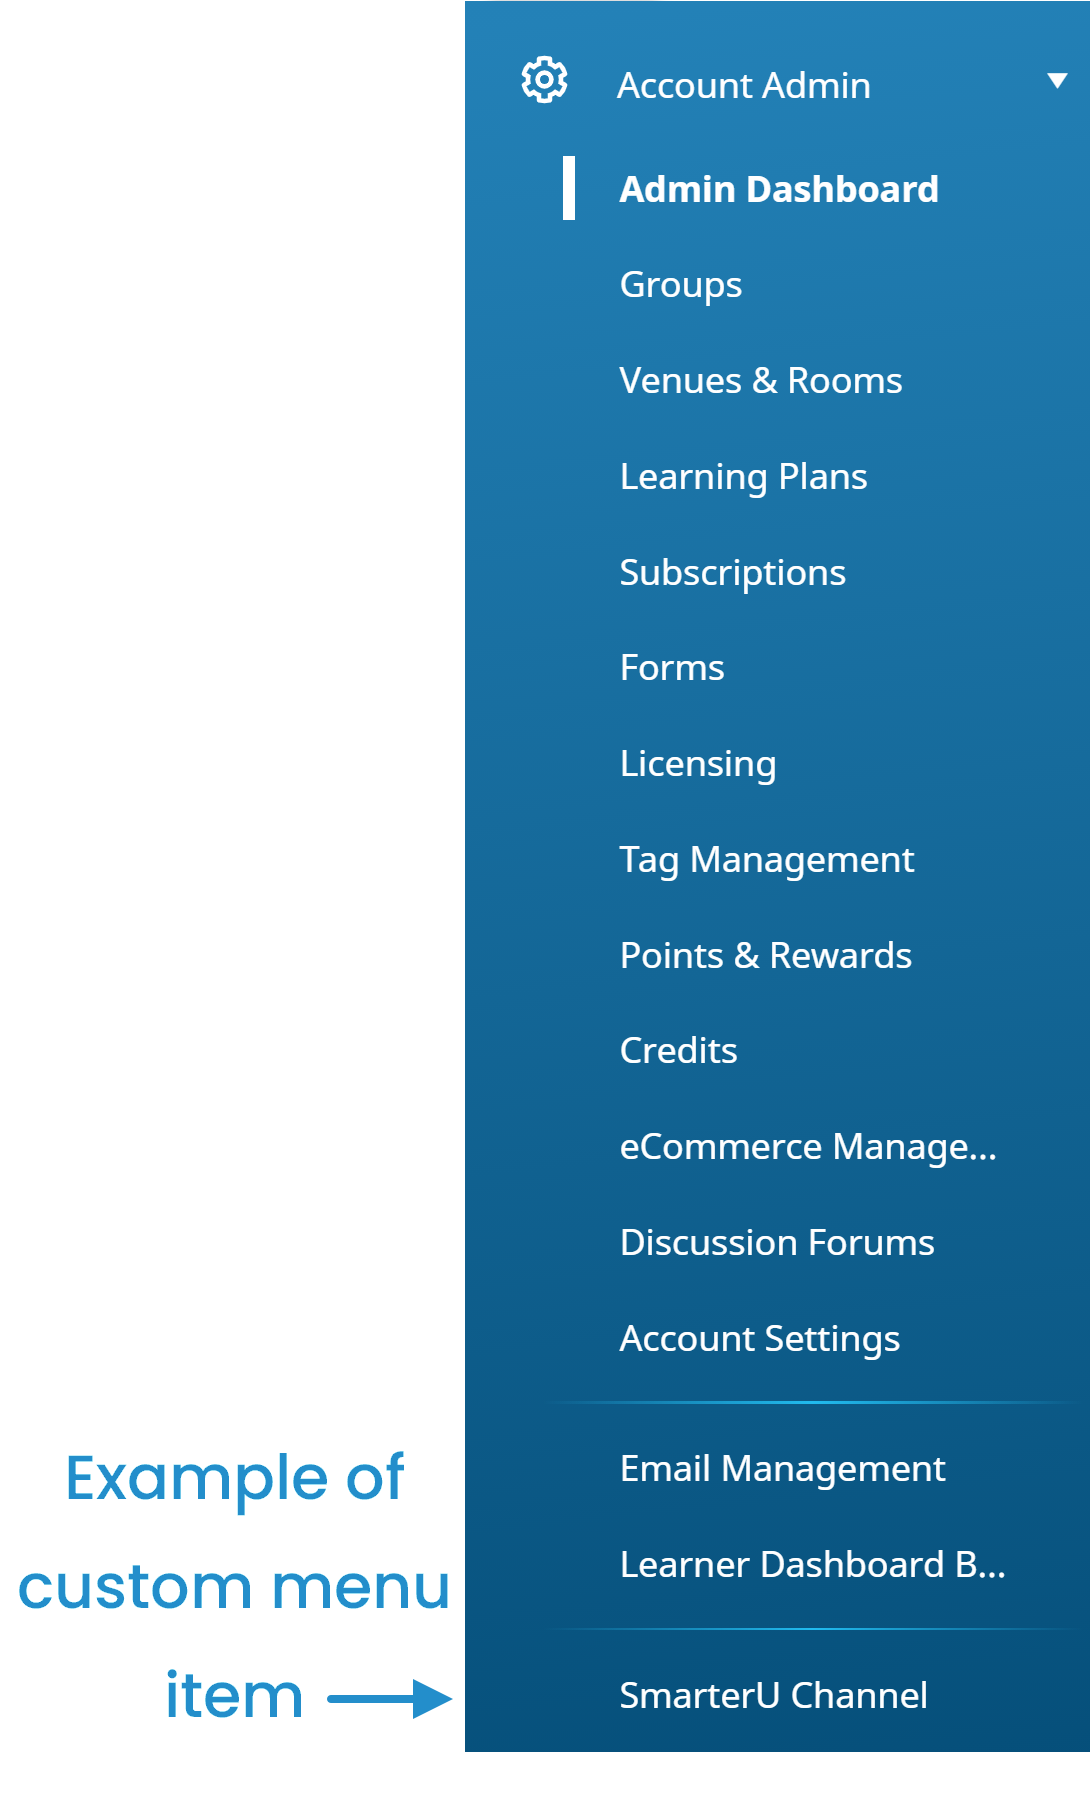
SmarterU enables you to add menu items to the admin interface's menu that will display the specified URL in a new browser tab. The custom menu item displays at the bottom of the Account Admin menu as shown below.
When you edit your account's settings, the Custom Menu Items accordion of the Account Profile workscreen displays a grid of the custom menu items that have been added to your account.

The columns of the grid are described below.
Column | Description |
|---|---|
Name | The name of the custom menu item. |
URL | The URL of the custom menu item. |
Status | Indicates whether the custom menu item displays:
|
Group Permissions | The selected group permissions that have access to the custom menu item. |
Groups | The number of selected groups that have access to the custom menu item. |
Subscriptions | The number of selected subscriptions that have access to the custom menu item. |
Users | The number of selected users that have access to the custom menu item. |
Adding Custom Menu Items
To add a custom menu option:
- Edit your account settings.
- Expand the Custom Menu Items accordion.
- Click Menu Item.

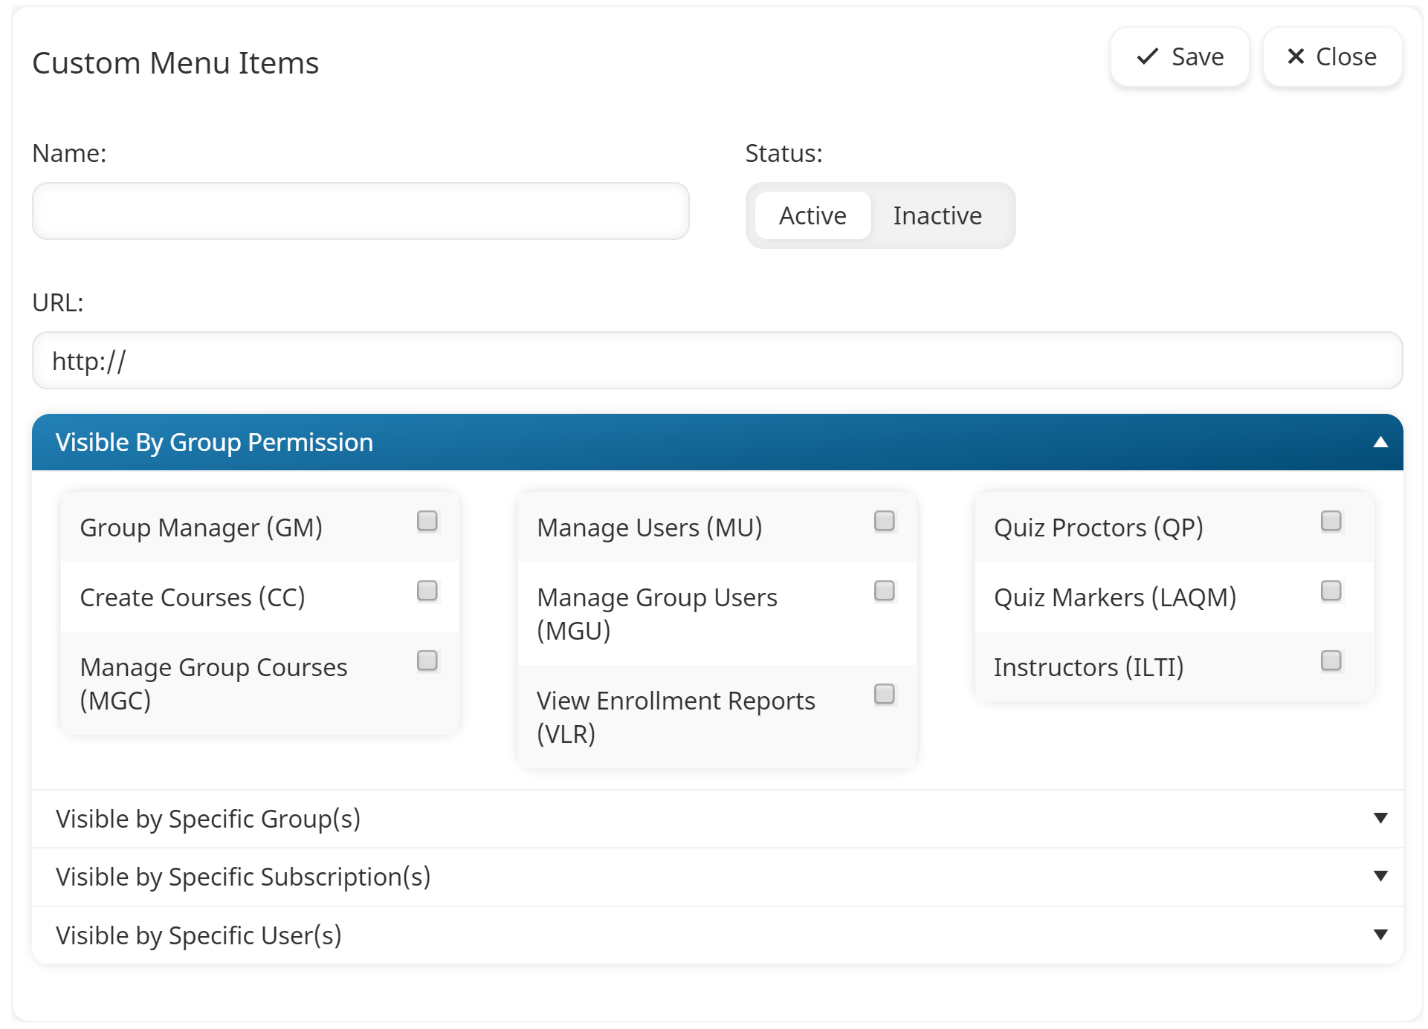
The Custom Menu Items window displays.

- Specify the settings.
- Click Save. The Custom Menu Item window closes.
- On the Account Profile workscreen, click Save.
Custom Menu Item Settings
Name
The name of the custom menu item. This is the name that displays under the Account Admin menu.
Status
The status indicates whether the menu item displays:
- Active - the custom menu item displays to administrators and users who have permission to view it.
- Inactive - the custom menu item is not displayed.
URL
Enter the URL that displays in a new tab when a user selects the custom menu item.
Visible By Group Permission
To control access to the custom menu item based on a user's group permission:
- Expand the Visible By Group Permission accordion.
- Select the group permissions that will enable a user to access the custom menu item.
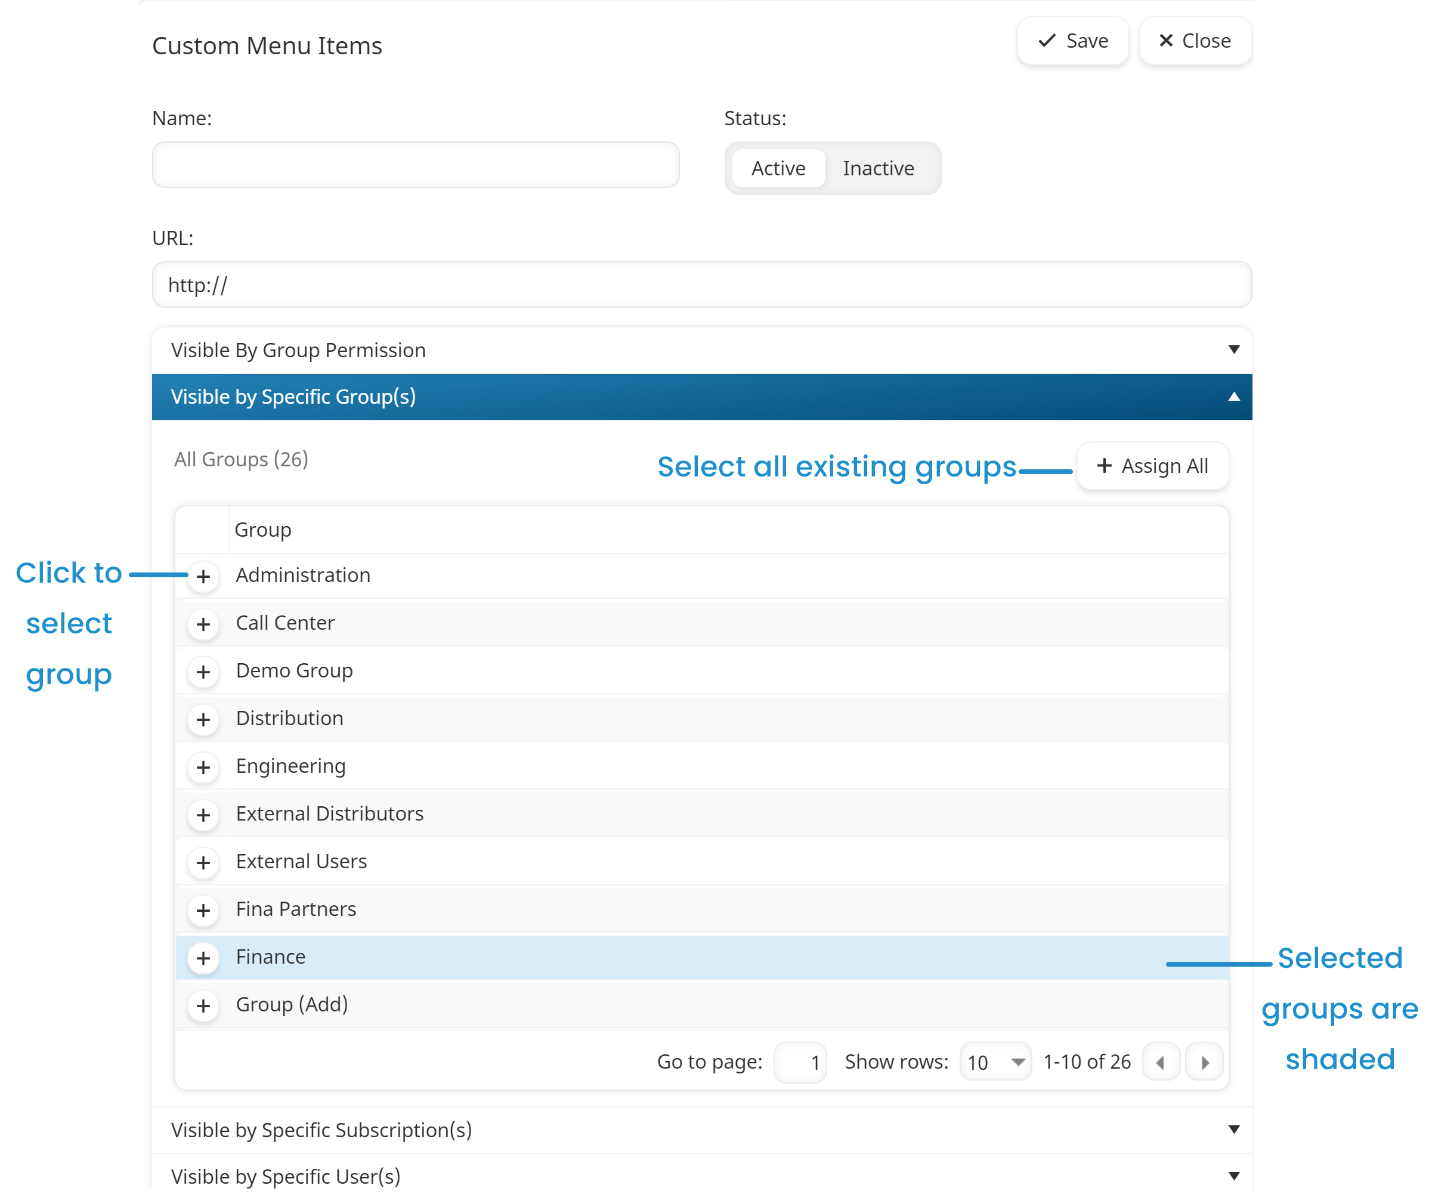
Visible By Specific Group(s)
To grant access to the custom menu item based on the group a user belongs to:
- Expand the Visible By Specific Group(s) accordion.
- Click the
 beside the group(s) that will be able to access the custom menu item. To select all existing groups, click Assign All. The selected group rows are shaded.
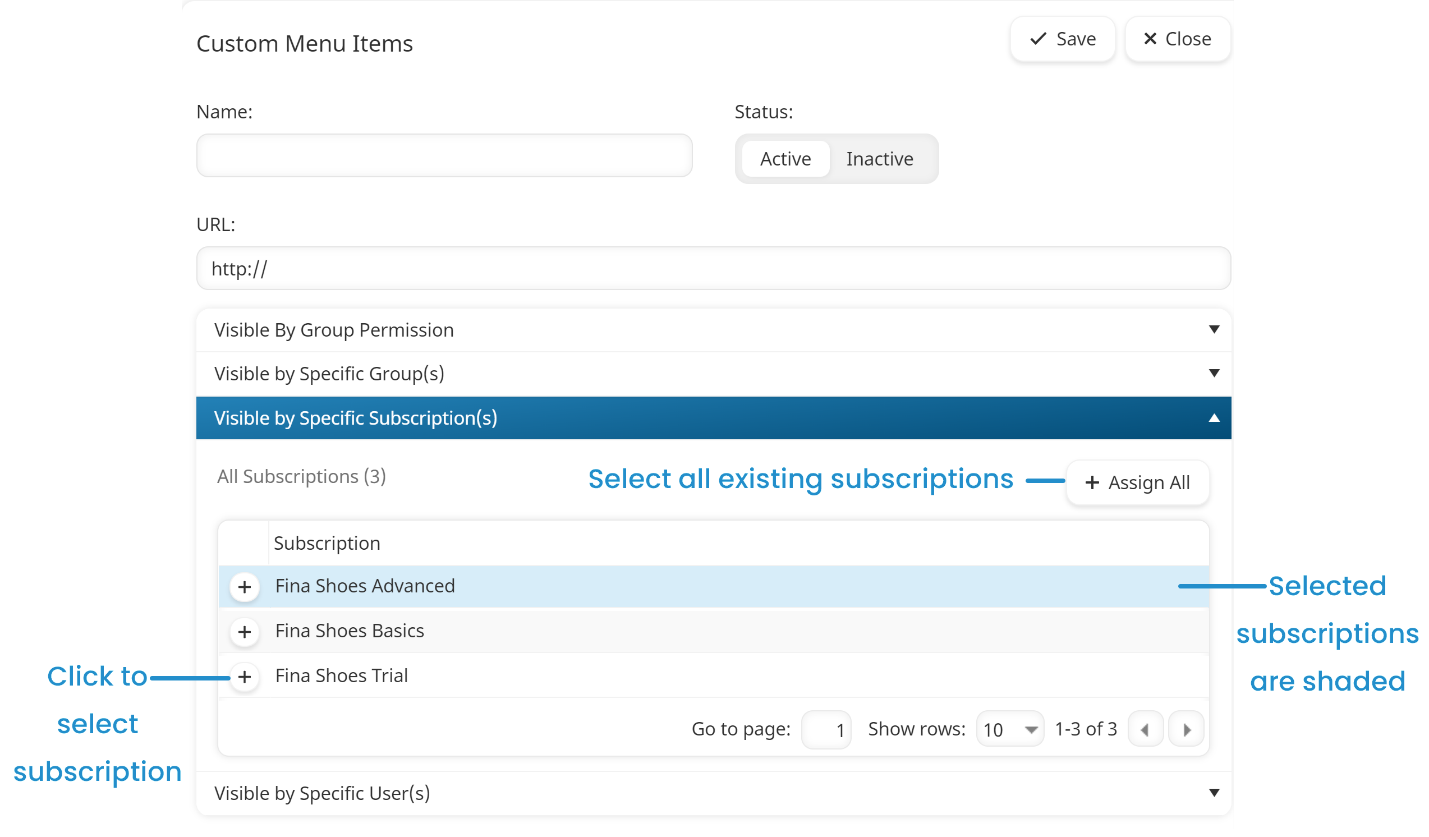
Visible By Specific Subscription(s)
To grant access to the custom menu item based on the subscriptions a user is enrolled in:
- Expand the Visible By Specific Subscription(s) accordion.
- Click the
 beside the subscription(s) that that be able to access the custom menu item. To select all existing subscriptions, click Assign All. The selected subscription rows are shaded.
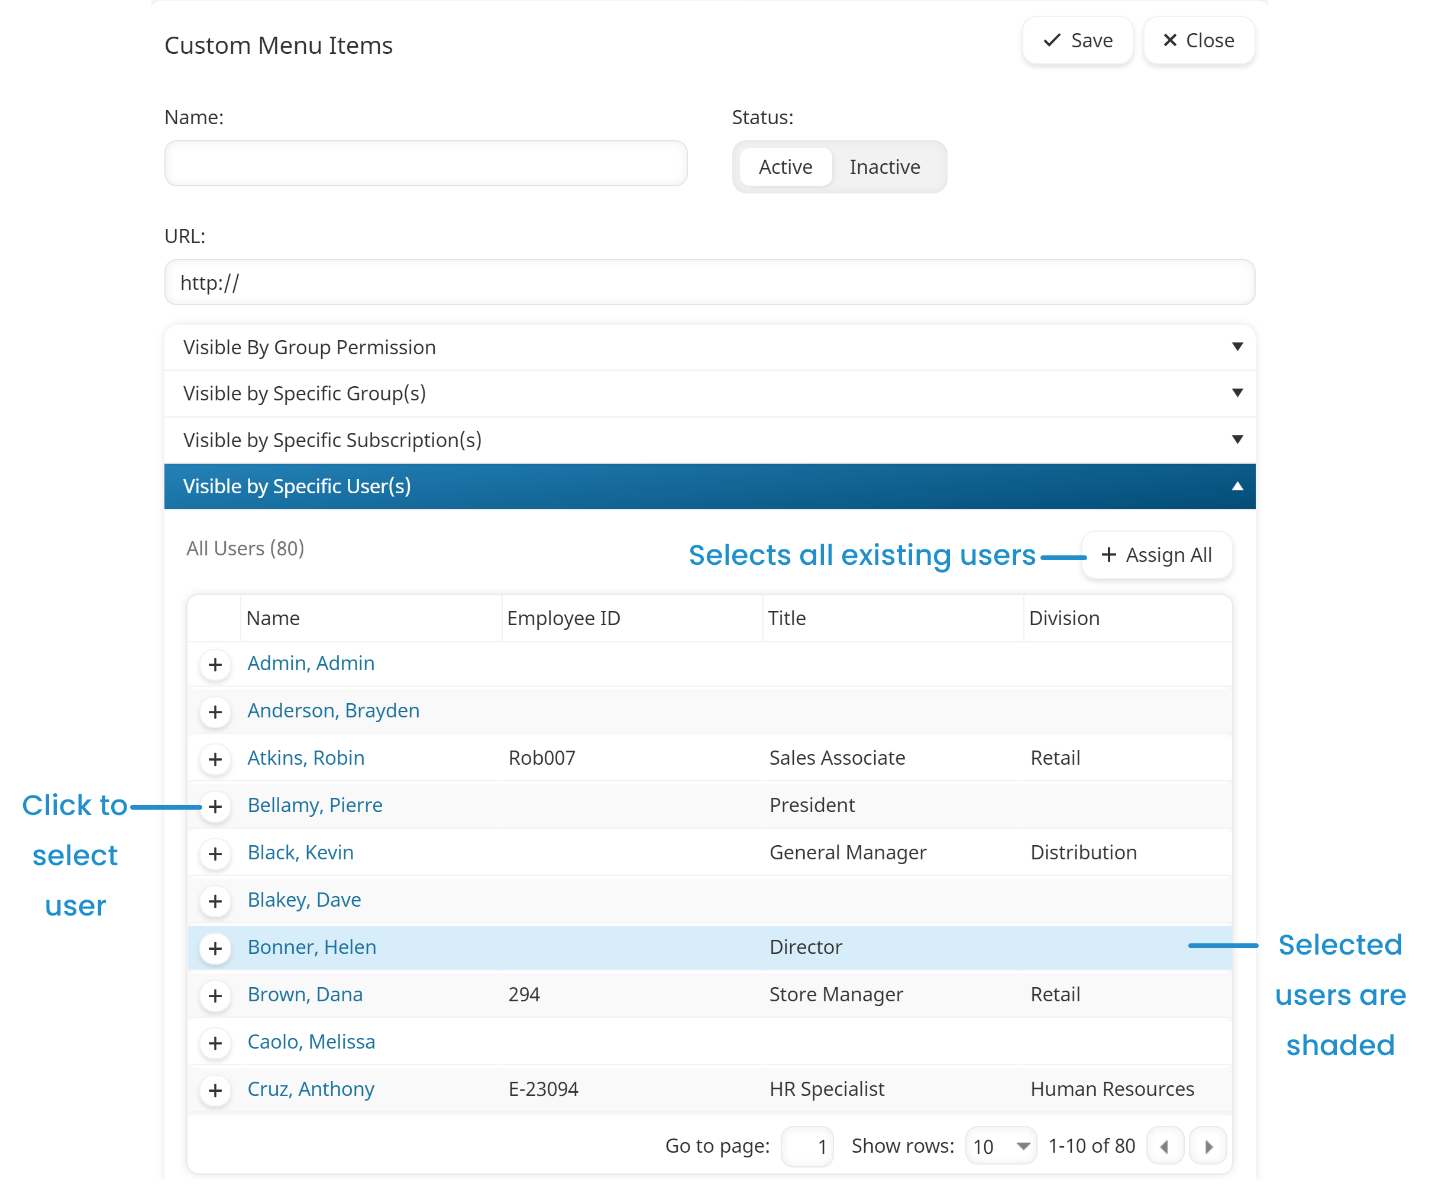
Visible By Specific User(s)
To grant access to the custom menu item by user:
- Expand the Visible By Specific User(s) accordion.
- Click the
 beside the user(s) that that be able to access the custom menu item. To select all existing users, click Assign All. The selected user rows are shaded.
Editing a Custom Menu Item
To edit a custom menu item:
- Edit your account settings.
- Expand the Custom Menu Items accordion.
- Click the
 beside the custom menu item you would like to edit.

The Custom Menu Item window displays the custom menu item's settings.
- Edit the custom menu item's settings as needed.
- Click Save. The Custom Menu Item window closes.
- On the Account Profile workscreen, click Save.
Removing a Custom Menu Item
To remove a custom menu item:
- Edit your account settings.
- Expand the Custom Menu Items accordion.
- Click the
 beside the custom menu item you would like to remove.

A confirmation message displays.
- Click OK.
- On the Account Profile workscreen, click Save.