Assigning users to the group enables you to enroll the user in the group's courses or subscriptions. It also enables you to grant the user group permissions.
A grid in the Users accordion displays the users assigned to the group.
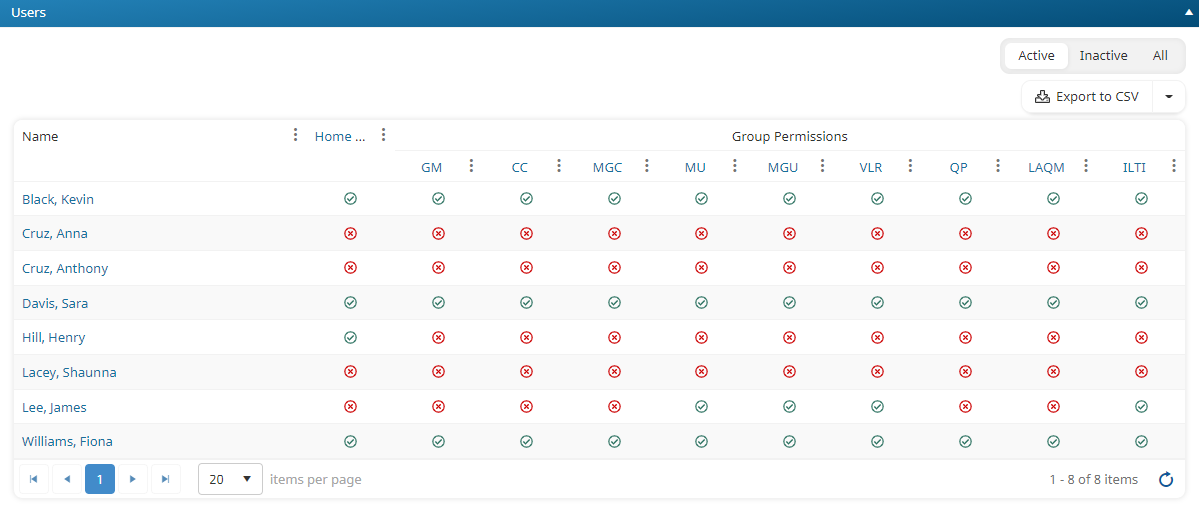
The grid's columns are described below.
Column | Description |
|---|---|
Name | The name of the user assigned to the group. |
Home Group | Indicates whether the group is the user's home group:
|
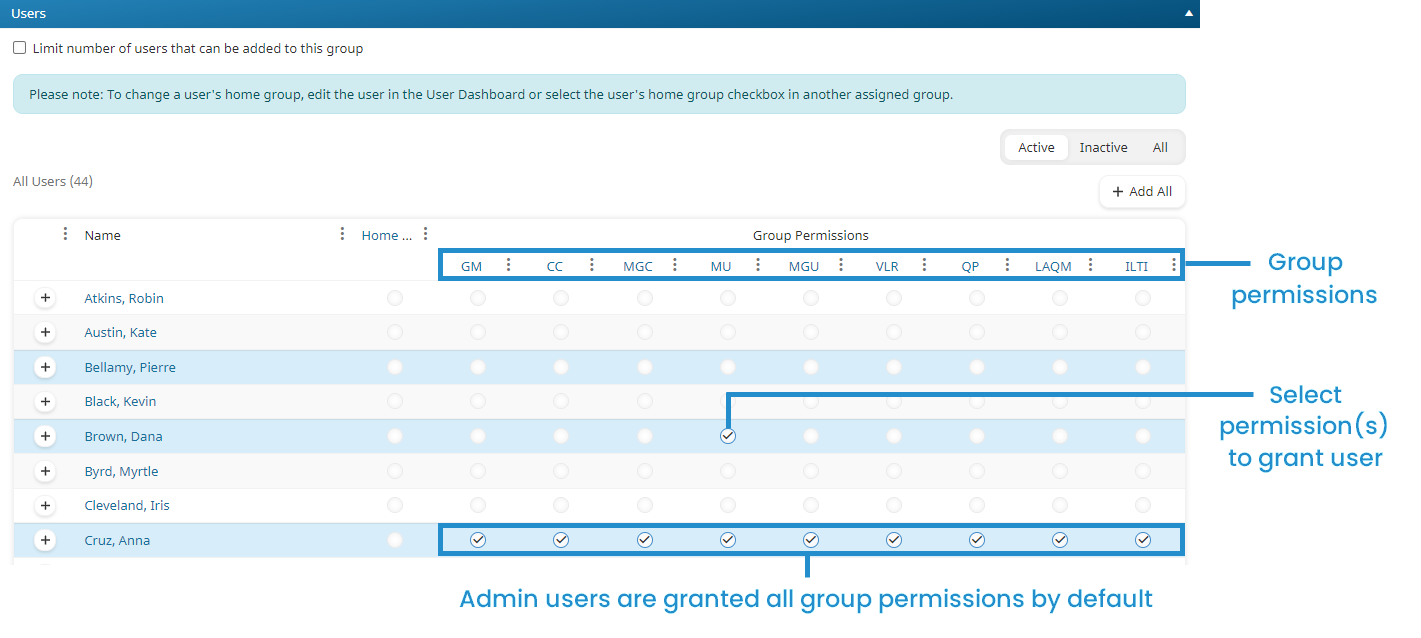
Group Permissions | Each group permission is listed below the Group Permissions column heading. The icon in the column indicates whether the user is assigned the permission:
|
 - The group is the user's home group.
 - The group is not the user's home group.
 - The user has been granted the group permission.
 - The user does not have the group permission.
You may add users to the group, change a user's group permissions, remove a user from the group, or export users to a .CSV file from the Add/Edit Group workscreen.
Adding Users to a New Group
Assigning users to the group enables you to enroll the user in the group's courses or subscriptions and grant the user with group permissions.
To add users to a new group:
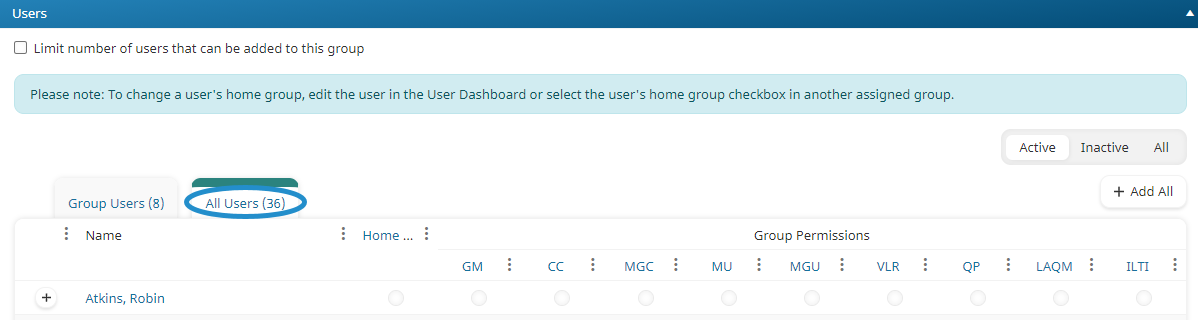
- From the Add/Edit Group workscreen, expand the Users accordion. By default, the grid displays all active users that you have permission to view.
- If you want to specify a maximum number of users that can be added to the group:
- Check the Limit Number of Users That Can Be Added to This Group checkbox.
- In the Users field, enter the maximum number of users that can be added to the group.

- To add a user to the group, click the
 displayed beside the user's name. To add all users to the group, click Add All. The selected user rows are shaded.
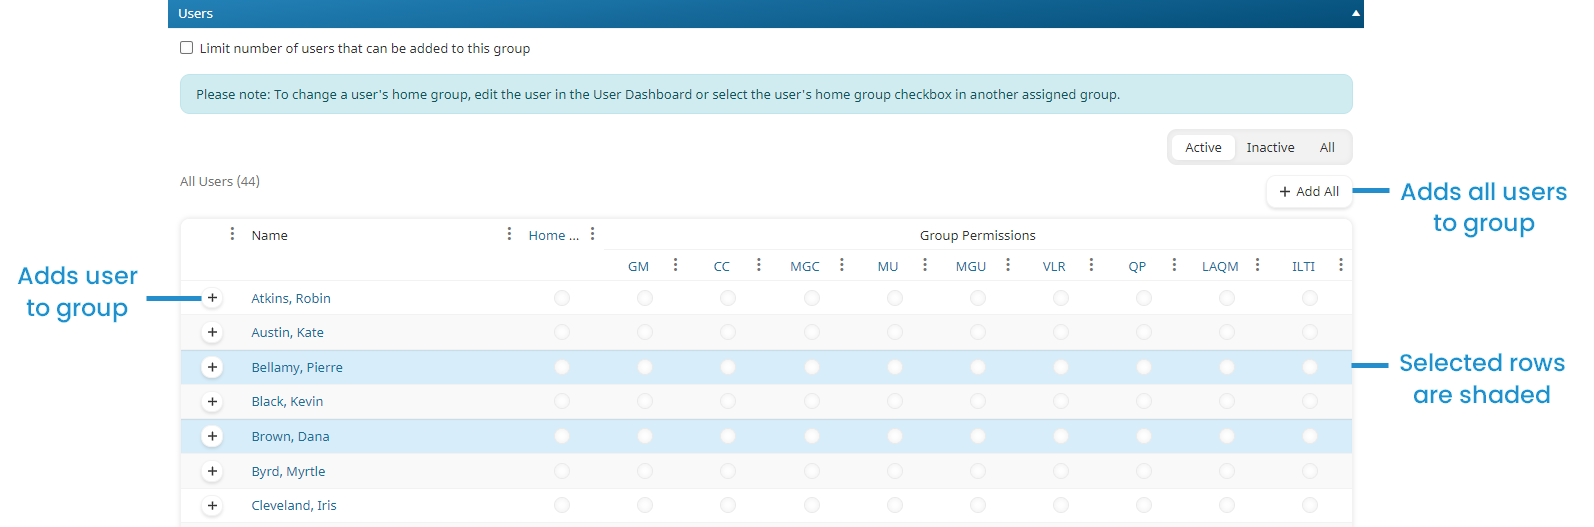
- To make the group the user's home group, check the checkbox in the Home Group column.
- To grant group permissions to a user, check the checkmark associated with the permission you would like to grant. Granting the GM (Group Manager) permission automatically selects all other group permissions.
- The user creating the group will automatically be granted the GM permission.
- Admin users are automatically granted all group permissions.
- Click Save.
If any of the group's courses and/or learning plans have the Auto-Enroll setting checked, users added to the group will be enrolled in those courses and/or learning plans.
Adding Users to an Existing Group
To add users to an existing group:
- From the Add/Edit Group workscreen, expand the Users accordion.
- Click Users.
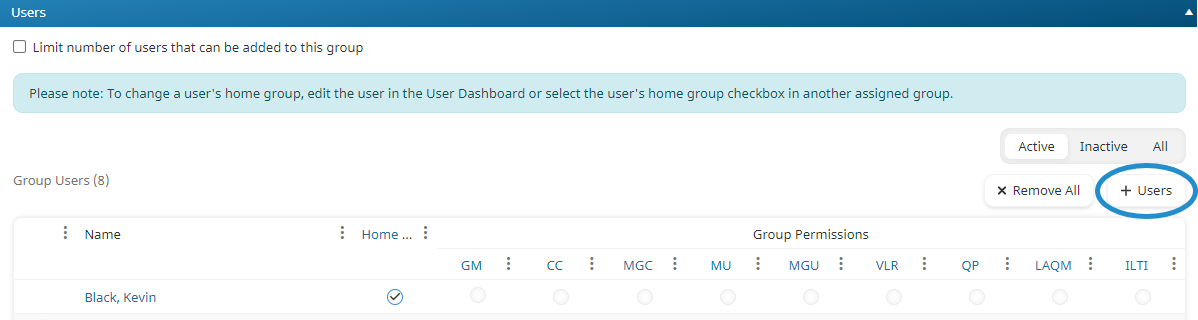
The All Users tab displays a list of users not in the group.
- Click the
 displayed beside the user you would like to add to the group. The selected user's row is shaded.
 - To make the group the user's home group, check the checkbox in the Home Group column.
- To grant the user with a group permission, check the checkbox in the permission's column.
- Click Save.
Editing a User's Group Permissions
To edit a user's group permissions:
- From the Add/Edit Group workscreen, expand the Users accordion.
- To grant group permissions to a user, check the checkbox associated with the permission you would like to grant. A checkmark indicates that the group permission is granted to the user.
- Click Save.
 ) indicates the user is not assigned the permission, a green checkmark (
 ) indicates the user is assigned the permission.
Removing Users from a Group
To remove a user from a group:
- From the Add/Edit Group workscreen, expand the Users accordion.
- Click the
 beside the user you would like to remove from the group. To remove all users from the group, click Remove All.
 - Click Save.