As an LMS admin, you play a key role in shaping each learner’s training experience. When you add a new learner to your SmarterU LMS account, the account invitation email is often their first introduction to your training environment. This message is more than just a system notification—it’s an opportunity to make a positive first impression.
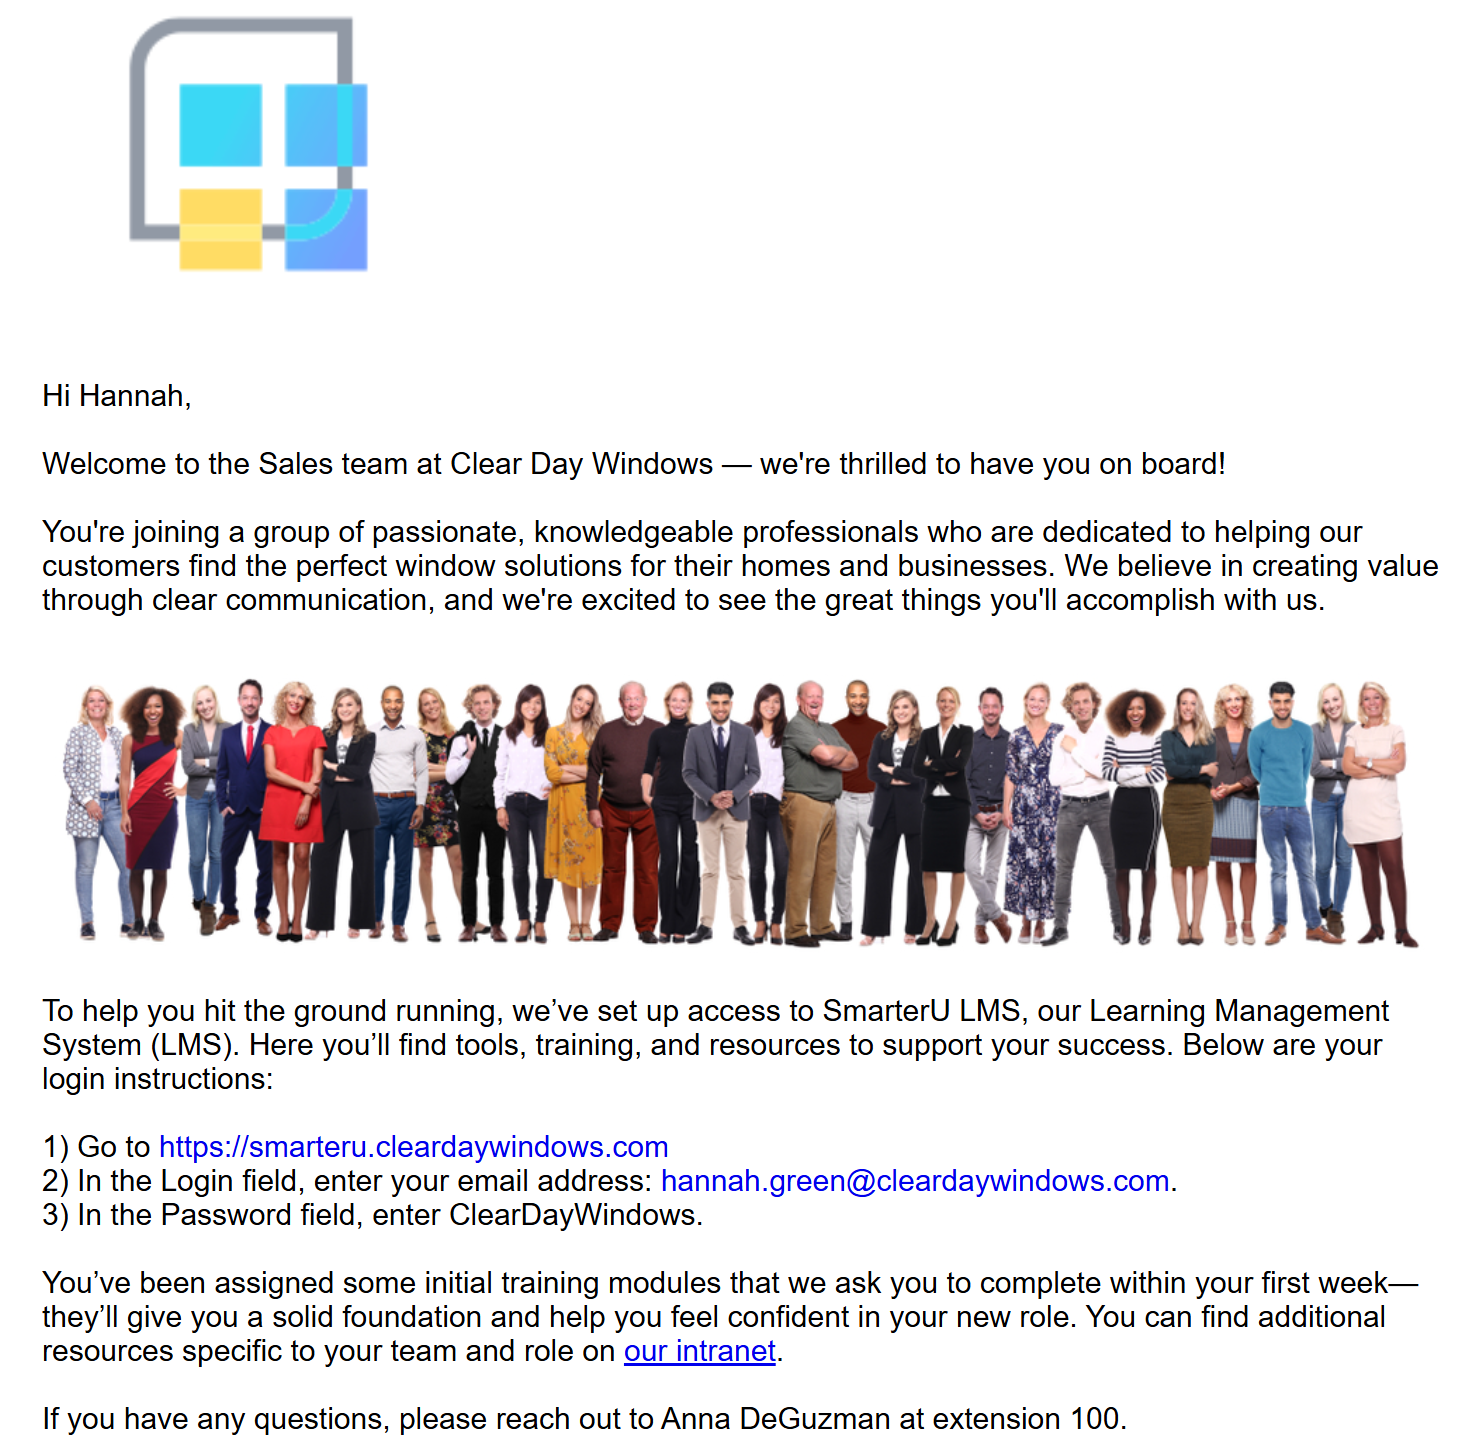
Customize the account invitation to align with your organization’s branding, provide helpful guidance, and set a welcoming tone that reflects your learning culture. It’s a small but meaningful way to create a smoother, more engaging start to every learner’s journey.
Want SmarterNews delivered to your inbox? Subscribe today!
Why Customize the Account Invitation Email?
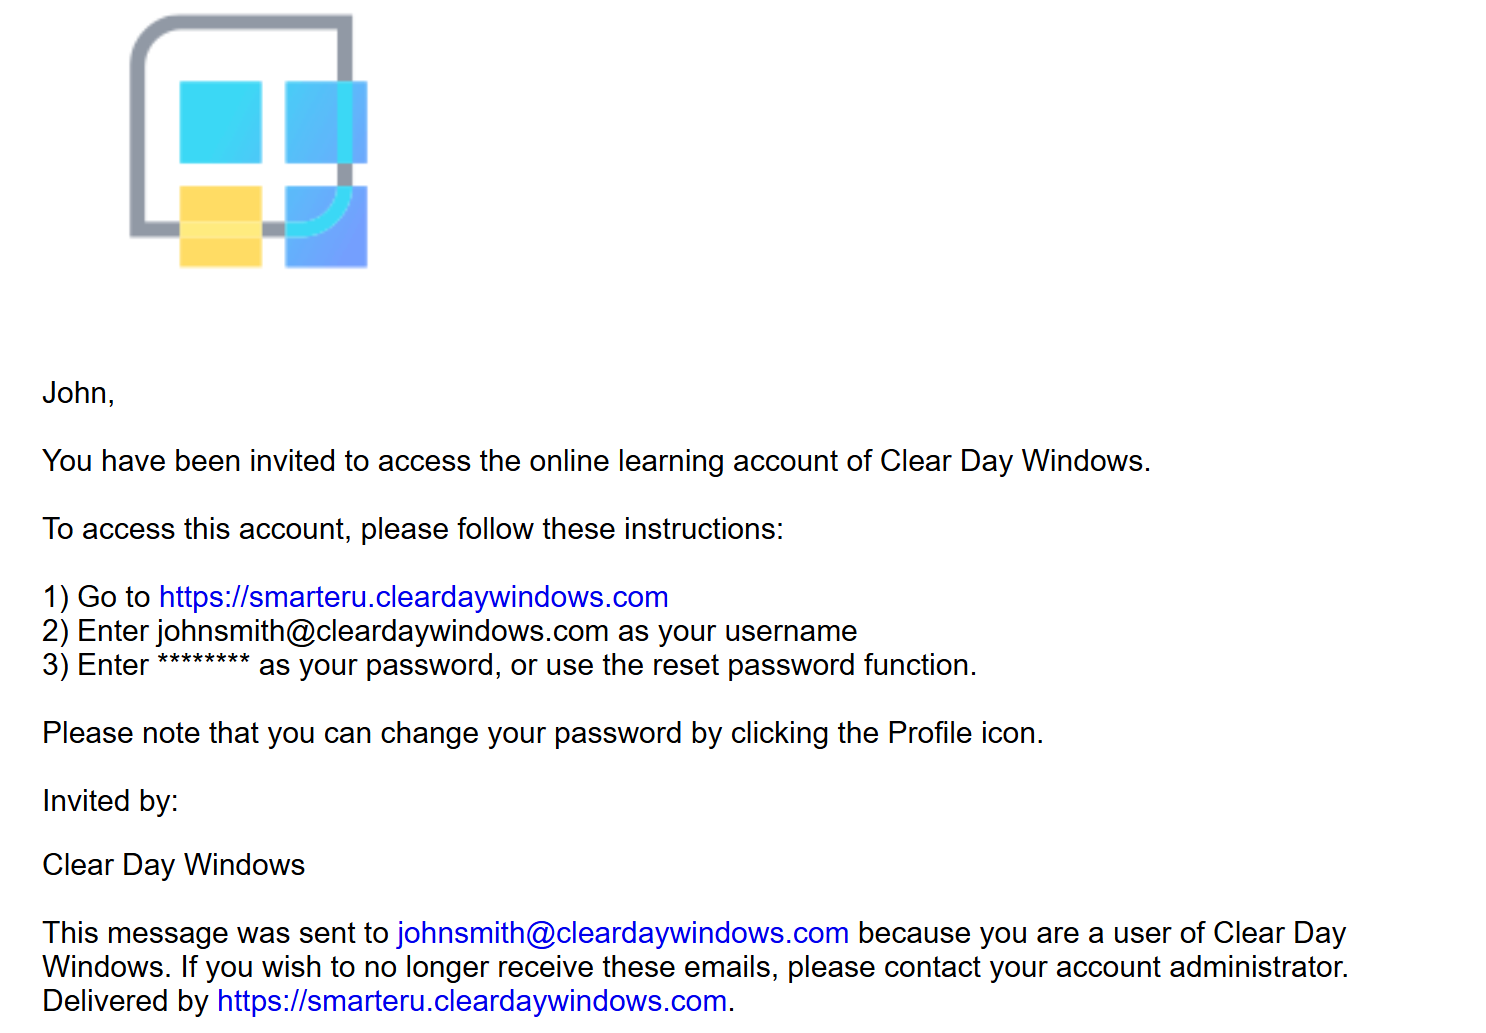
SmarterU provides a default Account Invitation email to welcome learners to your account and help them log in for the first time.
While you don’t have to edit this email, leaving it untouched means missing out on a valuable engagement opportunity.
Customizing the email lets you:
Strengthen your branding with logos, colors, and messaging.
Clarify the next steps by outlining what users should do once they log in.
Add a personal touch by including a personalized message tailored to your learners.
Streamline support by proactively answering common questions or linking to help resources.
Set the tone for the learner’s journey, making them feel welcomed and confident.
How to Customize the Account Invitation Email
The easiest way to customize the account invitation email is to make a copy of the default template included with SmarterU and edit it to meet your needs.
Alternatively, you can create a template from scratch.
To copy the default Account Invitation email template and customize it:
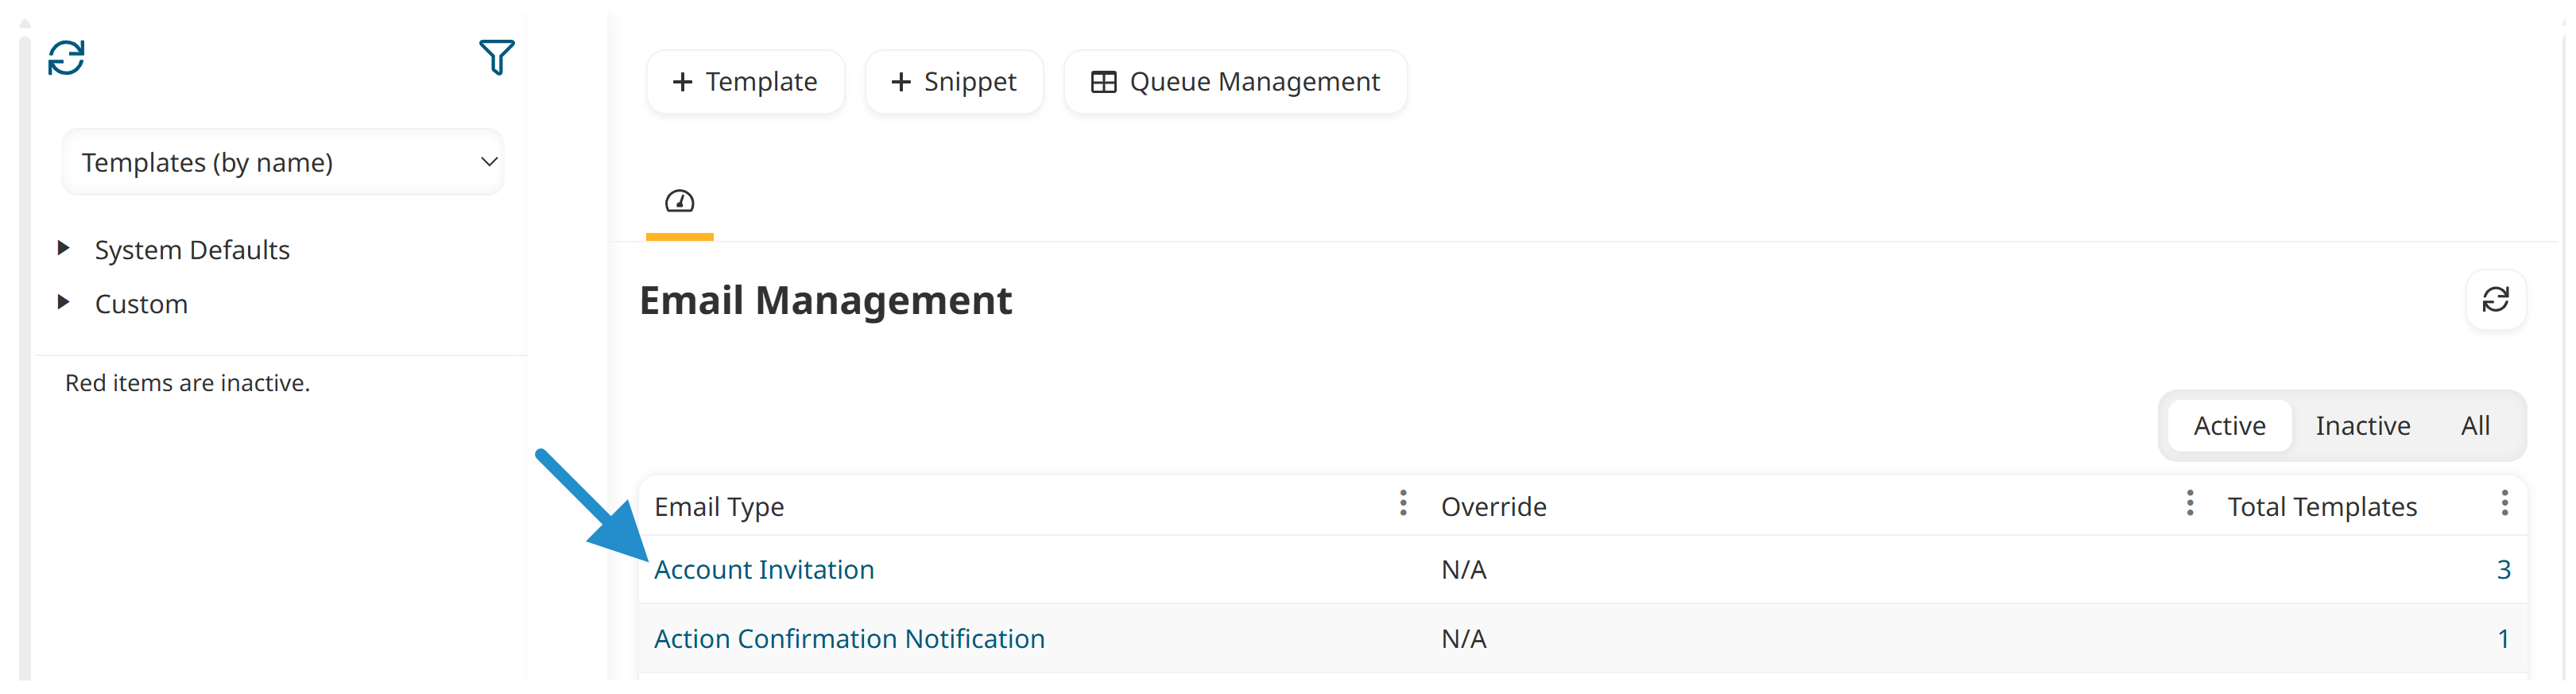
Navigate to the Email Management Dashboard.
Click Account Invitation.
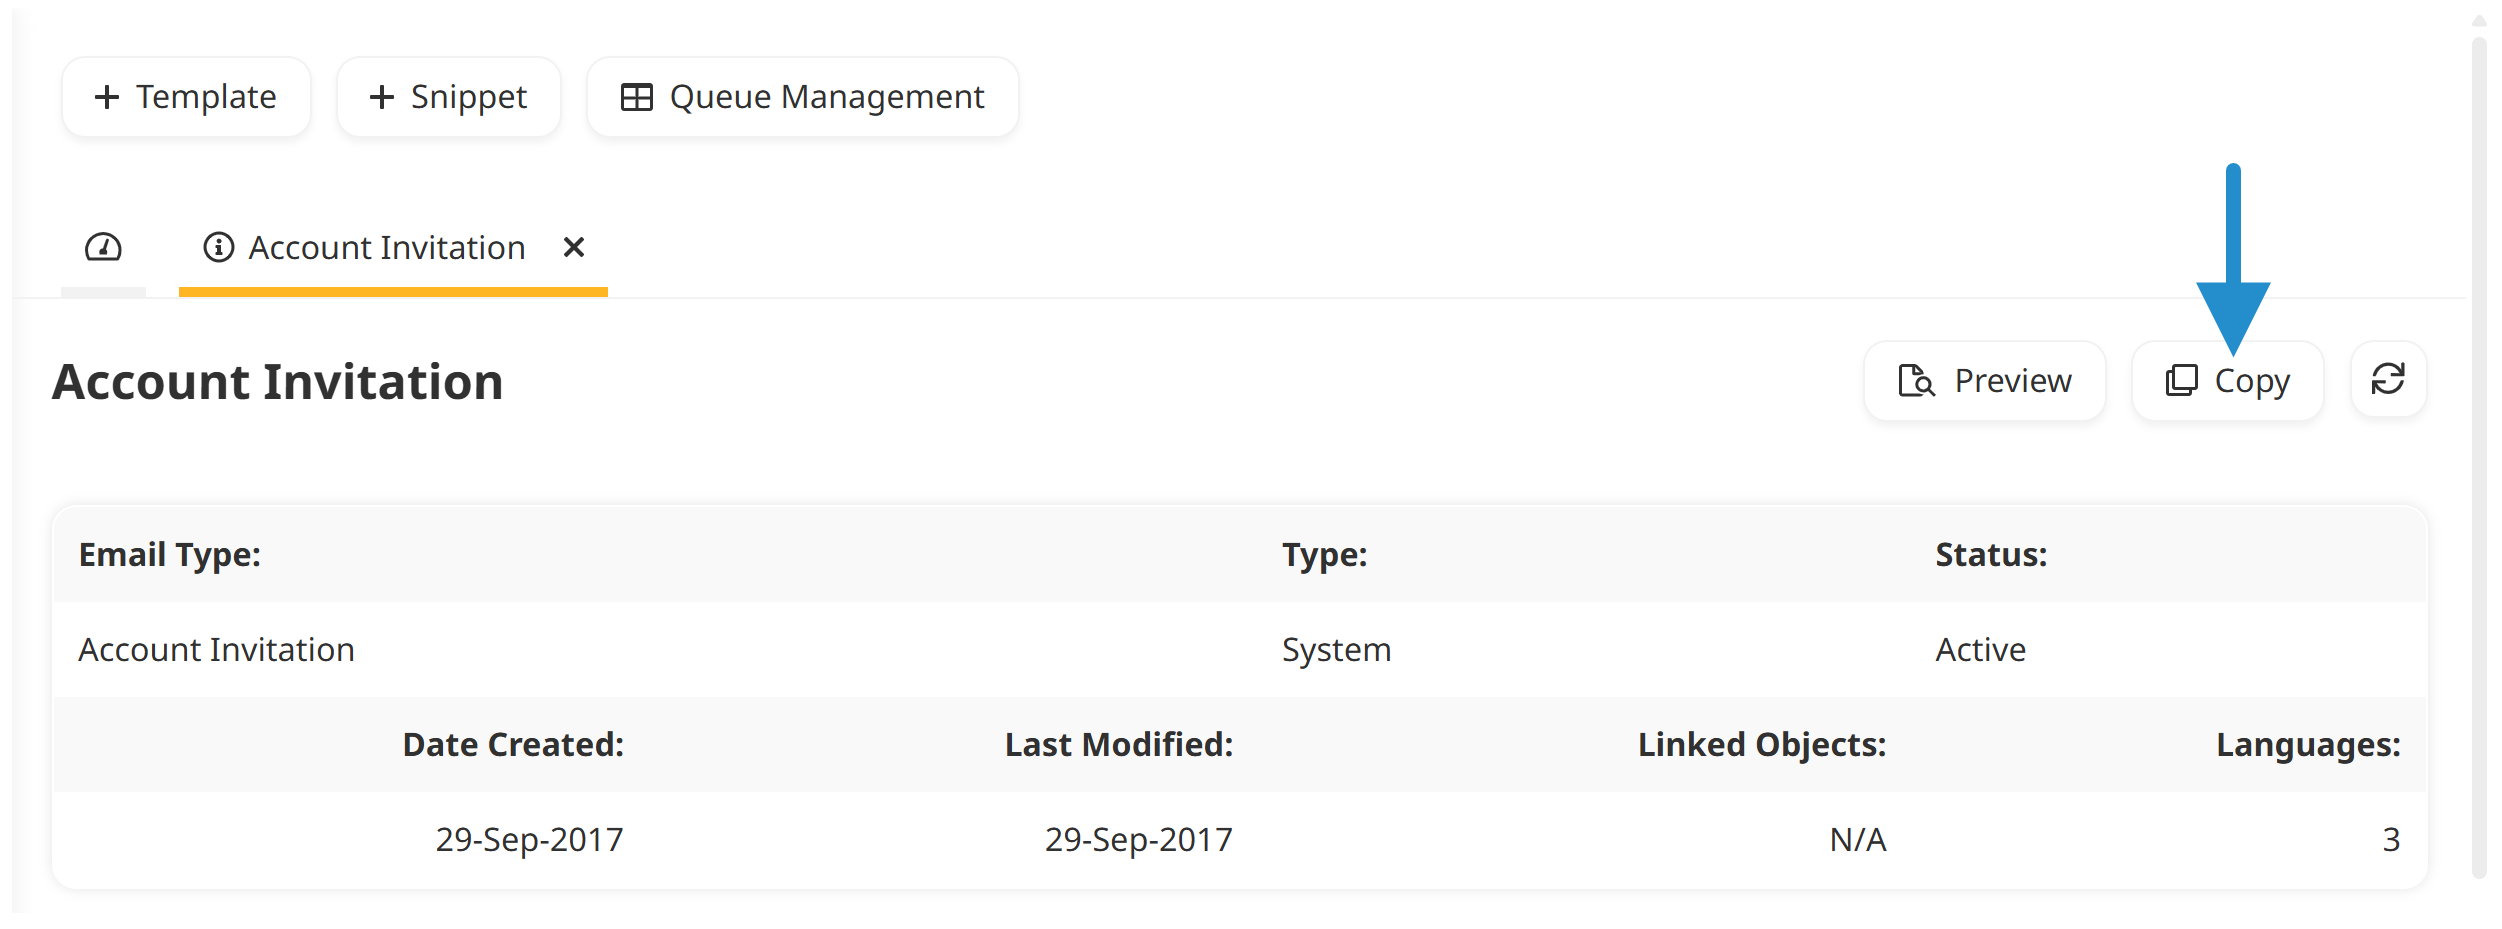
Click Copy.
Enter a name and description for the email template.
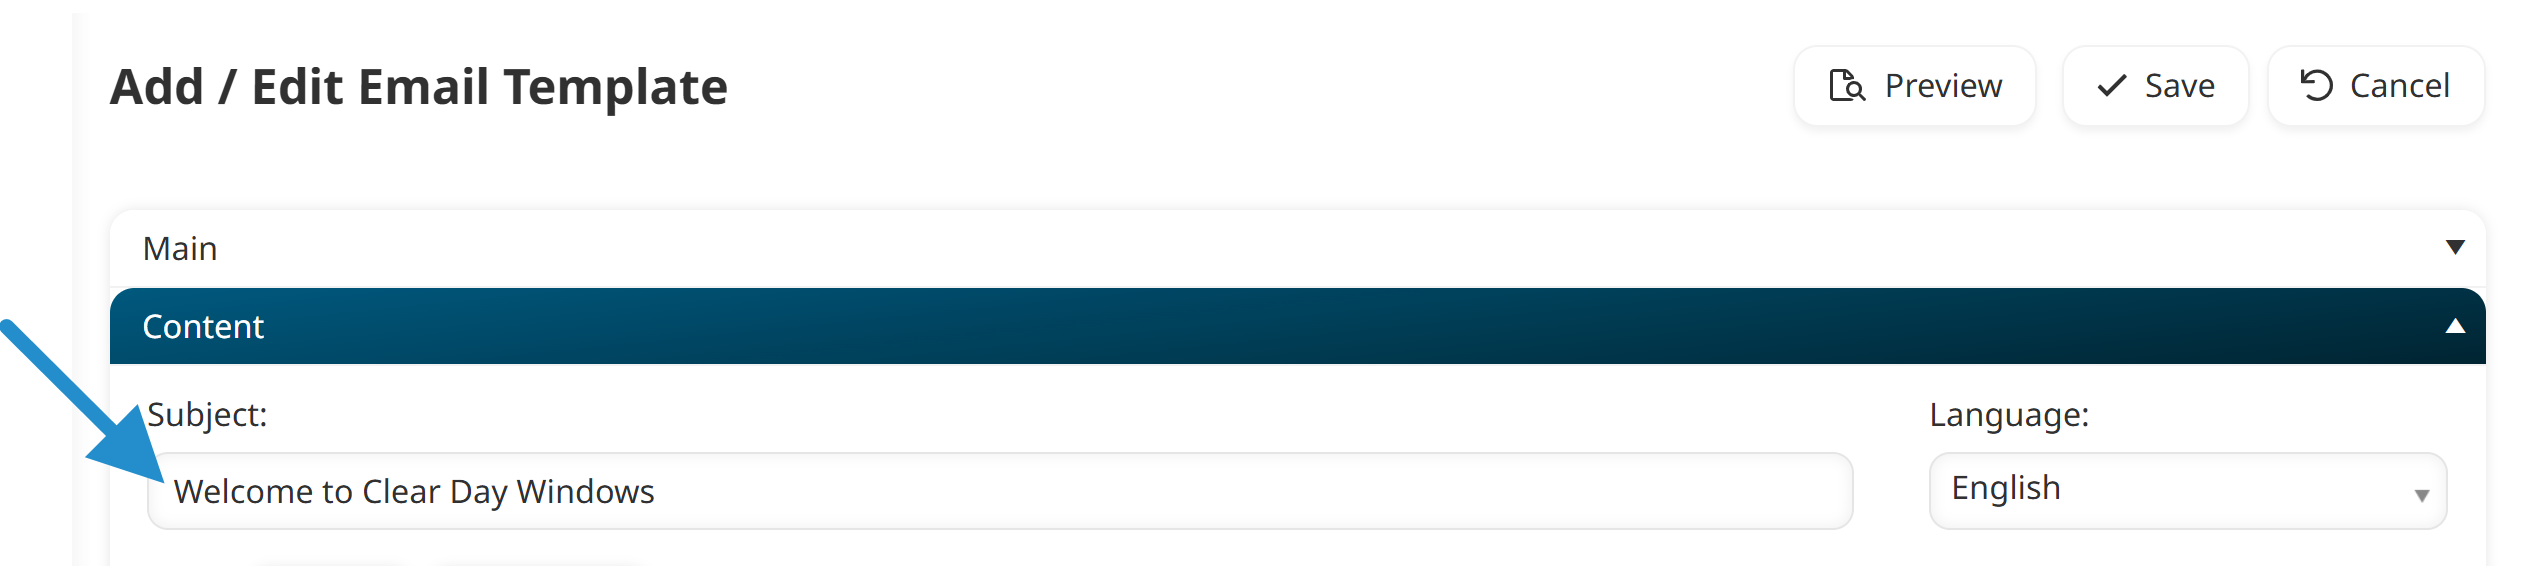
Expand the Content accordion.
In the Subject field, enter the subject line you want learners to see when they receive the email.
In the HTML tab, customize the text of the account invitation email. The WYSIWYG toolbar allows you to format the text, add links, add images, and more.
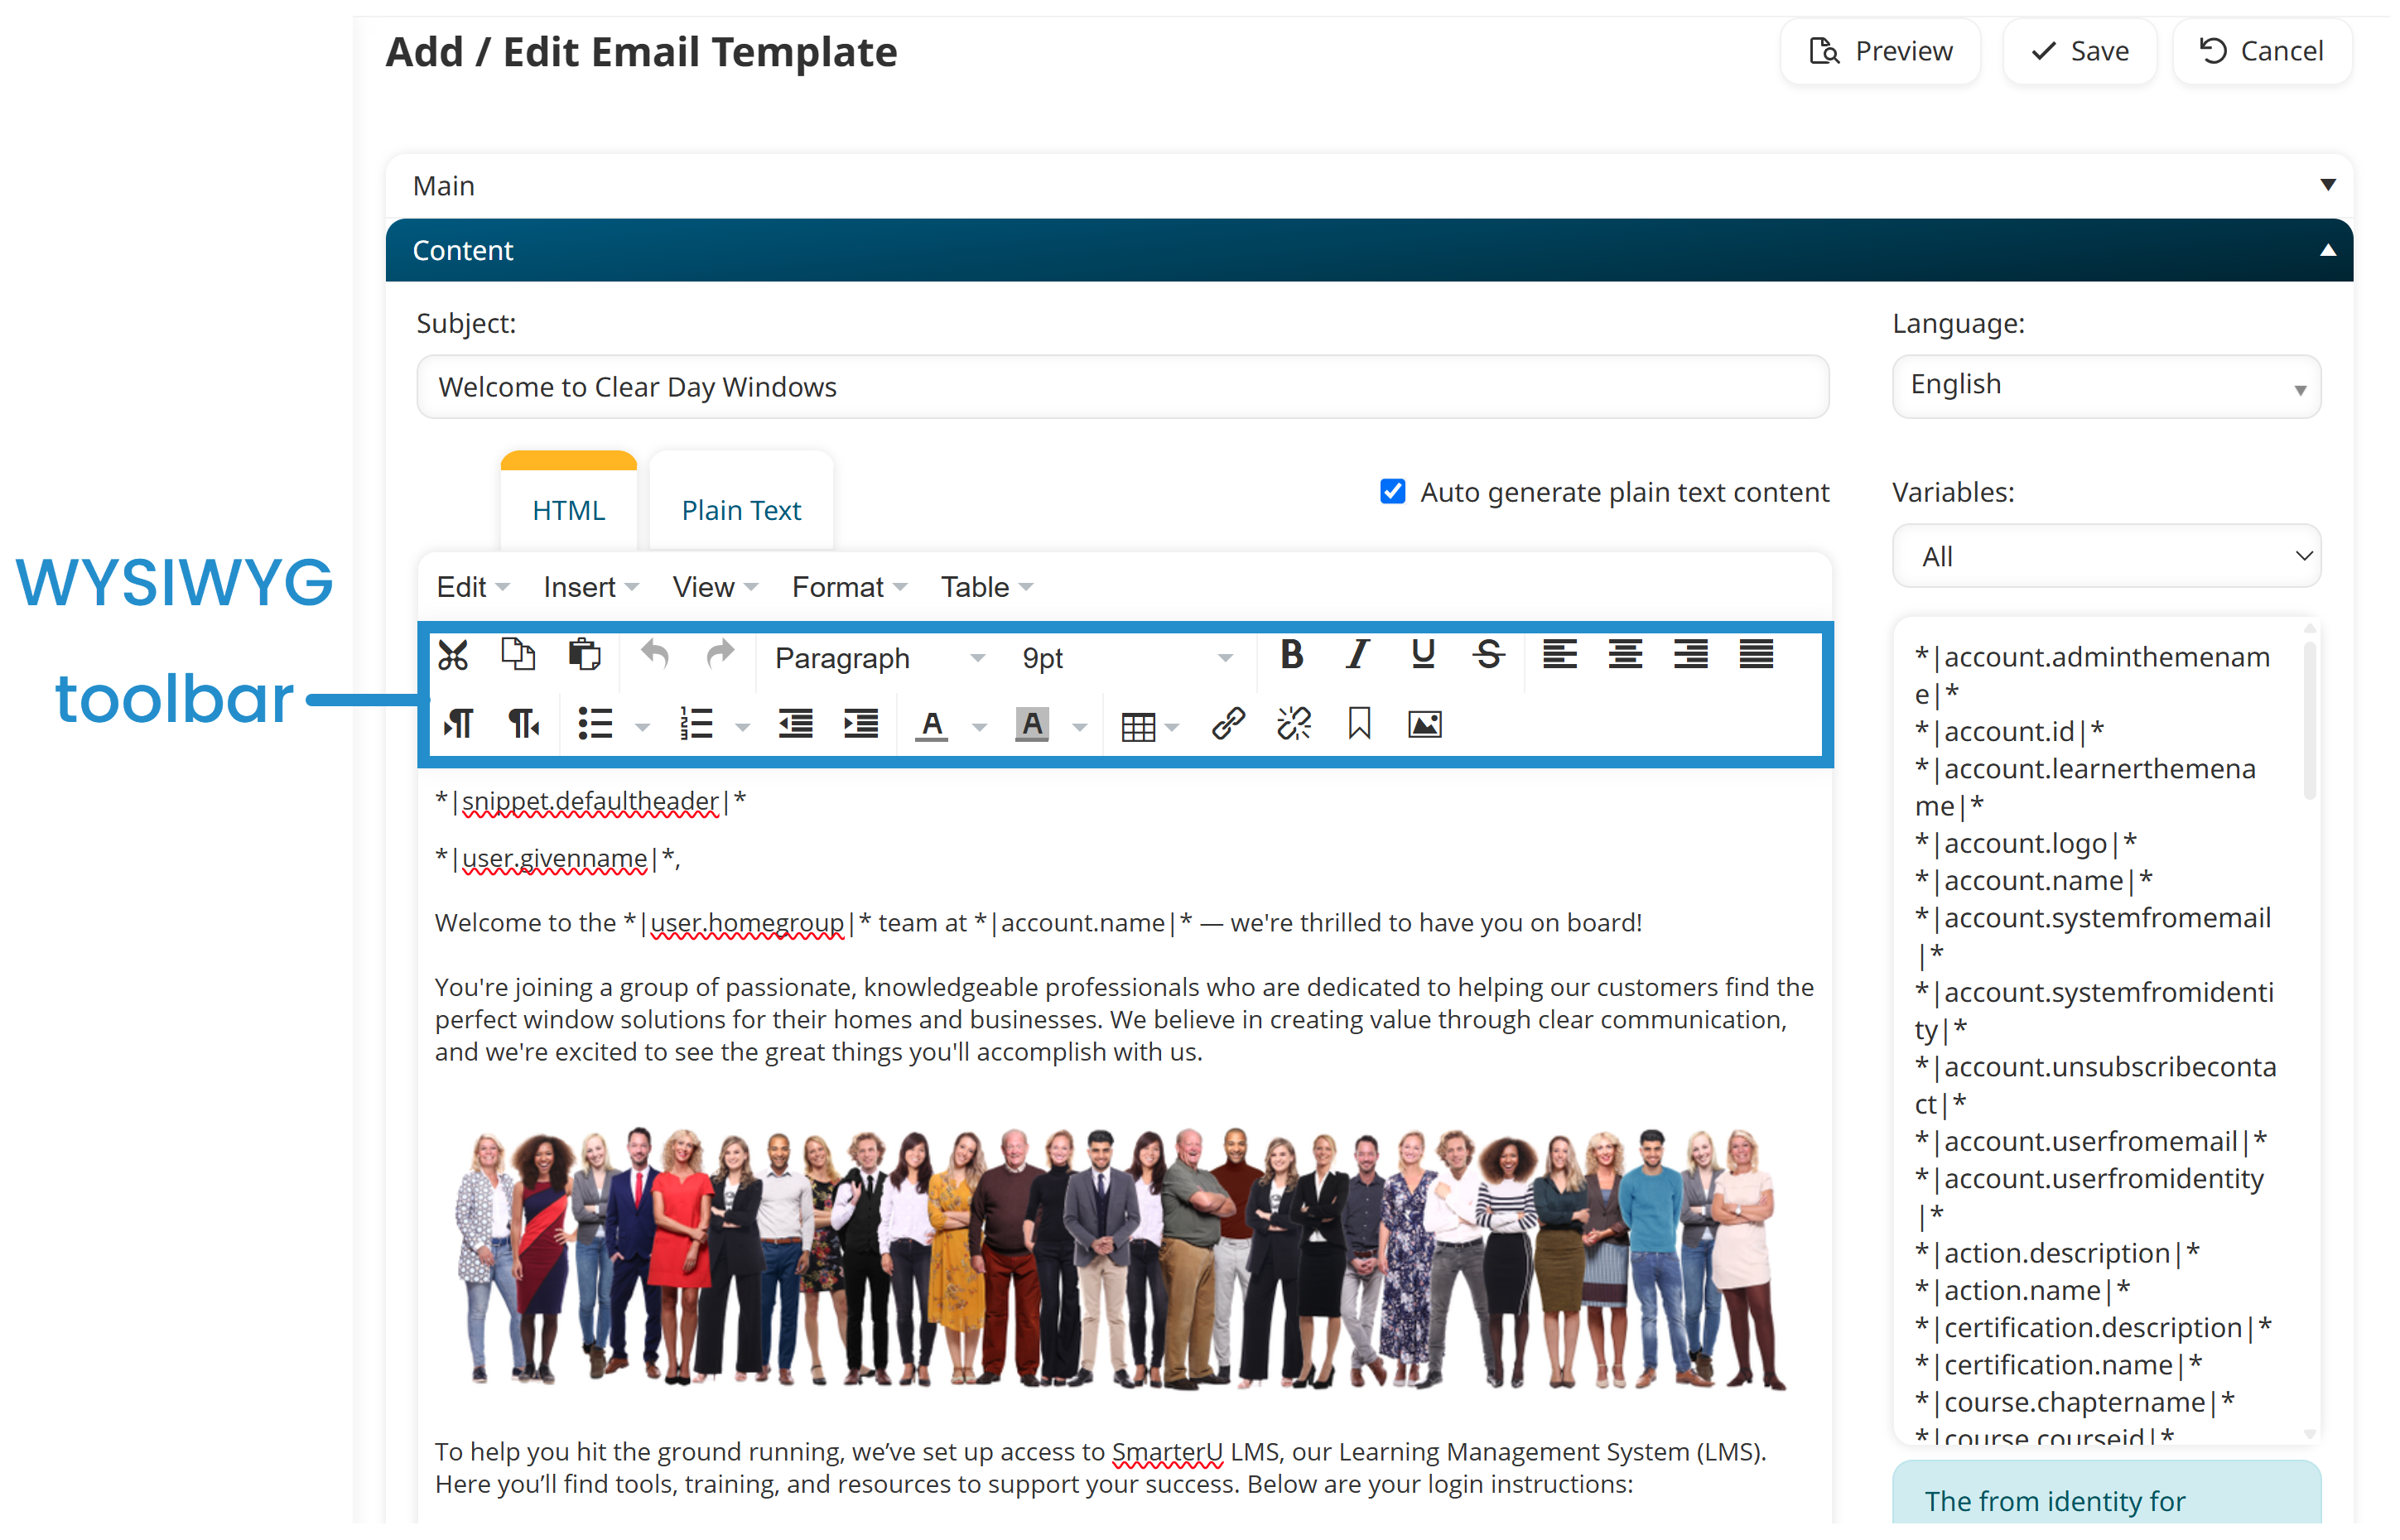
To personalize the email for each learner, you can add variables to your email template. Think of variables as placeholders that will be replaced with information such as the learner’s name, home group, or course name.
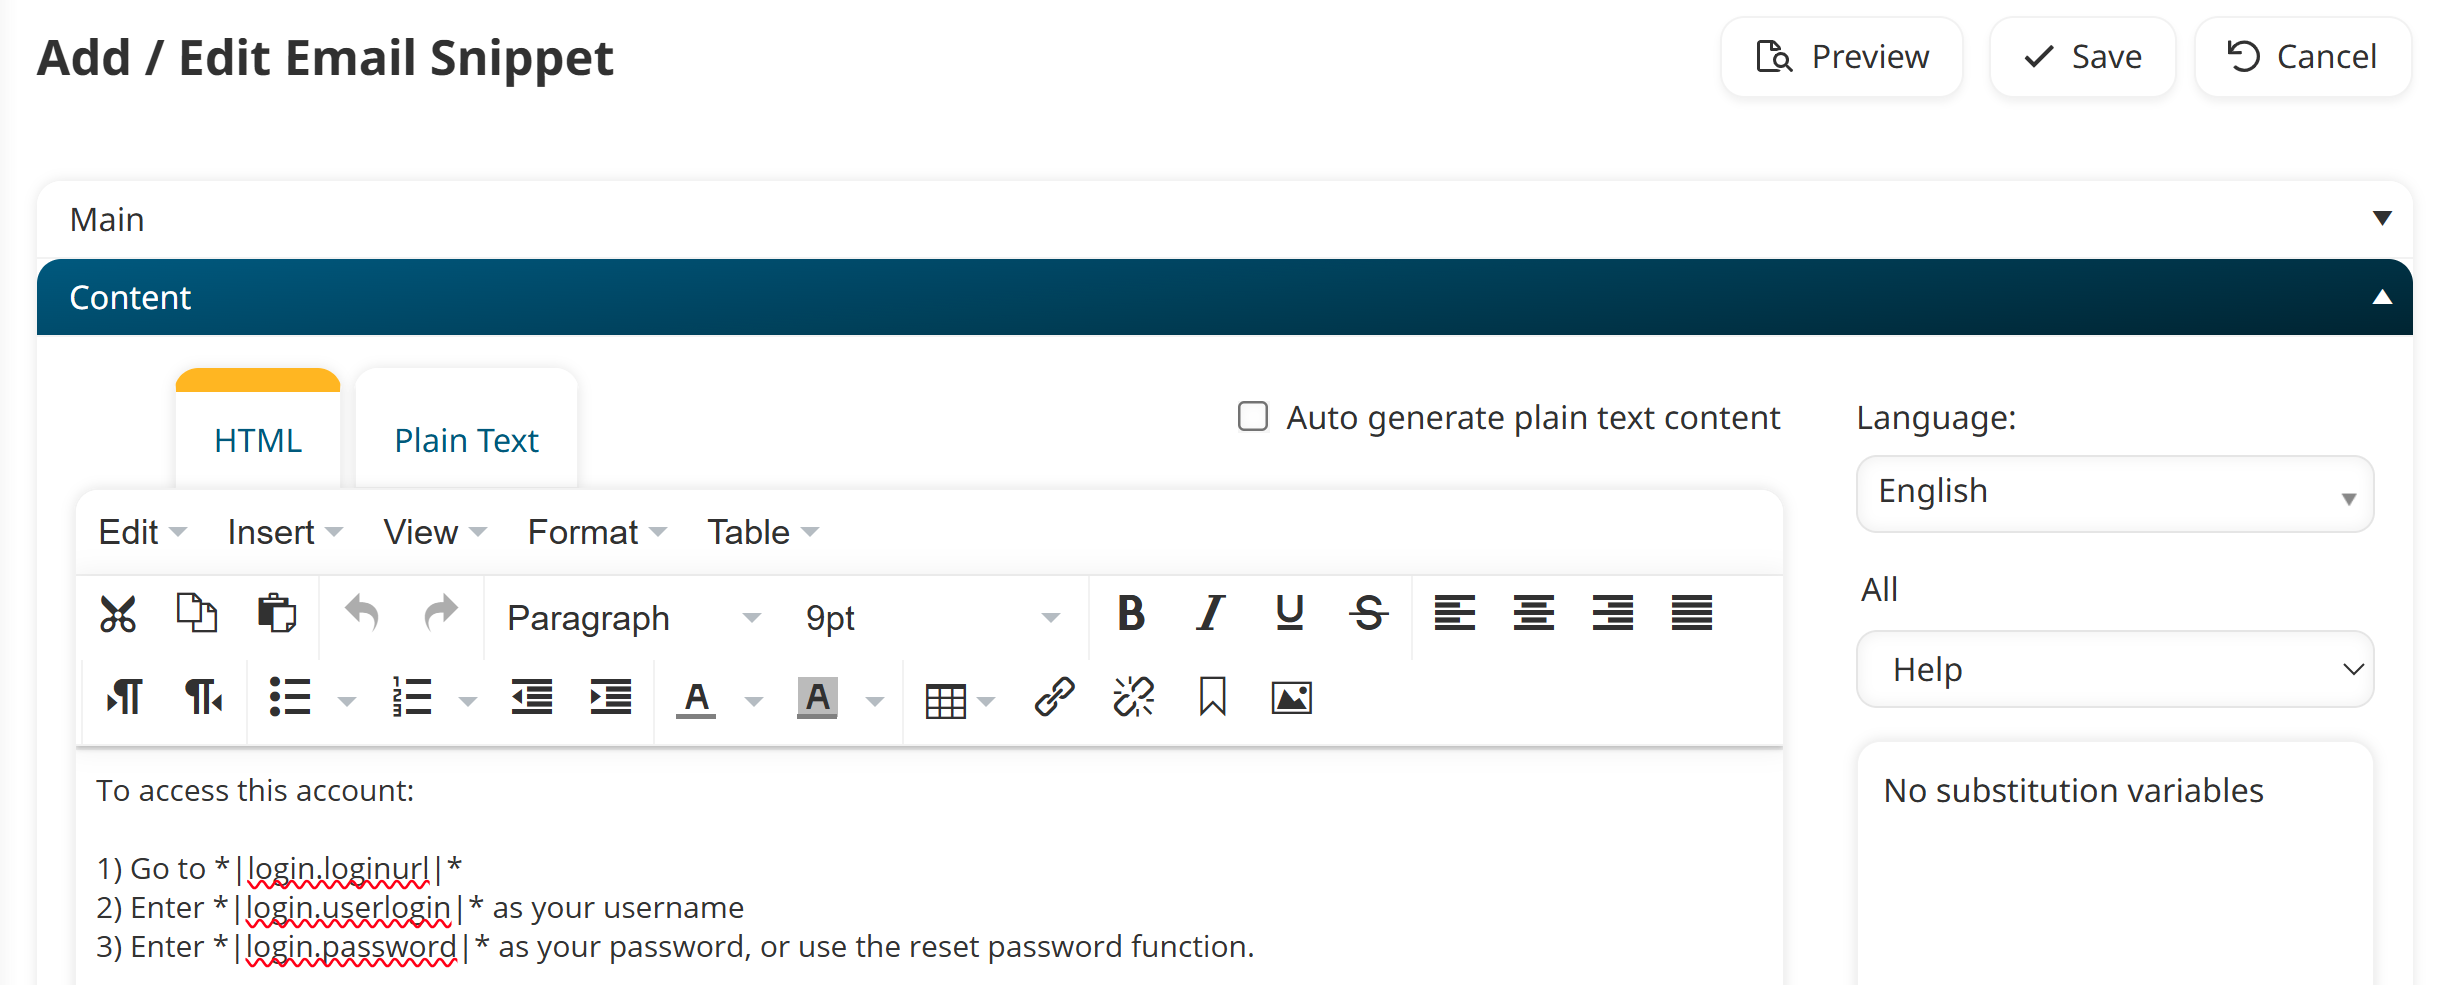
You can also create snippets in SmarterU. A snippet is another type of placeholder that lets you quickly add and update text. It’s beneficial for text that’s used in multiple email templates. You can even include variables in a snippet! For example, you can create a snippet for the steps for logging into SmarterU LMS.
Click Save.
To see how the email will appear to learners, click Preview.
After customizing your account invitation email, you can use it for everyone invited to your account or when inviting specific learners. You can even create multiple account invitation emails to use for different groups.
How to Use the Email Template for All Users
To use the email template for everyone invited to your account, you’ll need to set it as your account’s default. Using one template for all account invites ensures consistency and saves time, especially if you're regularly onboarding new learners.
This option uses the email for all users invited to your account, including learners, course managers, supervisors, and others.
To set the email as the account’s default:
Navigate to your account settings.
View the Email Template Options accordion.
From the Account accordion, select your email template’s name from the Account Invitation list.
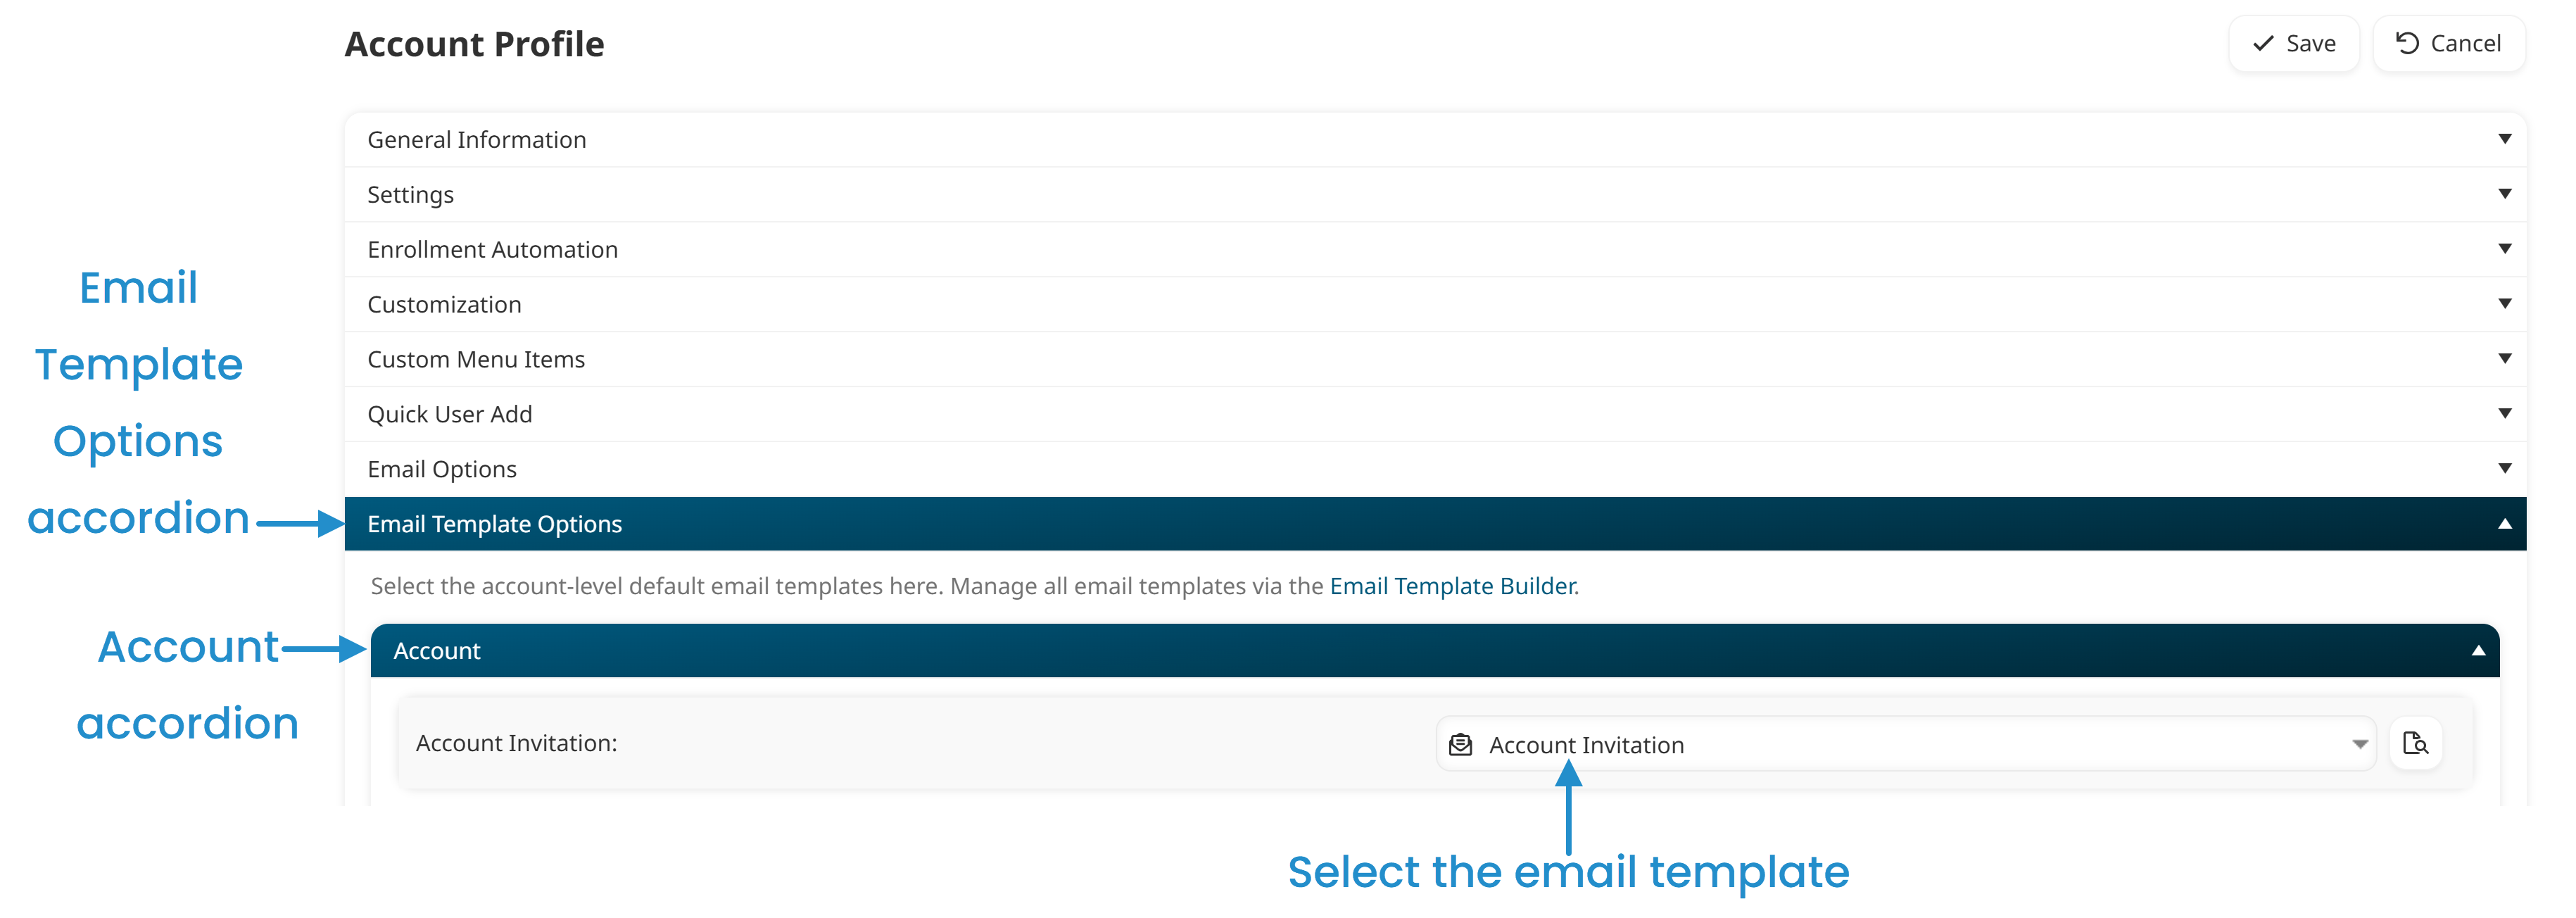
Click Save.
You can also change the default template for the account from the Email Management Dashboard.
How to Use the Email Template for a Specific Learner
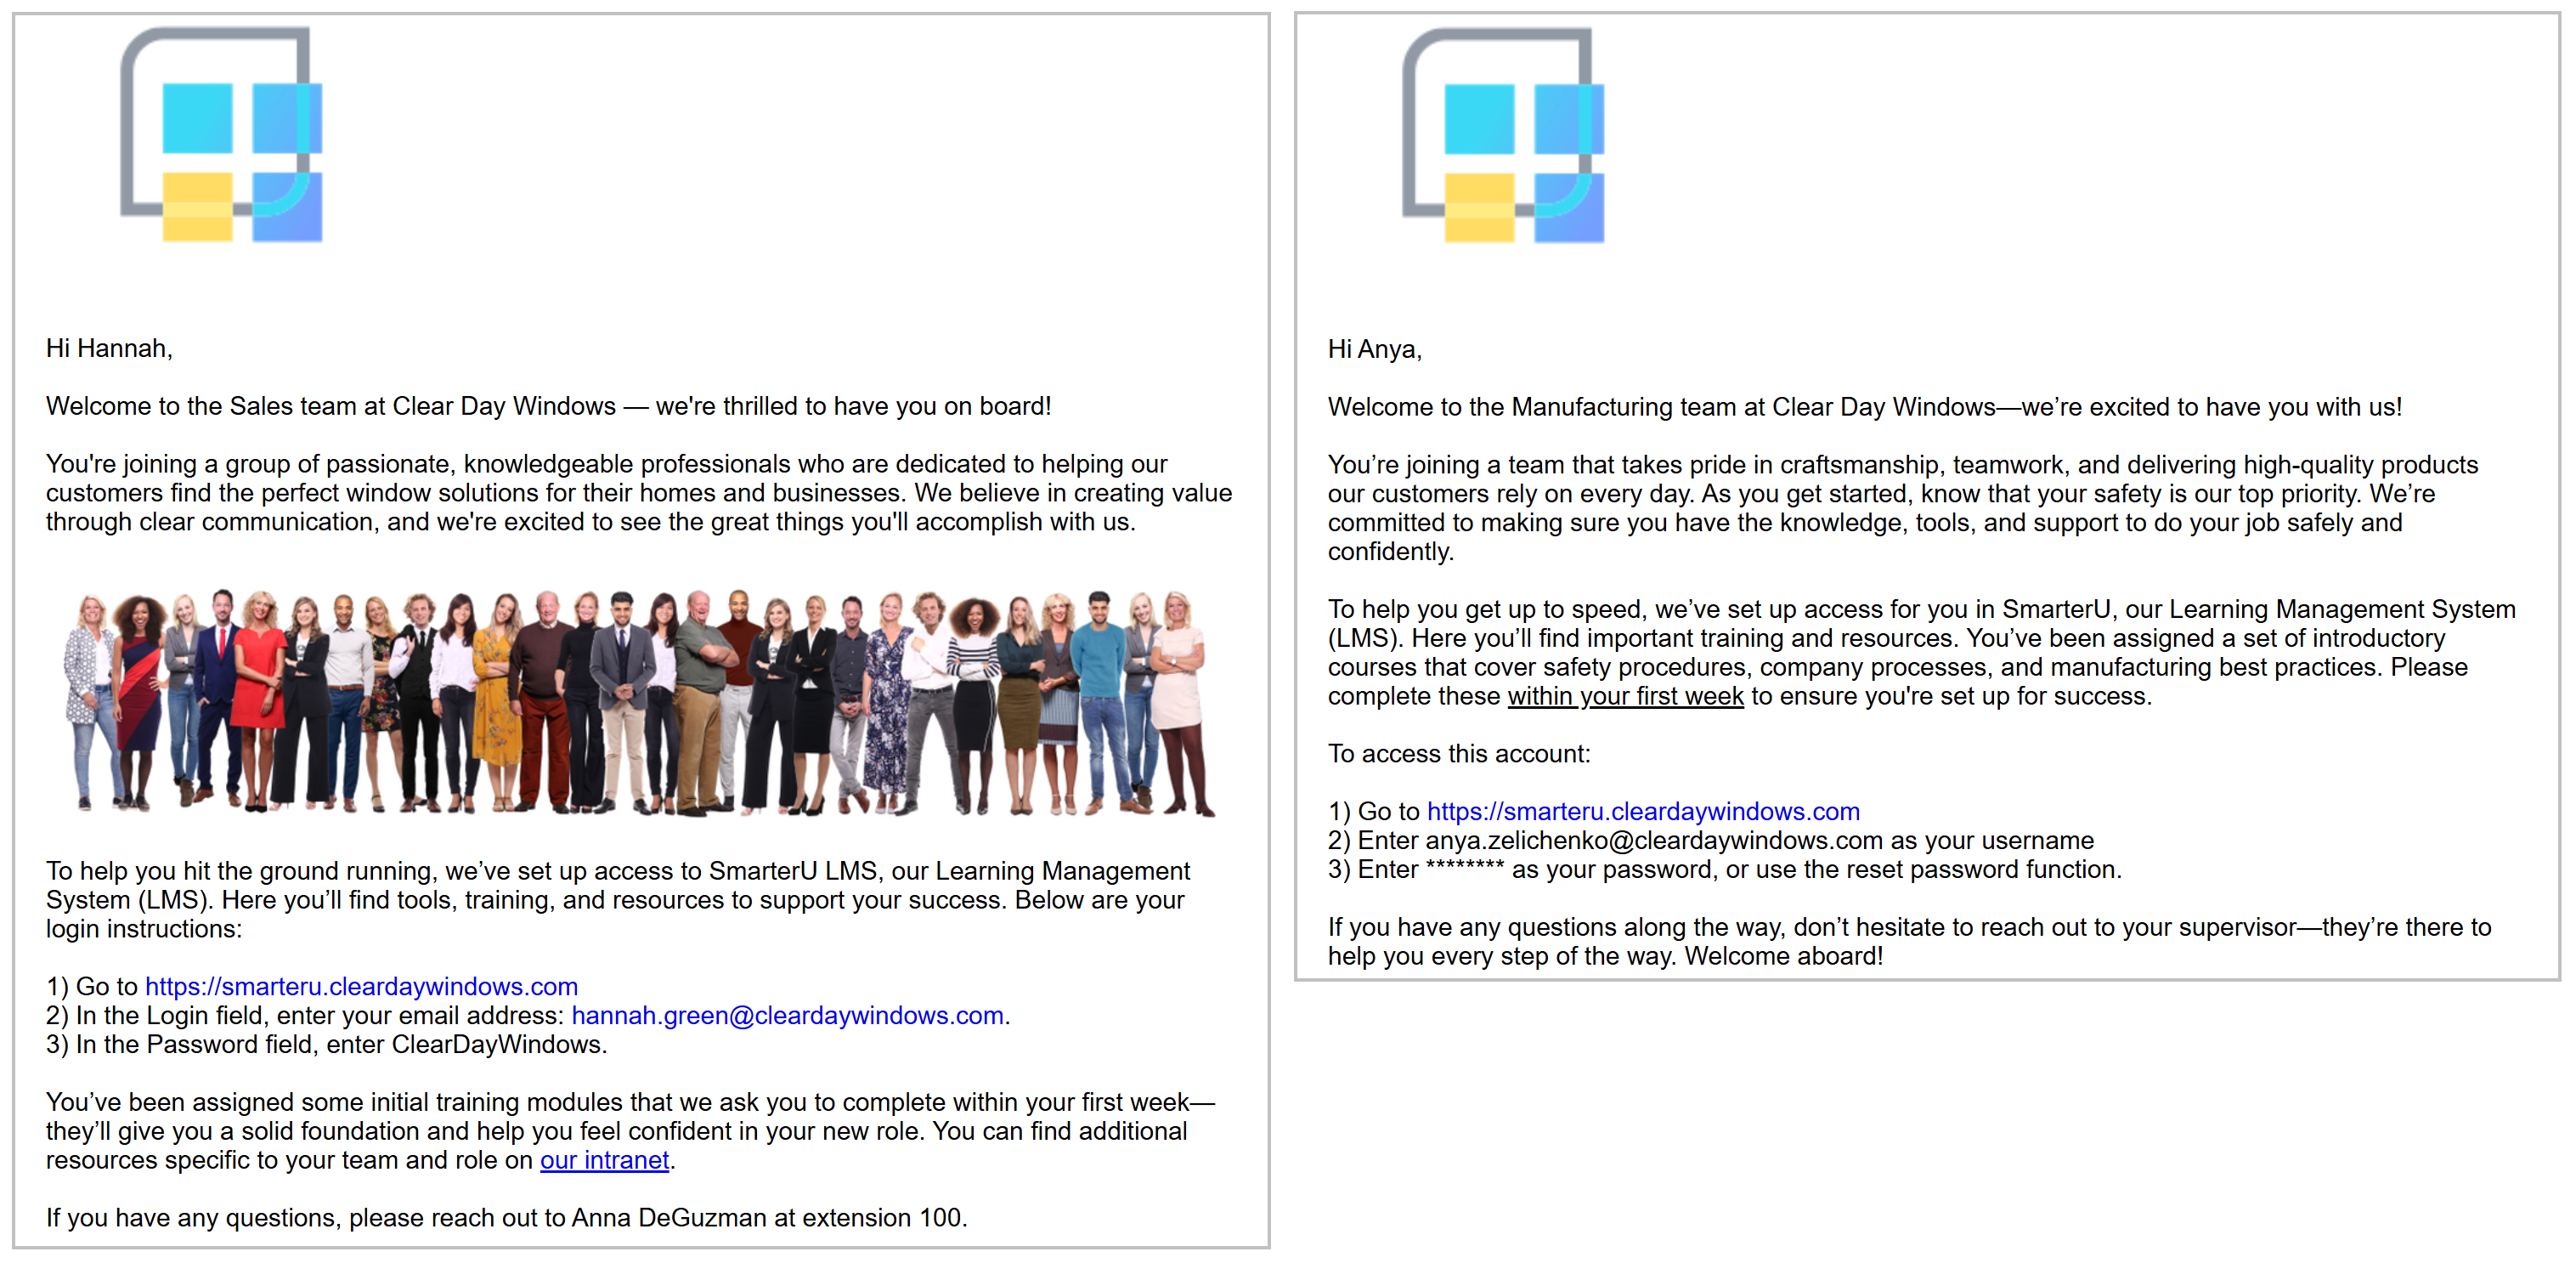
Sometimes, you may want to send a different invitation email to an individual learner. This personalization is helpful if you’re onboarding someone who needs unique instructions or if you’ve created variations of your email for different groups. For example, you may want to use one email for learners in your Sales department and another for learners in your Manufacturing department. With multiple email templates, you can customize the invitations to include department-specific contacts and resources.
To use a different invitation email template for a new learner:
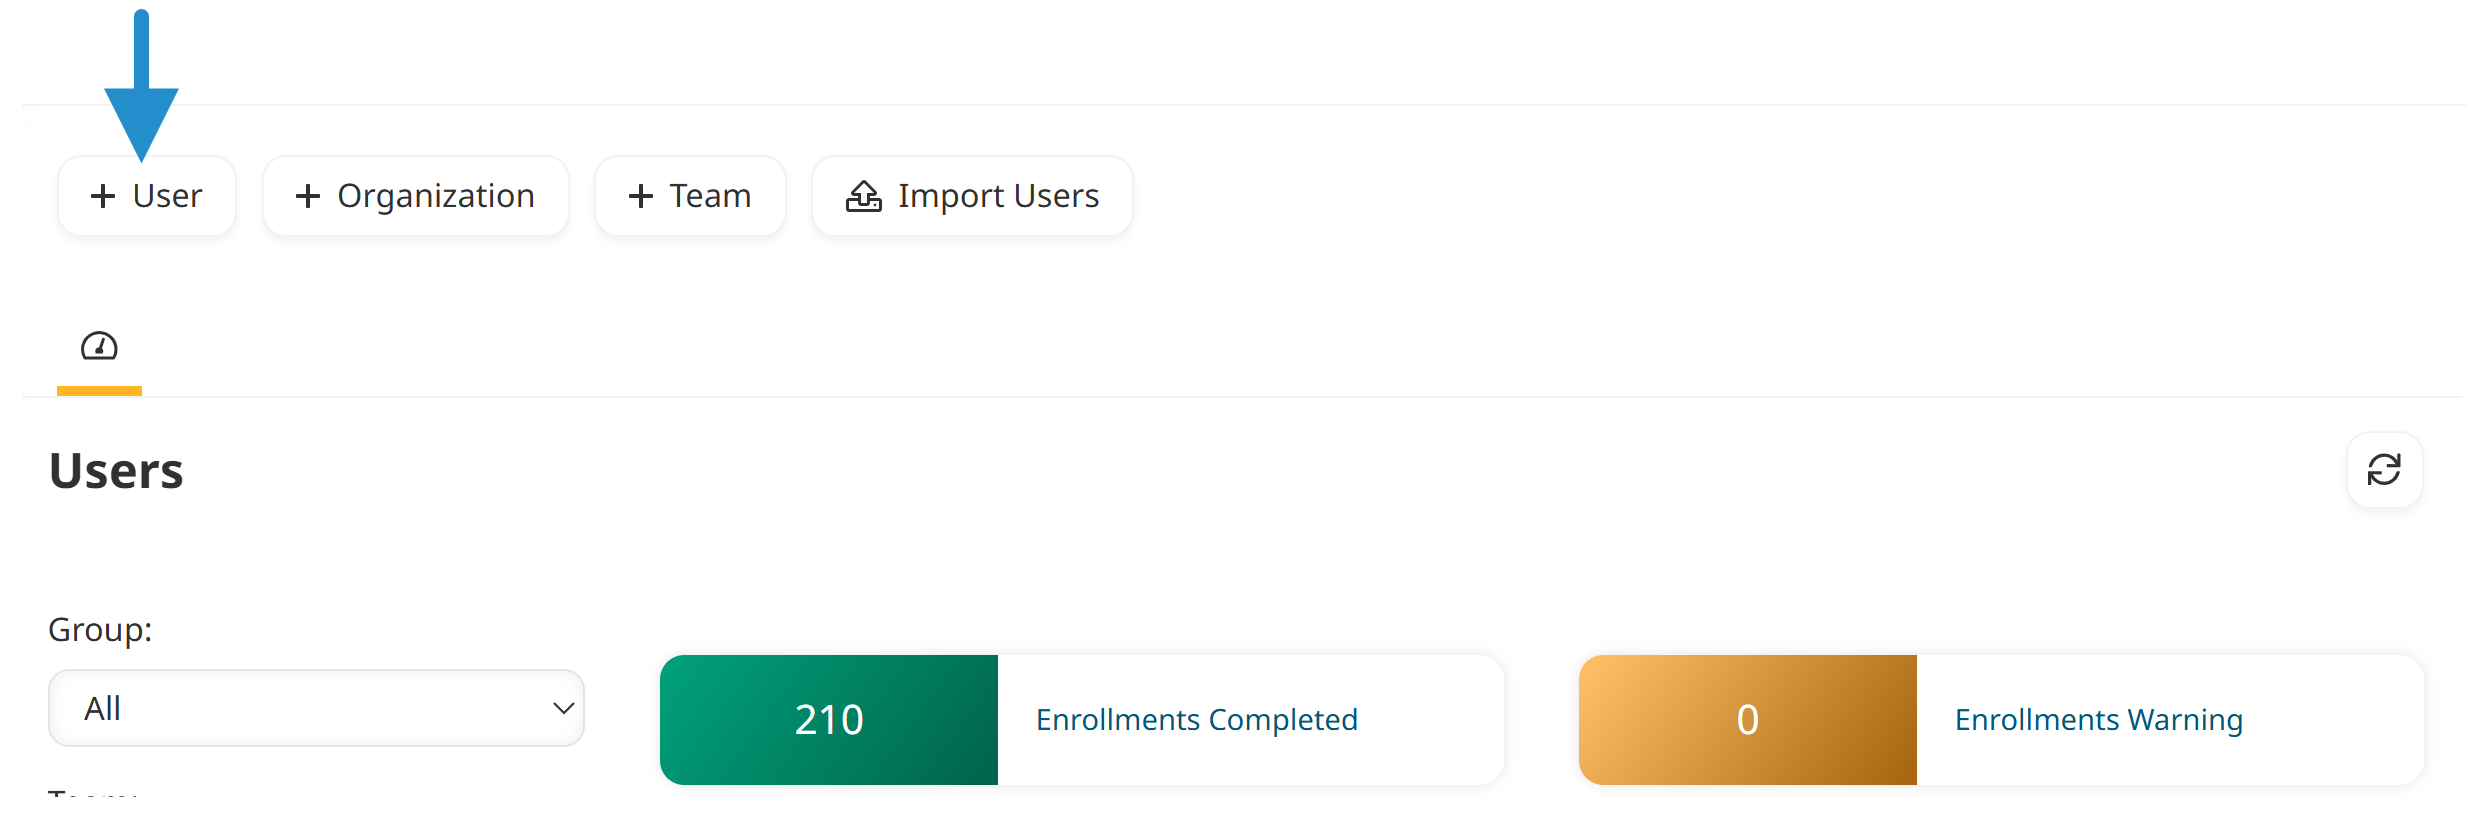
Navigate to the Users Dashboard.
Click User.
In the Login Information accordion, enter the user’s details.
Be sure that the Send Account Invitation Email checkbox is selected.
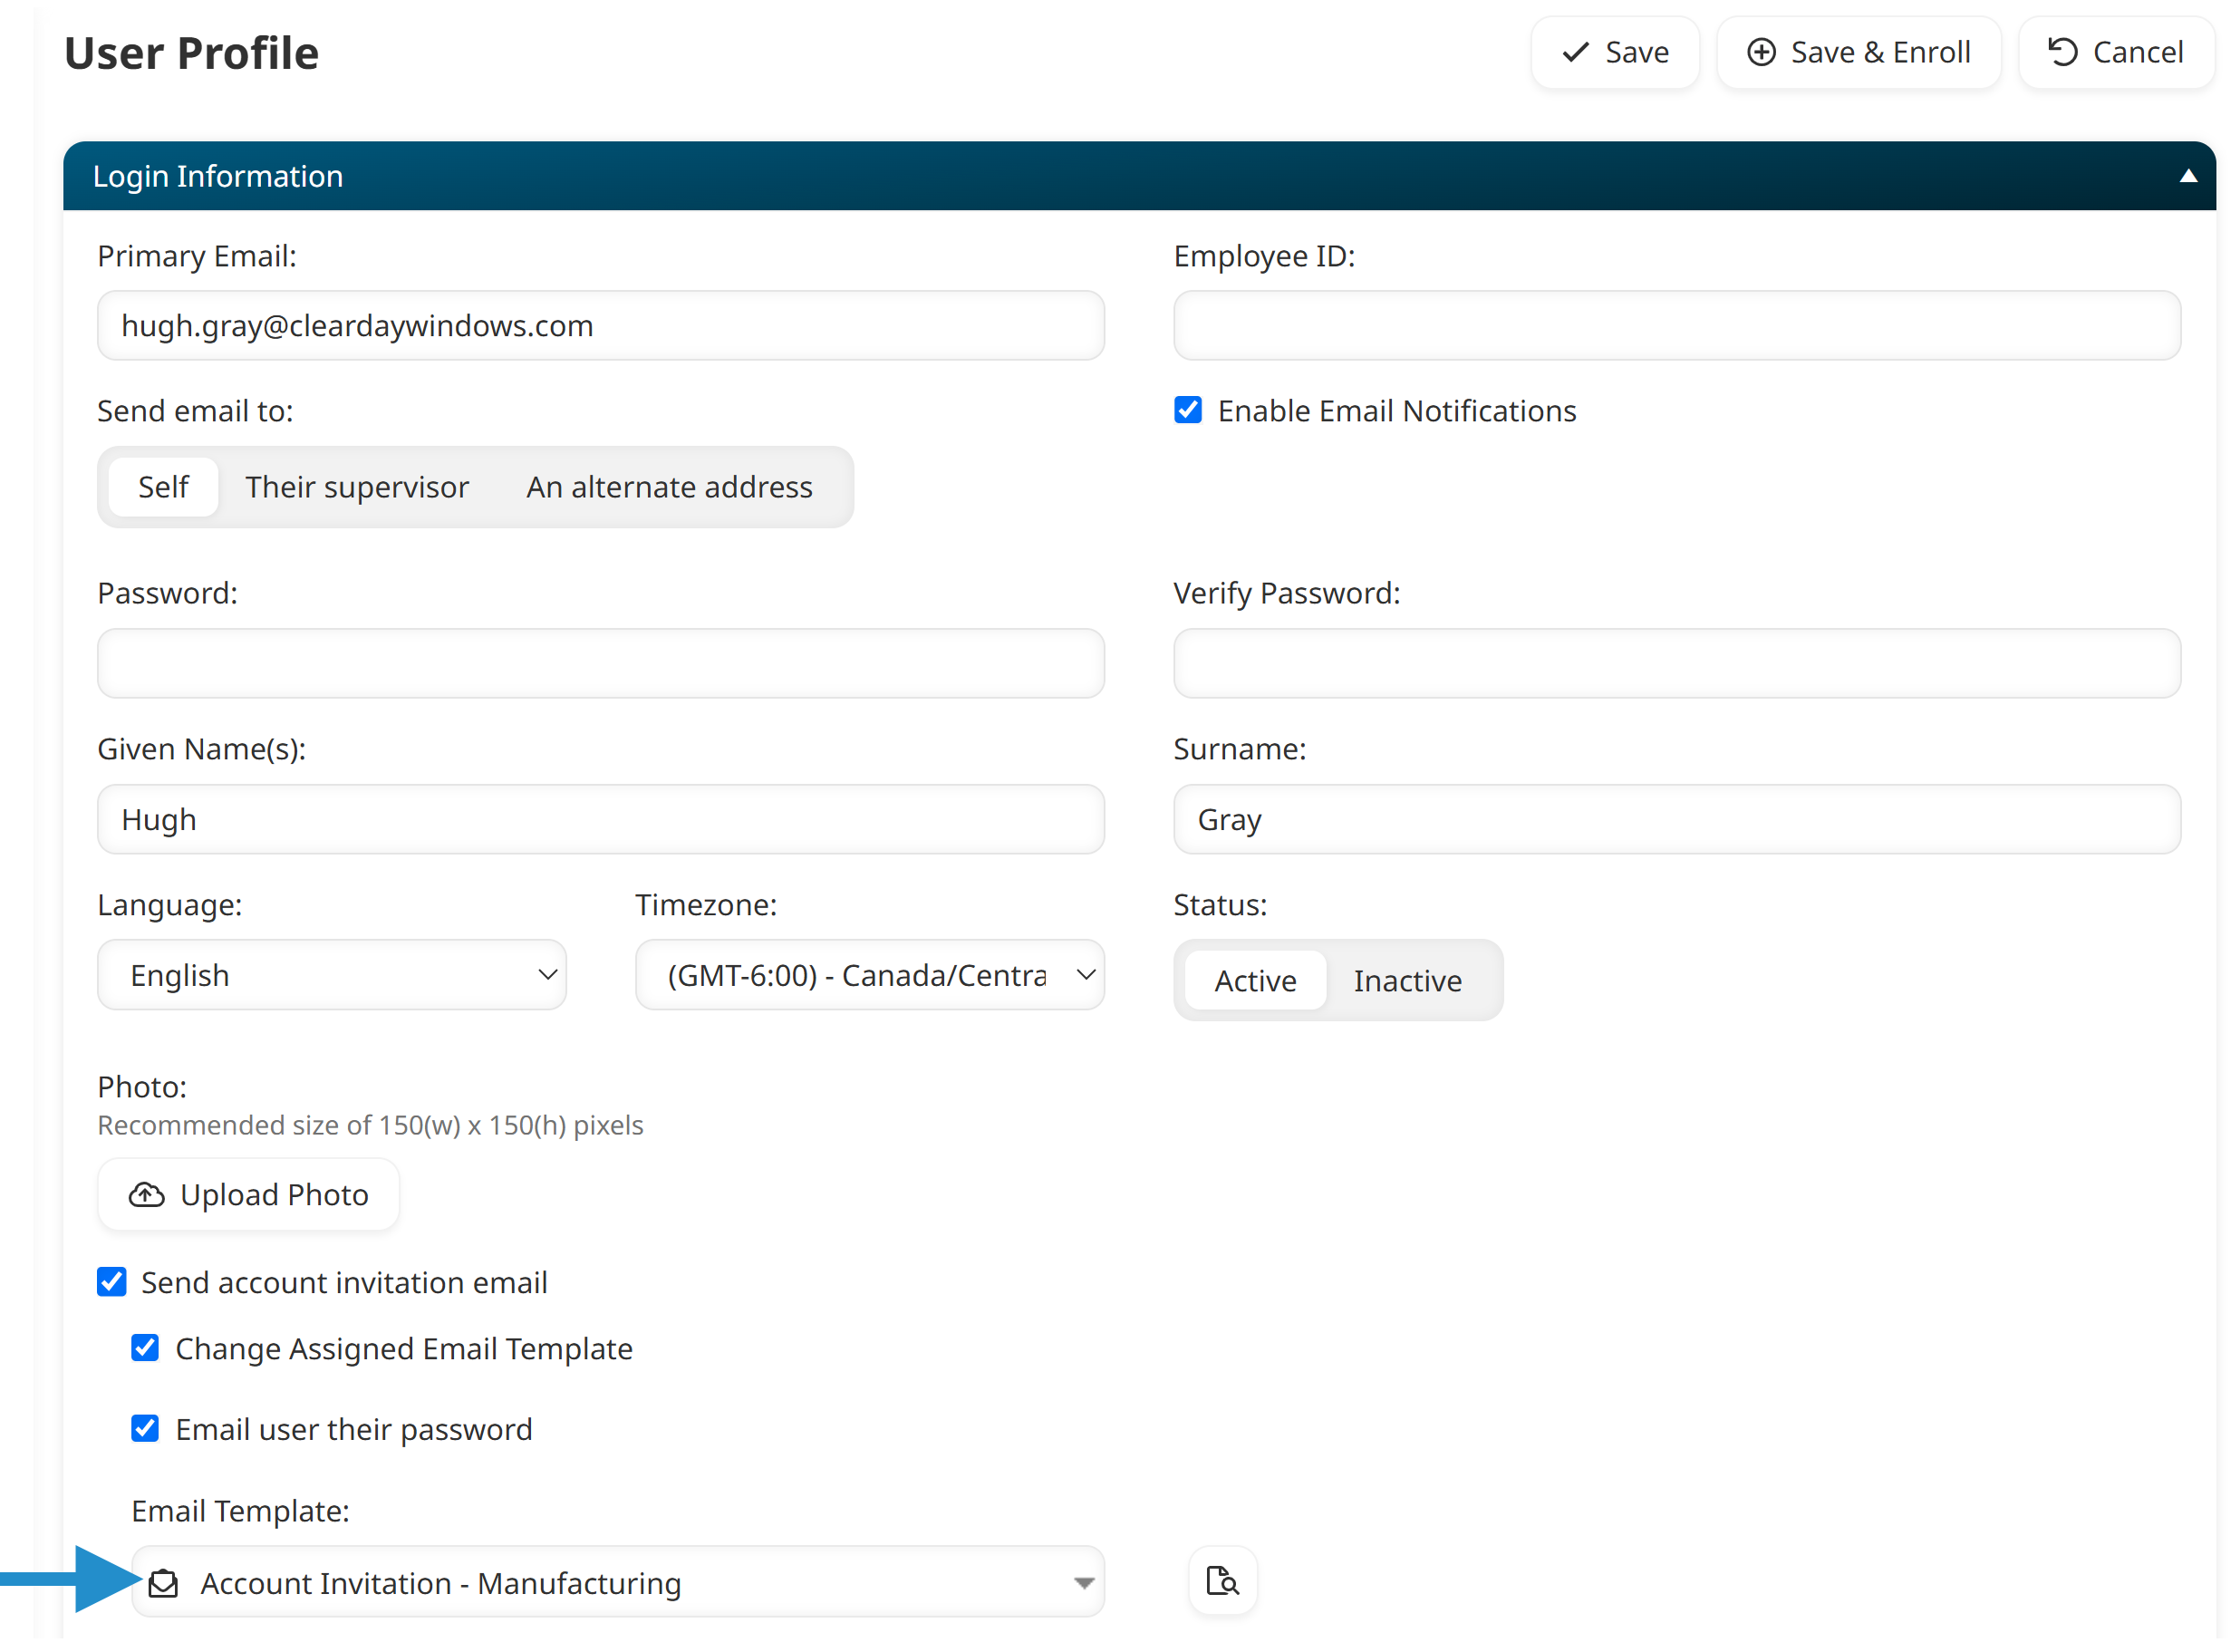
Select the Change Assigned Email Template checkbox.
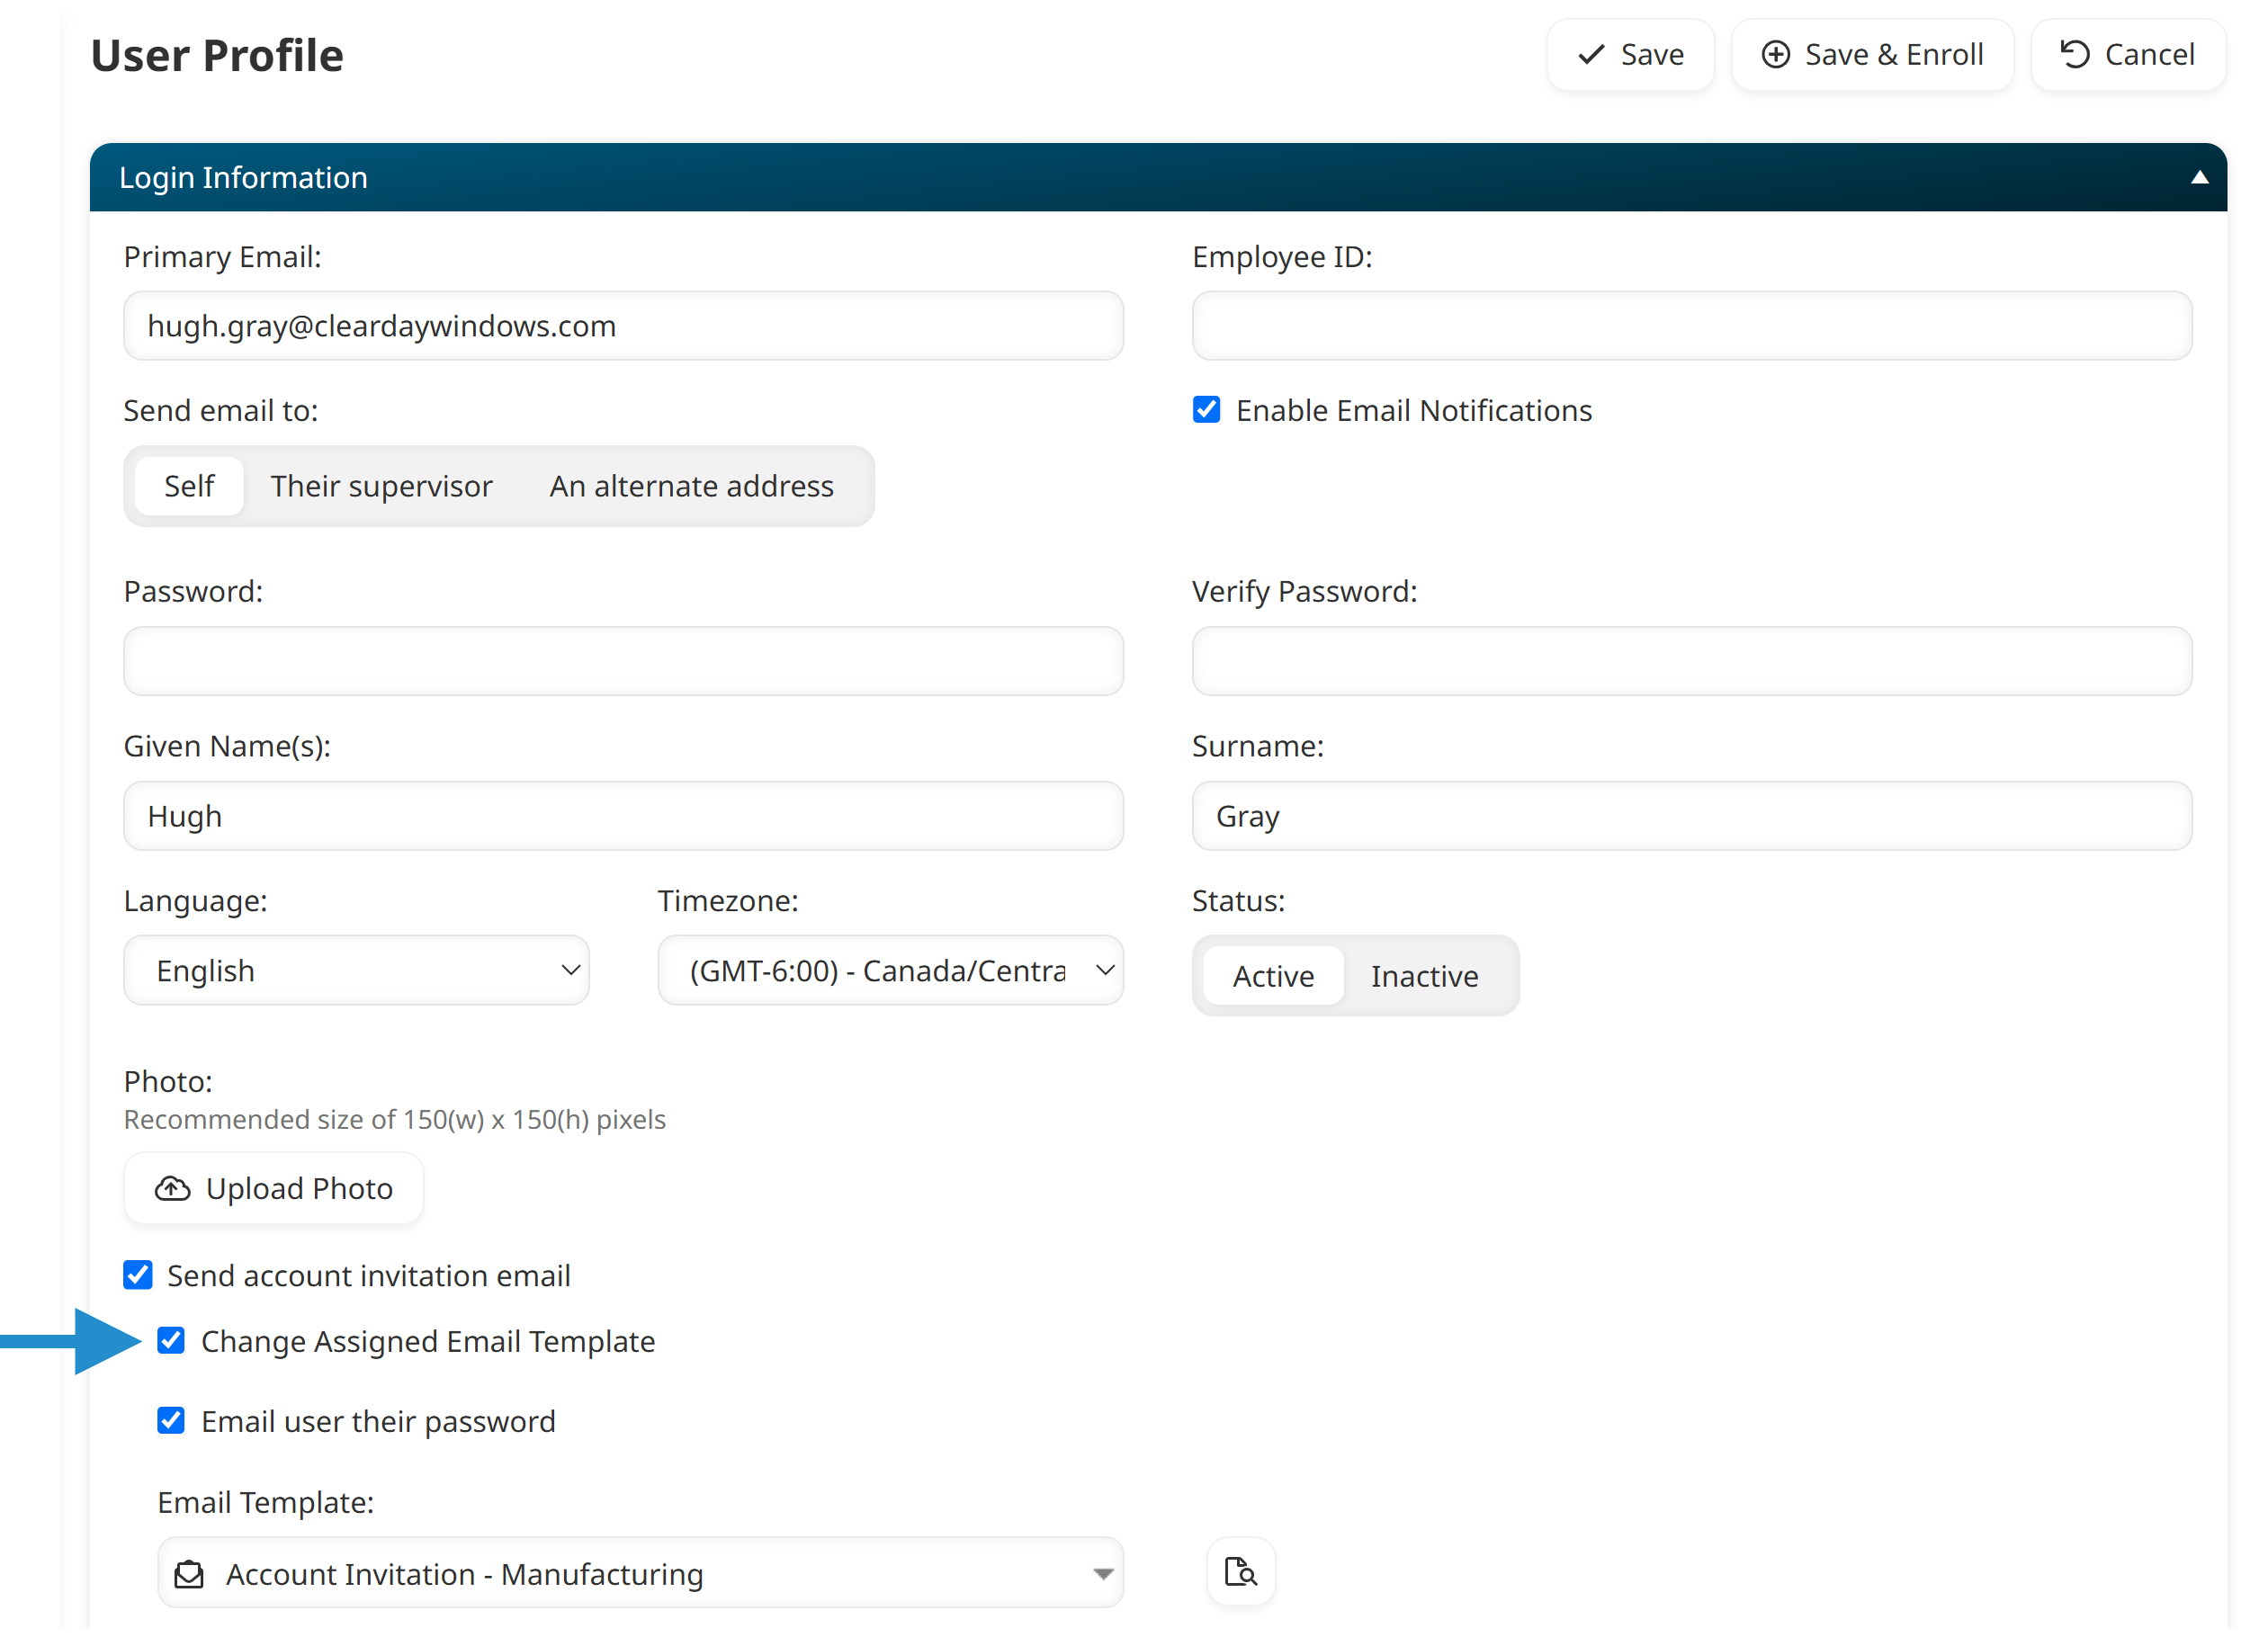
Select the account invitation email you want to use from the list.
Specify the other information for the learner.
Click Save.
Customizing your account’s invitation email transforms a routine notification into a meaningful welcome. Whether inviting one learner or hundreds, a thoughtful message helps learners feel supported and ready to dive in from their first click.
Questions? Contact our Success Desk.