Setting Up Webhooks in WooCommerce
SmarterU will only process orders that have a valid date_paid attribute and a status attribute of Completed. This is important for two reasons:
- Depending on how your WooCommerce storefront is set up, orders may not complete automatically. If this is the case, then orders will need to be moved from pending to complete manually in the WordPress admin. If you wish to ensure that your orders are completed automatically, there are a few things you can do:
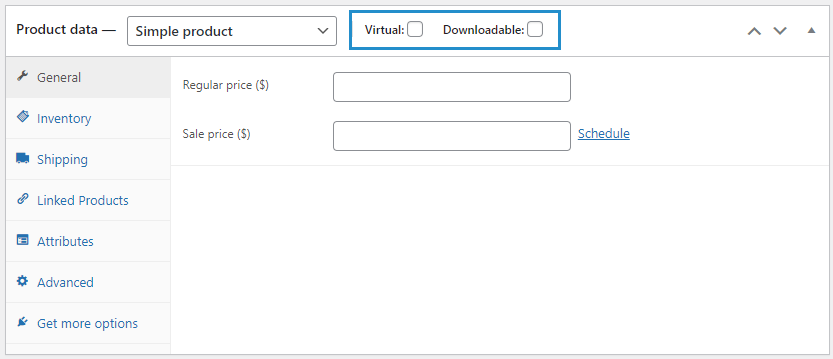
- Set your product(s) to be both Virtual and Downloadable. Orders for this type of product will complete automatically by default.
- Use a WordPress plugin to auto complete your orders after they have been paid.
- Add your own custom WordPress code.
- WooCommerce does not provide webhooks that trigger on order-paid events. This means that one or more of the other webhook topics will need to be used instead. Orders will behave differently depending on how your storefront and its products are configured.
If you are unsure which webhook topics you need, set up two webhooks in WooCommerce — one with its Topic set to Order Created, the other with its Topic set to Order Updated. Aside from the Topic, the settings for each will be identical. This will ensure that orders will always be processed on SmarterU once they meet the required criteria in WooCommerce (completed and paid).
To set up a webhook in WooCommerce:
- Log into the admin portal of your WooCommerce store.
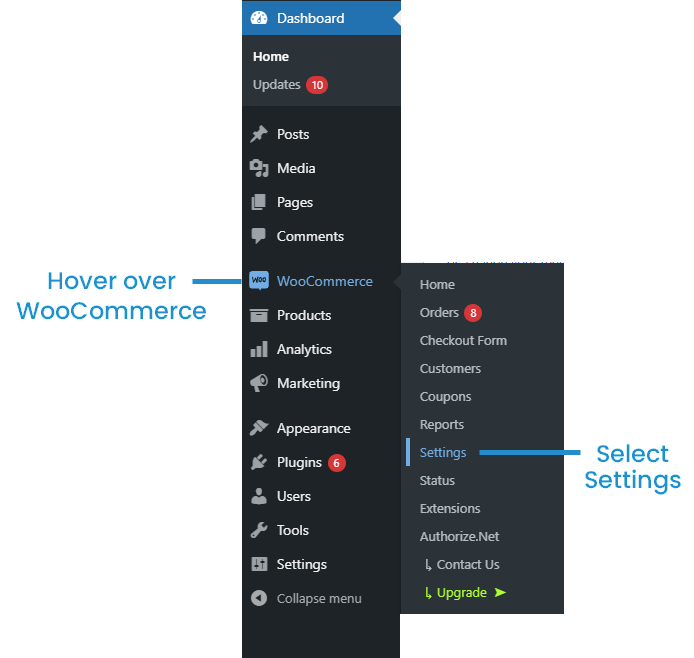
- Hover over the WooCommerce menu on the left side of the screen and select Settings.
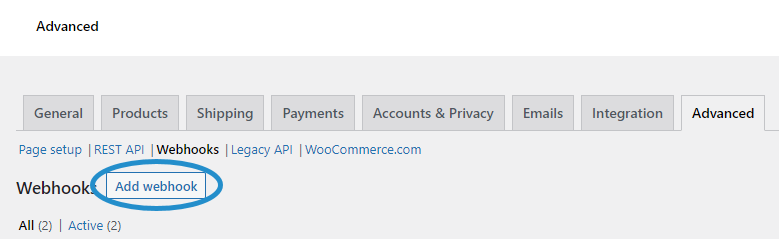
- On the Settings page, select the Advanced tab.
- Select the Webhooks sub-tab.

- Click Add Webhook.
The Webhook Data workscreen displays.
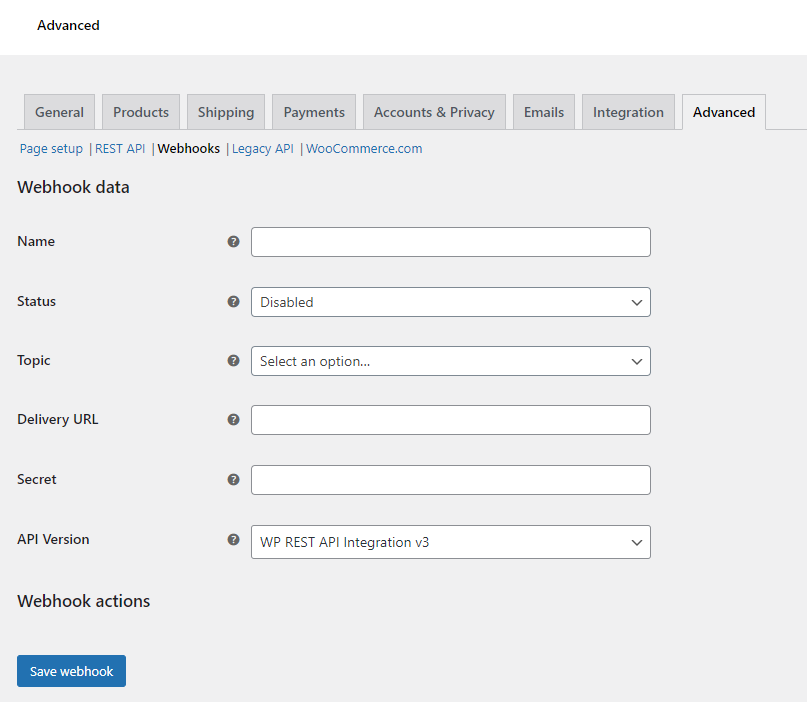
- Specify the following settings.
Name
The name of the webhook.
Status
Set to Active.
Topic
Select the event you want to trigger the webhook. If you are unsure which Topic to use, create one webhook with its Topic set to Order Created, and a second webhook with its Topic set to Order Updated. Other than the Topic, all other settings for these webhooks will be the same.
Delivery URL
This is where the webhook will be sent. This must be:
https://<SmarteruPortal>/ecommerce/woocommerce/rest-api/index.cfmwhere <SmarteruPortal> is an active portal CNAME or Keyword for your SmarterU account.
Secret
Enter a secret key to be used by SmarterU to verify the authenticity of each webhook request. This value must exactly match the Secret Key value that is entered in the SmarterU storefront settings.
API Version
Select WP REST API Integration V3.
- Click Save Webhook.
- Copy the <SmarteruPortal> and Secret to your SmarterU external storefront.
Setting Up Products
When an order is created, product information will be sent in the webhook to SmarterU. WooCommerce products can represent a SmarterU subscription variant or a learning plan.
SmarterU identifies which subscription variant or learning plan your products represent by matching their SKU values. Your WooCommerce products will need to be set up with a SKU, and that SKU will then need to be added to your matching subscription variant or learning plan.
To set up a product in WooCommerce:
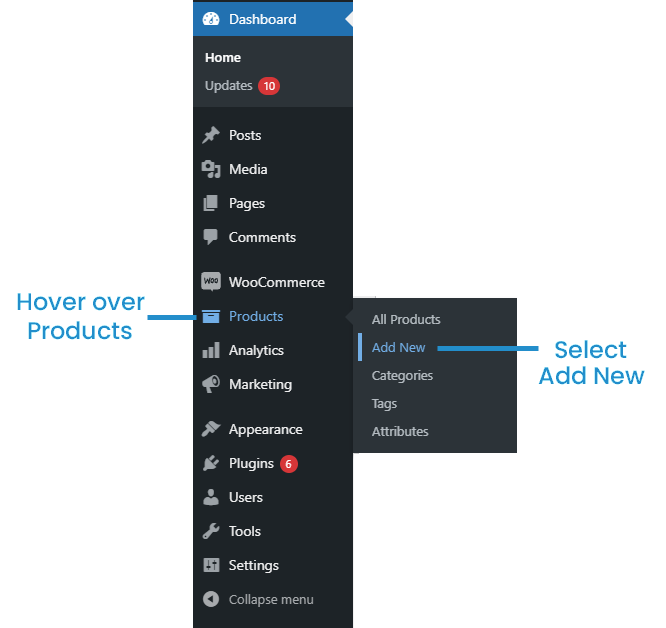
- Log into the admin portal of your WooCommerce store.
- Hover over the Products heading in the menu on the left side of the screen and select Add New.
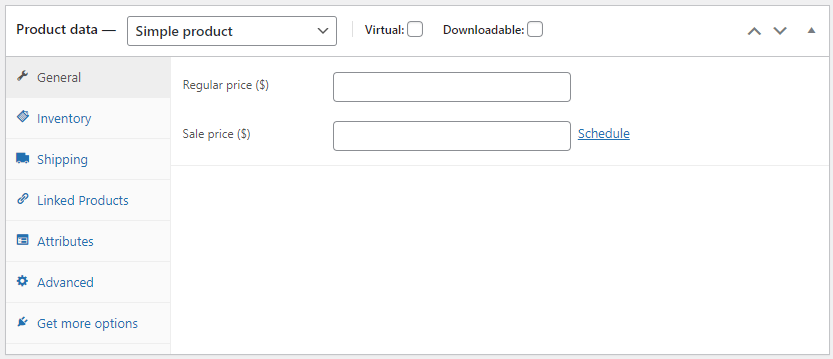
- In the General tab, add a price for the product.
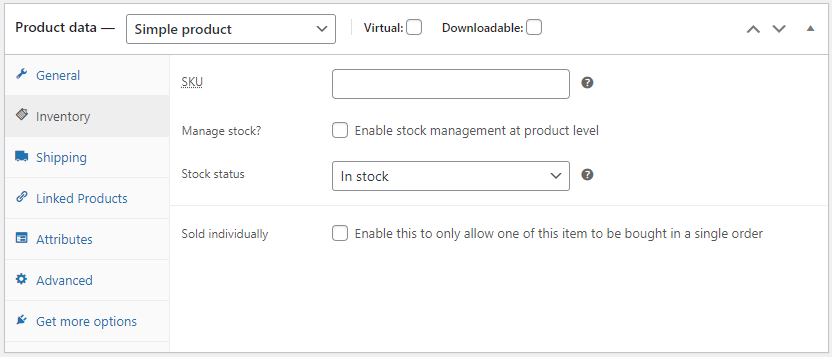
- In the Inventory tab, enter a SKU for the product. The SKU value that you enter must exactly match the subscription variant SKU (if selling subscriptions) or Learning Plan ID (if selling learning plans) that you enter in your settings in SmarterU.
- If you wish to set the product to be both Virtual and Downloadable (see the note at the top of this page), you can enable both of those options here. Orders for this type of product will complete automatically by default.