You can customize the login screen to SmarterU by adding one or more portals to your account.

In addition to customizing the appearance of the login screen, you can specify a keyword that enables your users to access your SmarterU portal securely using https://<yourkeyword>.smarteru.com. If you would like to force a secure login, contact our Success Desk to enable the force SSL option.
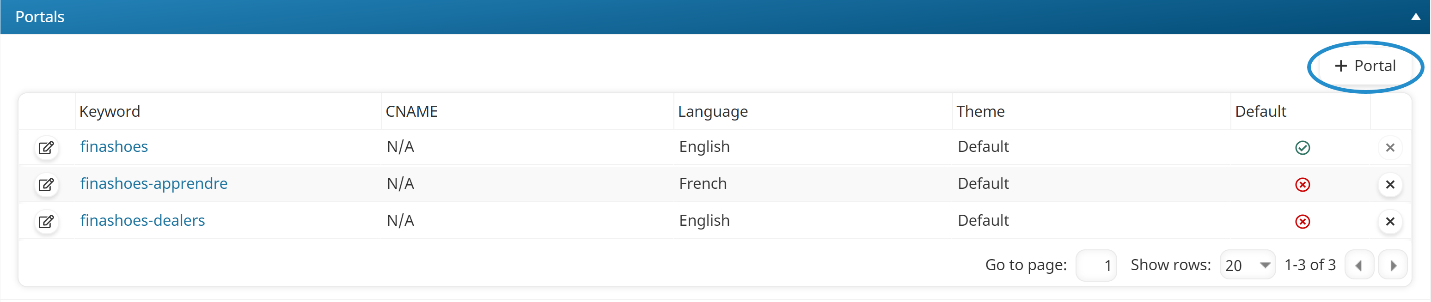
When you edit your account's settings, the Portals accordion of the Account Profile workscreen displays the portals added to your account.

Adding a Portal
To add a new portal:
- Edit the account to display the Account Profile workscreen.
- Expand the Portals accordion.
- Click Portal.
The workscreen to add a new portal displays.
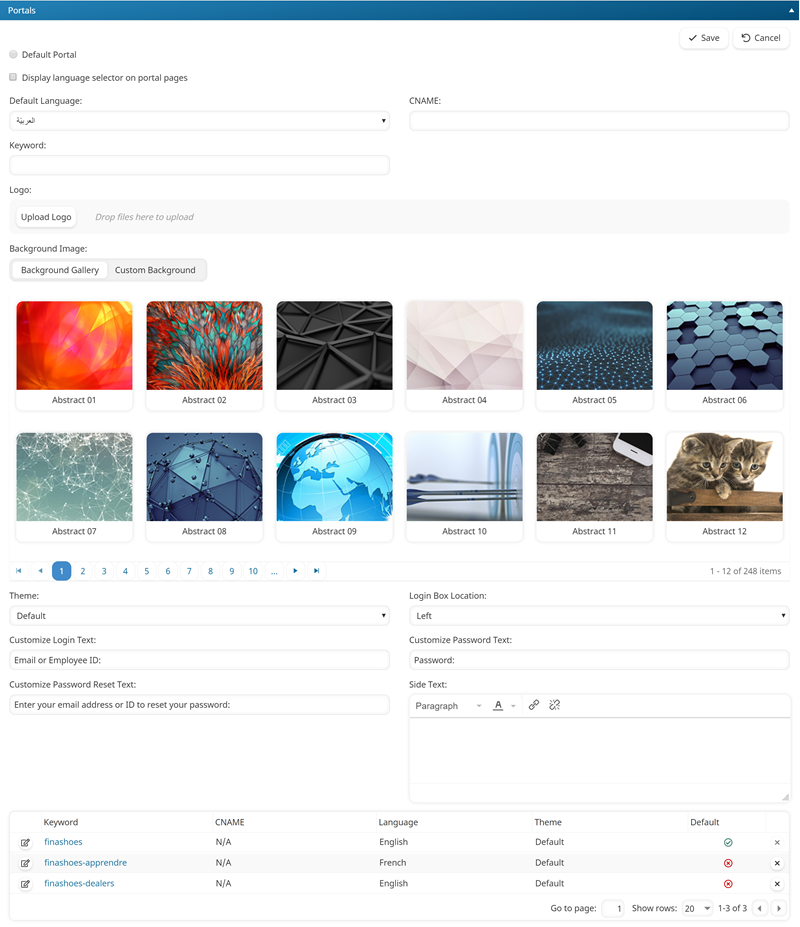
- Specify the portal's settings.
- Click Save.
Settings
Default Portal
If checked, this will be the default portal for your account. A default portal must be set. If a user's language cannot be determined, the default portal will be used. The default portal will appear in the standard footer of emails.
Display Language Selector on Portal Pages
If checked, the language selection list that enables users to select their language displays. This allows you to provide a certain level of multi-lingual functionality without having to create a different portal for each language.
Default Language
Select the language that will be used for the portal by default. If the Display Language Selector on Portal Pages setting is checked, users will be able to change the language of the portal.
CNAME
All portals must be accessed over a secure (HTTPS) connection. This is available to all accounts at no extra charge by using your specified <keyword>.smarteru.com.
If you wish to use a custom CNAME, you must purchase the SSL certificate for your domain. For security reasons, SmarterU cannot do this on your behalf. For details on creating a custom SSL certificate, refer to the Customizing Your SSL Certificate page.
Contact our Success Desk for assistance.
When deciding on a URL, or CNAME, you have two options:
- A subdomain of your current domain (i.e., training.mycompany.com or learn.mycompany.com). This option is free to set up within your current DNS account.
- A new domain (i.e., www.mynewtrainingsite.com). This new domain would have to be purchased from your DNS provider.
Once you've selected an option, someone from your IT staff will need to set it up for you. Please send the appropriate set of instructions below to your IT staff, substituting the text in <angle brackets> with the appropriate information.
If you chose a subdomain:
Dear <IT Person>,
Please set up a CNAME record in our <mycompany.com> DNS account. This will point the new subdomain to our new SmarterU.com training account’s login page.
- CNAME (or Alias): <subdomain> (as in <subdomain>.<mycompany.com>)
- Points to: elearning-academy.net
If you have any questions, please contact the Neovation Success Desk at success@neovation.com.
Thanks!
If you chose a new domain:
Dear <IT Person>,
We have purchased a new domain address to use with our new SmarterU.com training account’s login page. Please set up a Web Forward and a CNAME record to get this to work correctly.
Web Forward:
- Please forward <mynewtrainingsite.com> to www (as in www.mynewtrainingsite.com)
CNAME:
- CNAME (or Alias): www (as in www.mynewtrainingsite.com)
- Points to: elearning-academy.net
If you have any questions, please contact the Neovation Success Desk at success@neovation.com.
Thanks!
Once this setup is complete, replace your chosen subdomain or new domain into the CNAME field.
Keyword
The keyword is required and allows you to access your portal. It allows you to simulate a portal login when you are unable to set a DNS CNAME. For example, if you enter "bni" as your keyword, then your private login URL would be https://bni.smarteru.com.
Logo
The logo displays at the top of the portal's login box.

To upload a logo for the portal:
- Click Upload Logo.
- Navigate to the location of your file. Acceptable file formats are GIF, JPG, and PNG.
- Open.
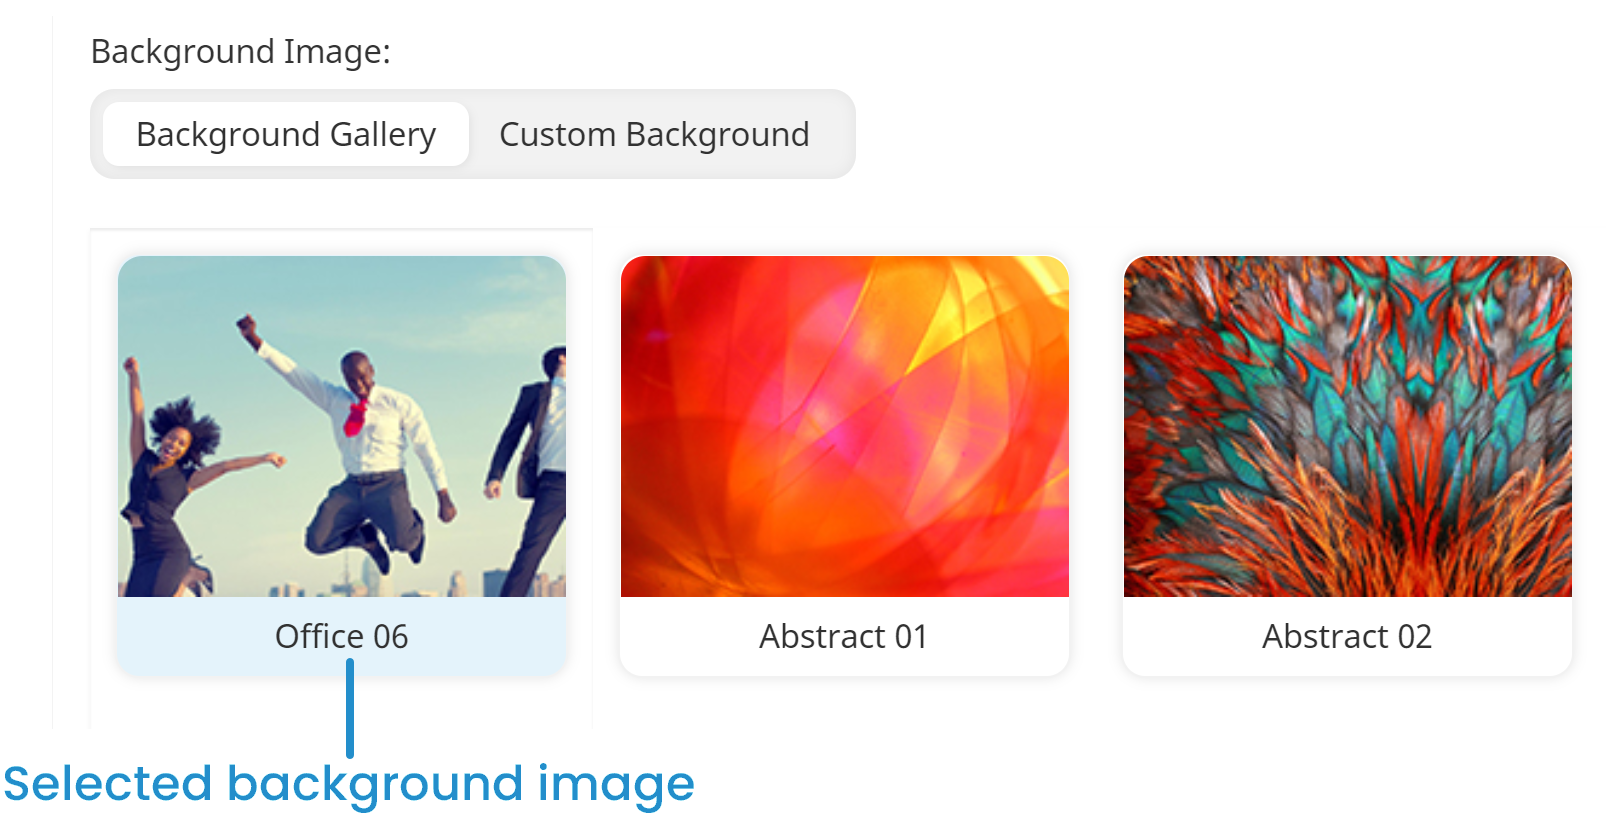
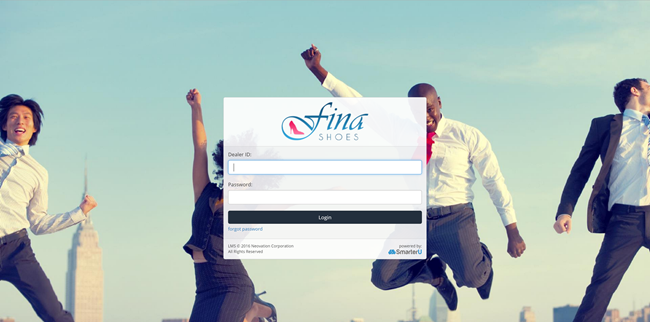
Background Image
The background image displays on the portal's login page. For example, the following shows the selected background image for a portal.
Here's how the background image looks on the portal's login page.
To use one of the provided background images, select the image.
To upload a custom background image, select Custom Background and click Upload Background.
- Refer to SmarterU File Uploads for file specifications.
- Because a custom image is adjusted for screen size, the image may be cut off or distorted.
Custom Background Options
This setting is only applicable if the Background Image setting is Custom Background. Select how you would like the image displayed:
- Center - The image is centered in the background.
- Stretch - The image is stretched across the background. When using the Stretch option, we recommend avoiding images that include iconography, logos, or text.
Theme
Select the theme you would like to use for the portal.
Login Box Location
Select where you would like the login box to display.
Customize Login Text
If you would like to customize the Login field's label, enter the text.
Customize Password Text
If you would like to customize the Password field's label, enter the text.
Customize Password Reset Text
If you would like to customize the Password Reset field's label, enter the text.
Side Text
Enter any text you would like to include on the login page.
Require Cookie Consent
If checked, users will be asked to accept cookies prior to logging in.
Cookie Consent Message
This setting is only applicable if the Require Cookie Consent setting is enabled. If you would like to customize the message displayed when a user is prompted to accept SmarterU's cookies, enter the text.
Decline Consent Message
This setting is only applicable if the Require Cookie Consent setting is enabled. If you would like to customize the message displayed when a user declines SmarterU's cookies, enter the text.