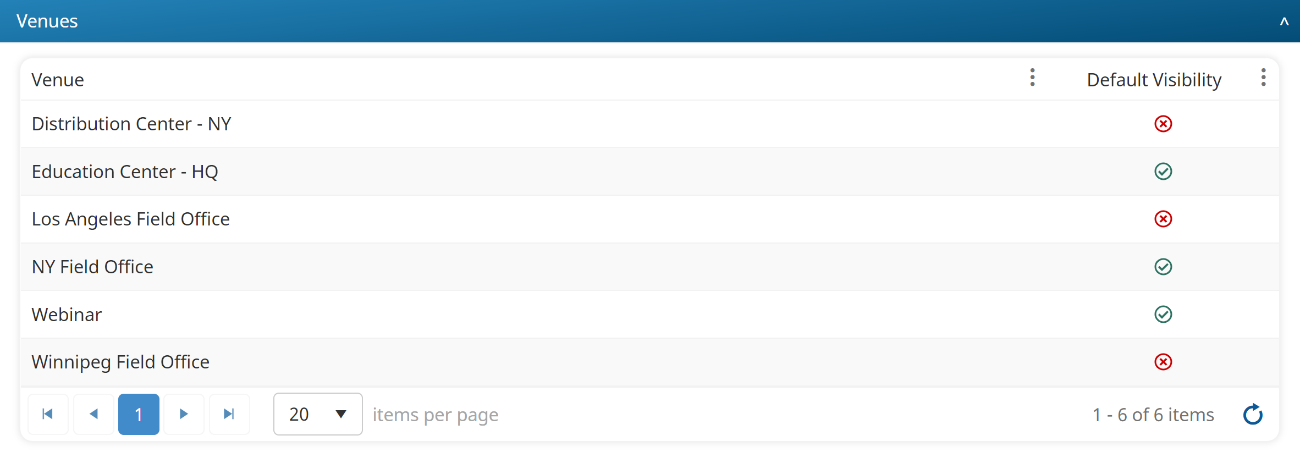
The venues assigned to a user display in the Venues accordion of the User Profile workscreen. The User Profile workscreen displays when you add, edit, or view a user's details.
A  beside the venue indicates that it's visible to the user by default. A
  indicates that the venue is not visible to the user by default.
Assigning Venues to a User
Assigning venues to a user prevents sessions that take place in venues outside of the user's location from displaying. For example, users in Chicago will likely be interested in sessions that take place in venues in or around Chicago. These users will likely not want to see sessions that take place in San Diego or London venues.
To assign venues to a user:
- Add a user or edit a user to display the User Profile workscreen.
- From the User Profile workscreen, expand the Venues accordion.
- Click Venue.

An All Venues tab displays all venues. Any venues that are assigned to All Users at the venue level displays in the grid. Venues assigned to All Users are assigned with all existing users as well as any new users that are added in the future. The Default Visibility setting for these venues will be set to the default specified at the venue level. You may change the Default Visibility setting for the user.
- Click the
 beside the venues you want to associate with the user.
 - If you'd like the instructor-led sessions taking place at the venue to display on the Learner Dashboard by default, check the Default Visibility checkbox.
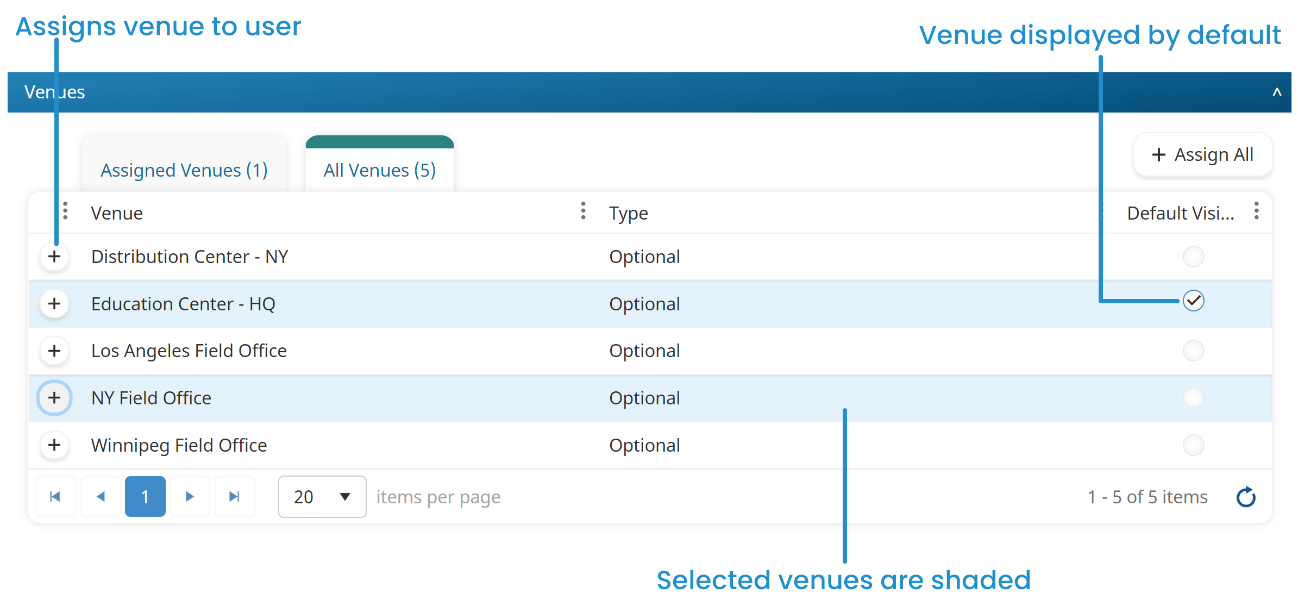
- Click Save.