When learners log into your LMS, what they see — and how quickly they can find it — matters a lot. While straightforward, intuitive navigation helps users stay focused and productive, confusing menus can lead to frustration and time wasted.
Using custom menu items in SmarterU LMS, you can enhance navigation and provide helpful links to admins and learners. With a custom menu, you can guide users exactly where you want them to go and provide quick access to useful links. For example, you can point them toward a helpful FAQ or guide, your file storage system, HRIS, help system, or an external collaboration tool like Google Drive.
What Are Custom Menus in SmarterU LMS
Custom menu items can be considered shortcuts. They allow users to quickly find, click, and navigate to tools and resources that will help streamline their workflows. You can add custom menu items in SmarterU LMS in two places.
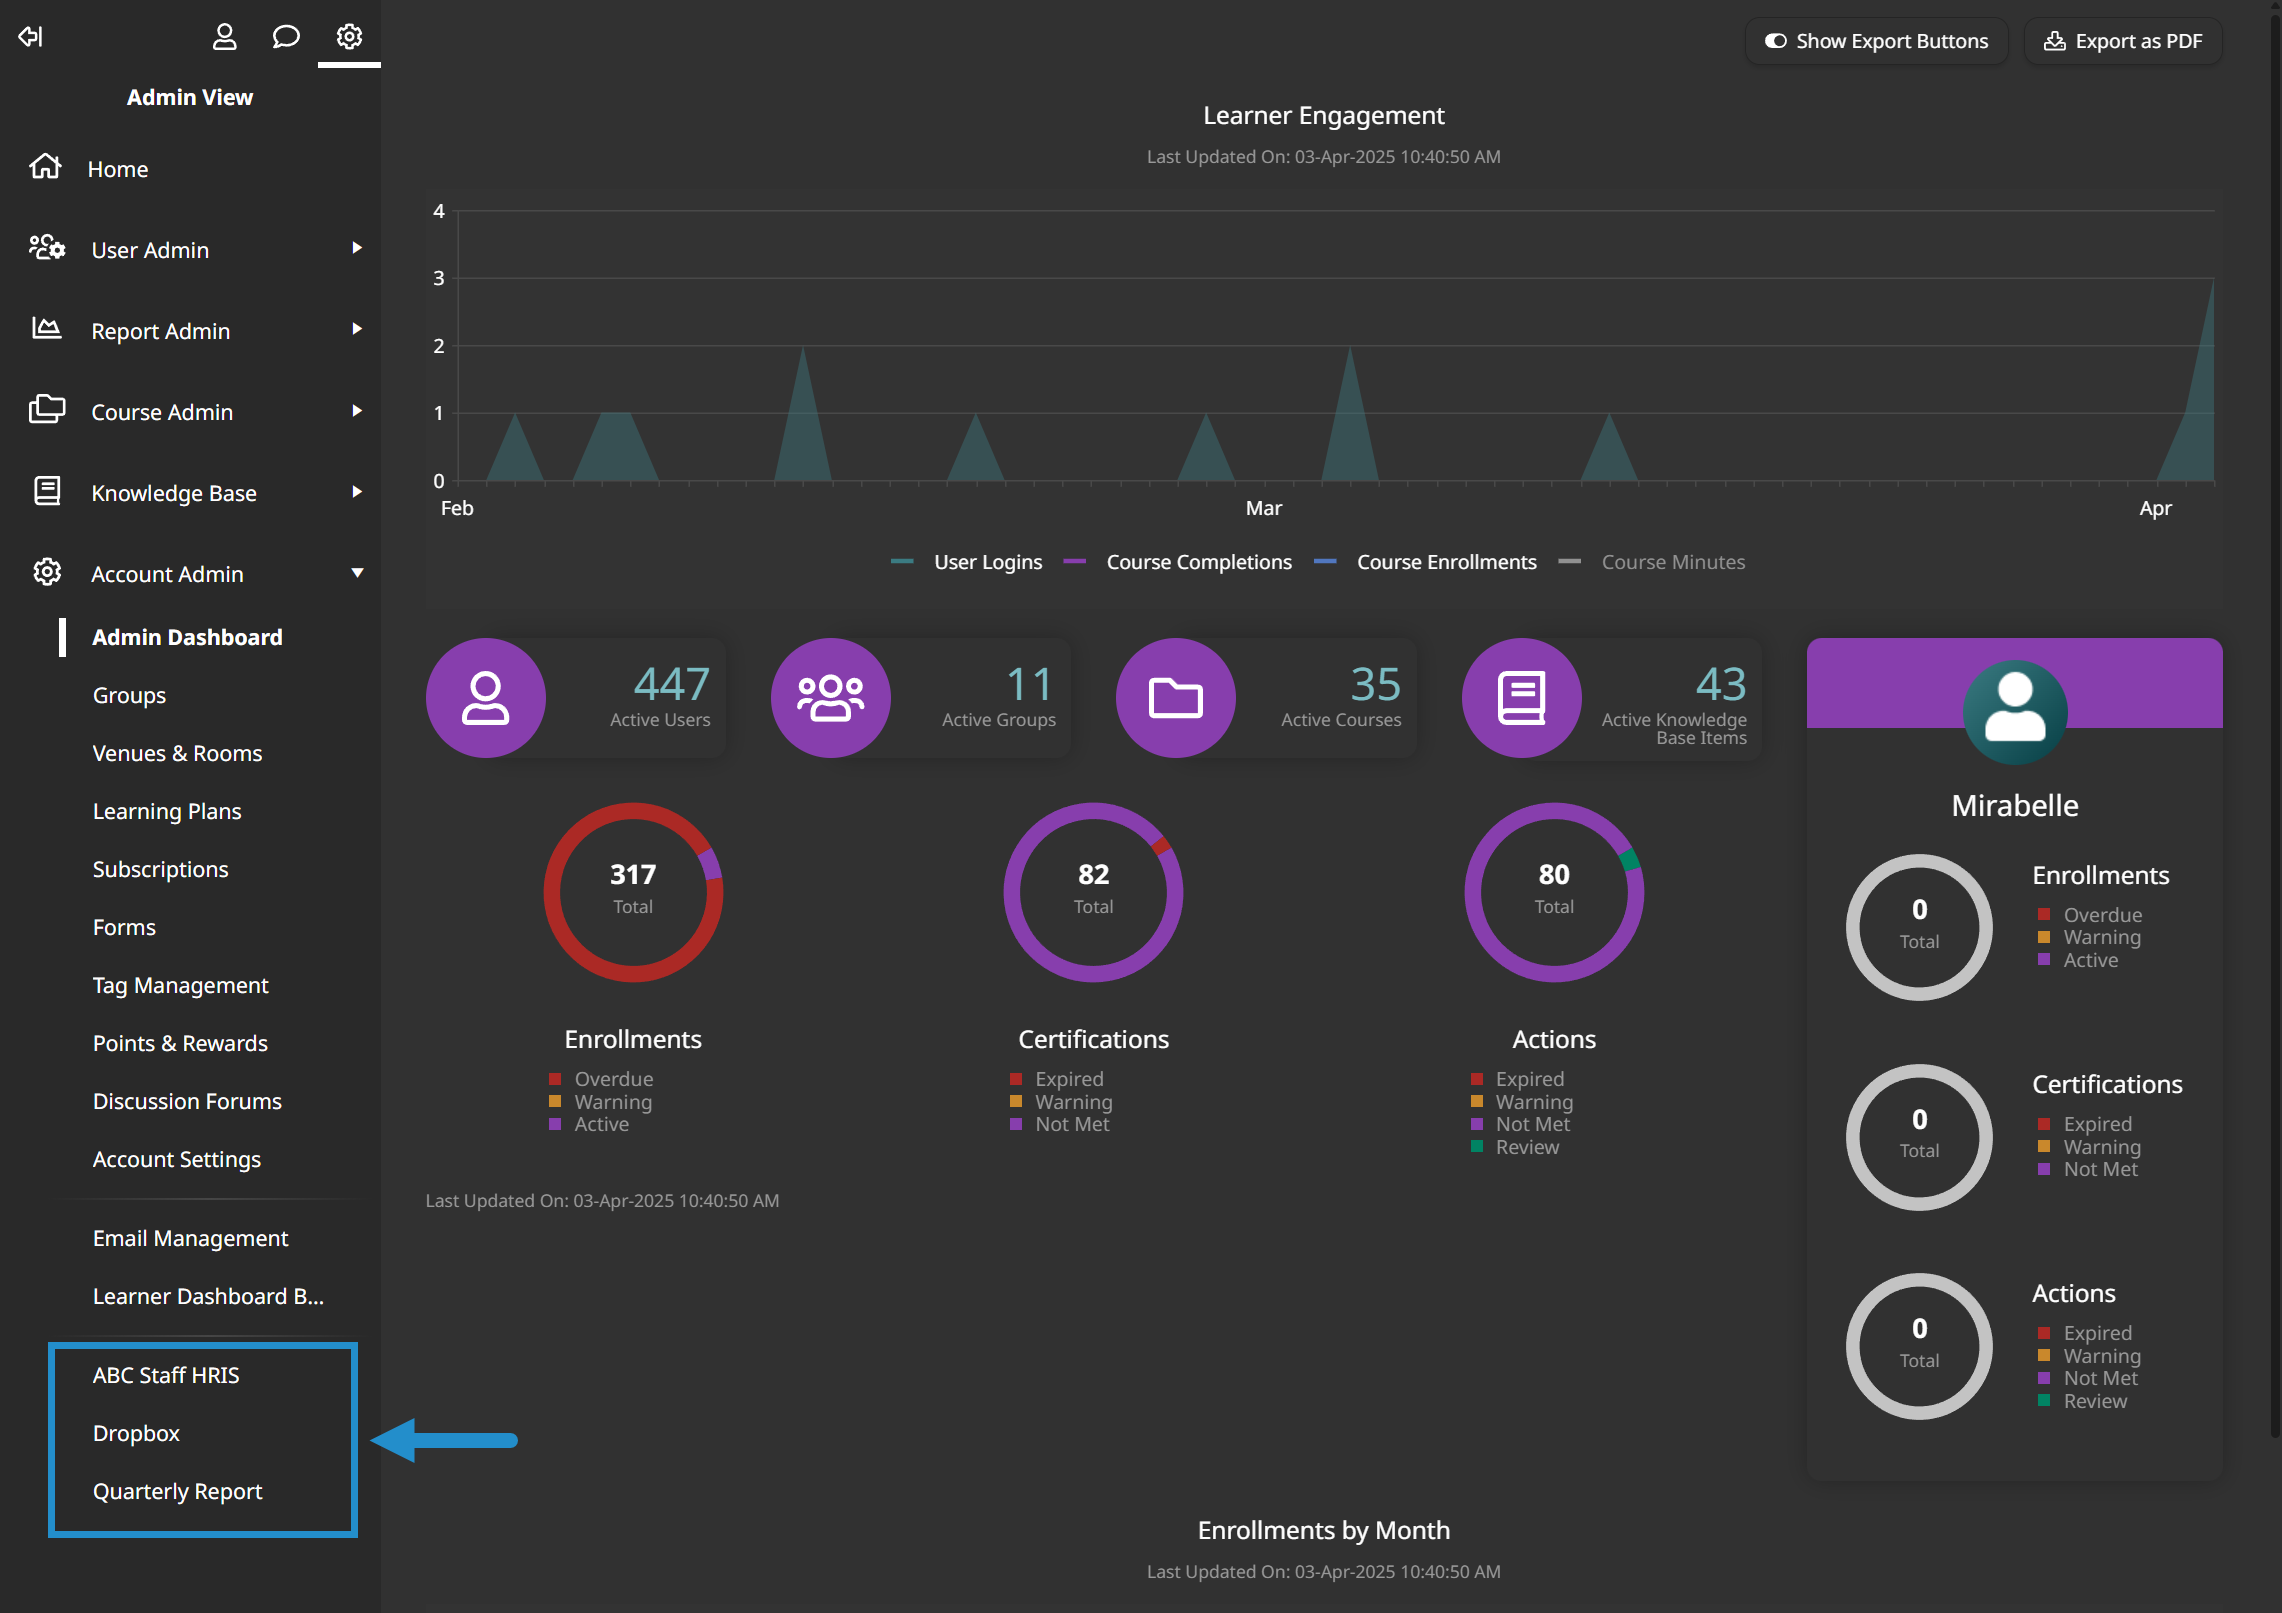
Add custom menu items to the admin interface to provide quick access links to admins. For example, you might provide links to your HRIS system, a shared file directory (e.g., Dropbox), and an advanced business intelligence (BI) report.
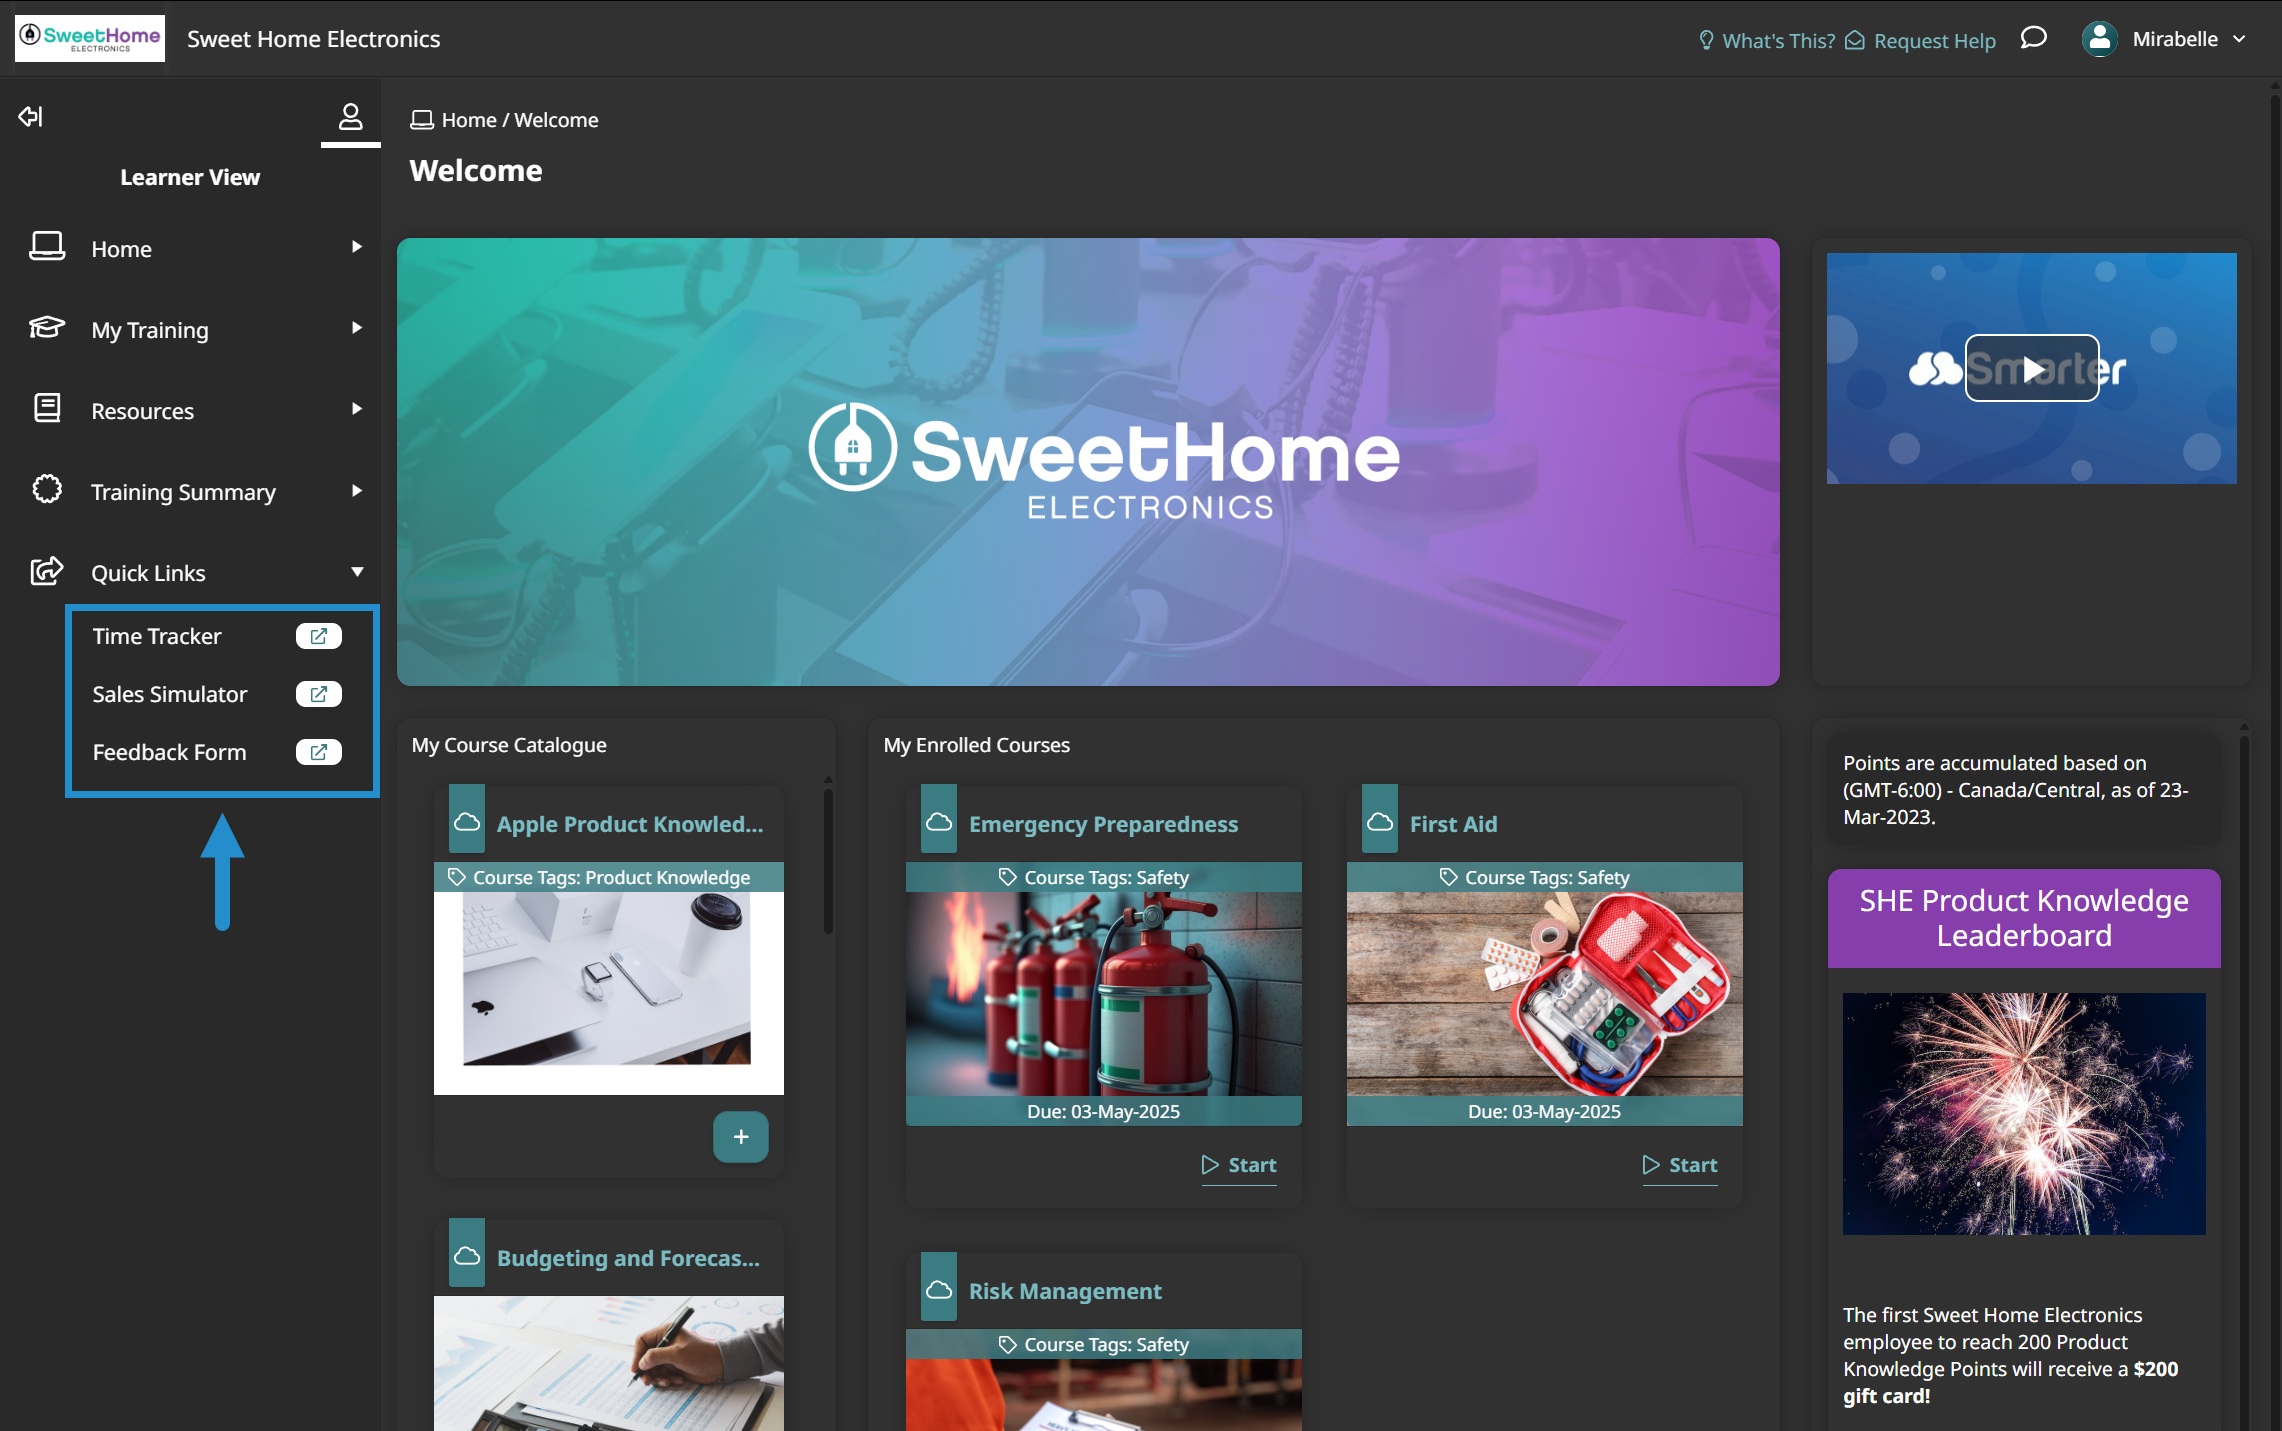
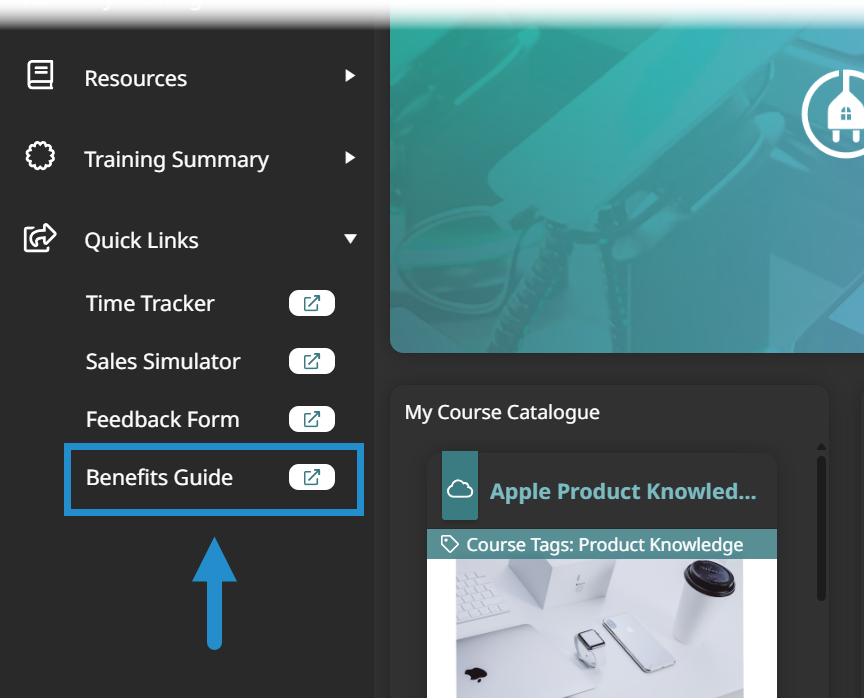
Add custom menu items to the Learner Dashboard to present useful links to learners. For example, you might provide links to your time-tracking application, a virtual practice environment, and a SmarterU feedback form.
By providing custom menu items to both admins and learners, you can deliver the right navigation experience for each group.
Beyond basic navigation, custom menu items also give you the ability to:
Make key resources more easily accessible (no more buried links)
Draw attention to important documents
Support different groups of learners with targeted dashboard links
Keep SmarterU LMS aligned with your other tools and applications
How to Add a Custom Menu Item to the Admin Interface
First, let’s look at how to add a custom menu item in the admin interface to help support admins and other users with elevated permissions. If you want to focus on your learner experience, skip to the next section.
To add a custom menu item to the admin interface:
Navigate to your account settings.
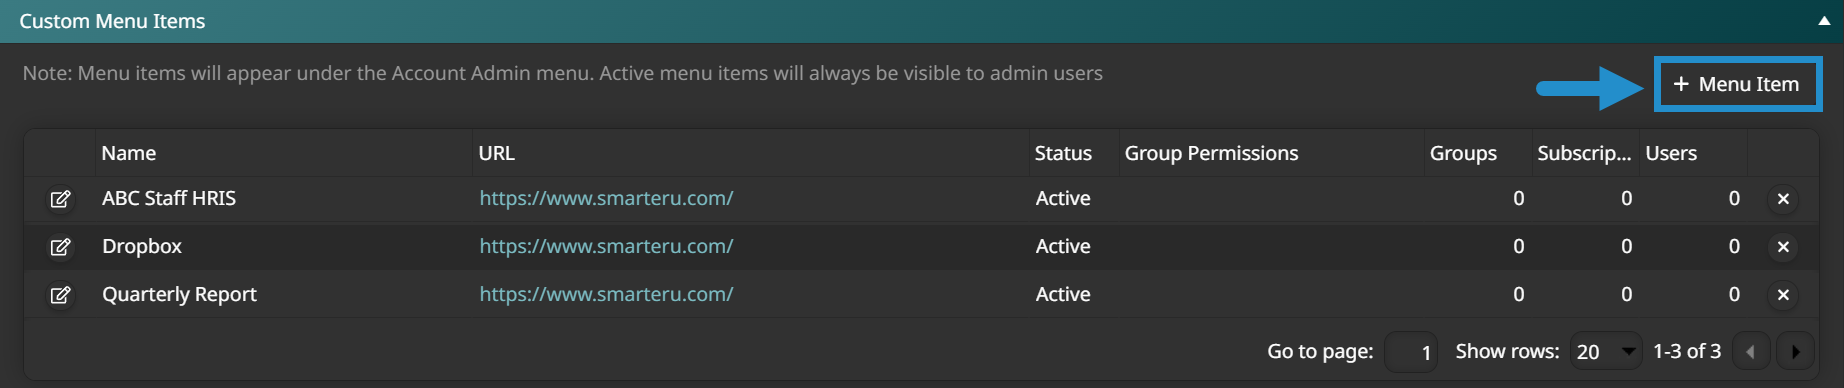
View the Custom Menu Items accordion.
Click Menu Item to add a new link.
Enter a name and URL for the link. The name you enter will appear in the menu, so choose something concise and easy to understand.
Decide if you want the link to appear to specific users (e.g., users who are part of a specific group or with certain permissions). If you want the custom menu item to be visible to admins only, don’t select any “visible by” options.
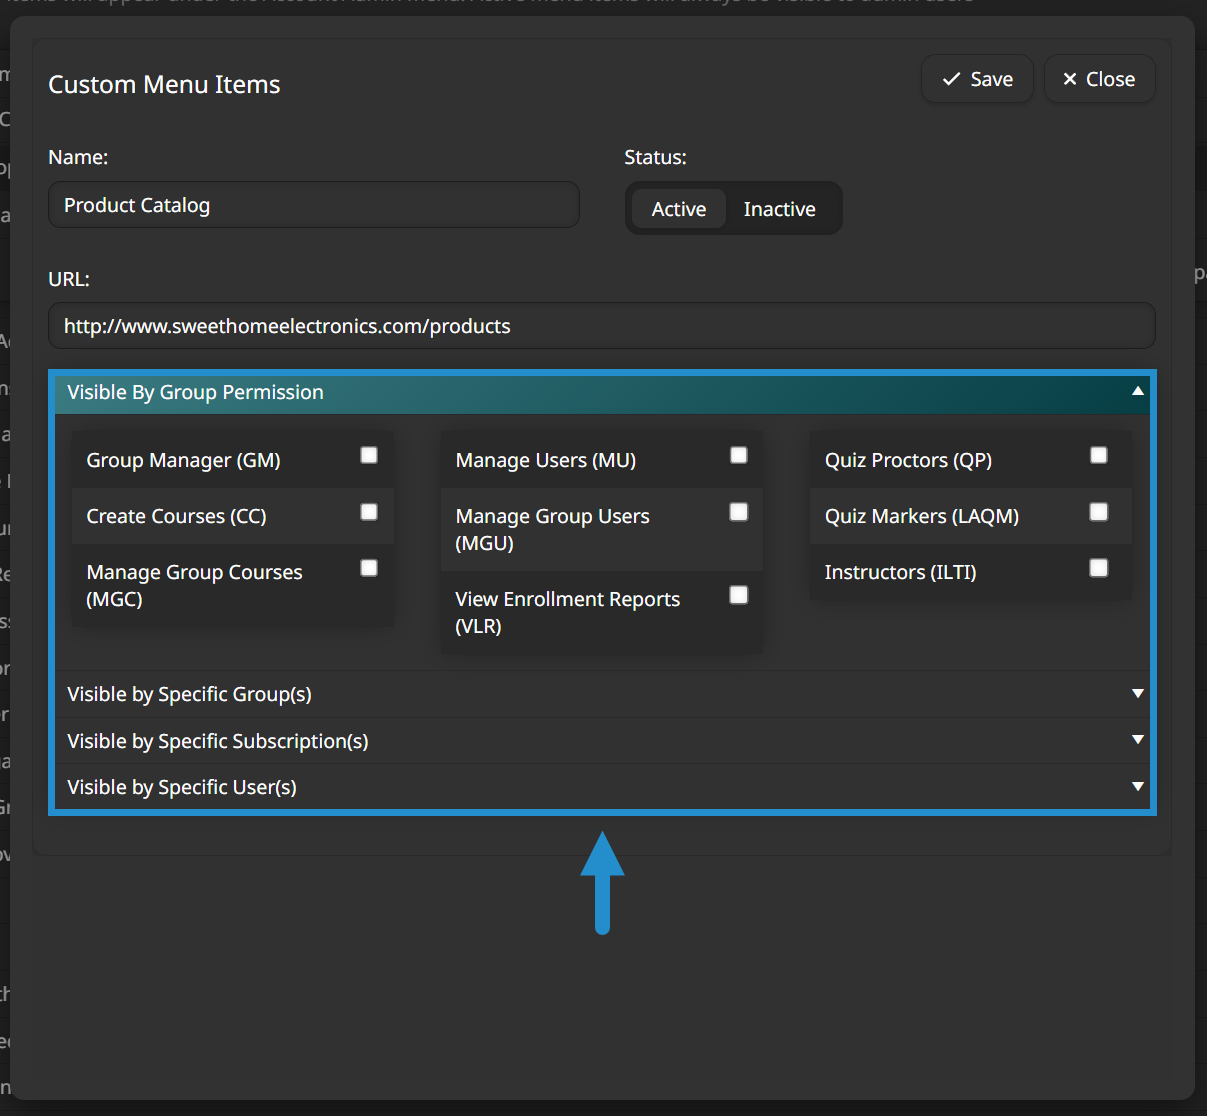
Click Save.
When viewing the admin interface, the link will appear at the bottom of the Account Admin section of the navigation menu.
How to Add a Custom Menu Item to the Learner Interface
Now, let’s go through the steps to add a custom menu item to your Learner Dashboard. If you have multiple custom Learner Dashboards set up, you can add different custom menu items tailored to those learners’ needs.
To add a custom menu item to a Learner Dashboard:
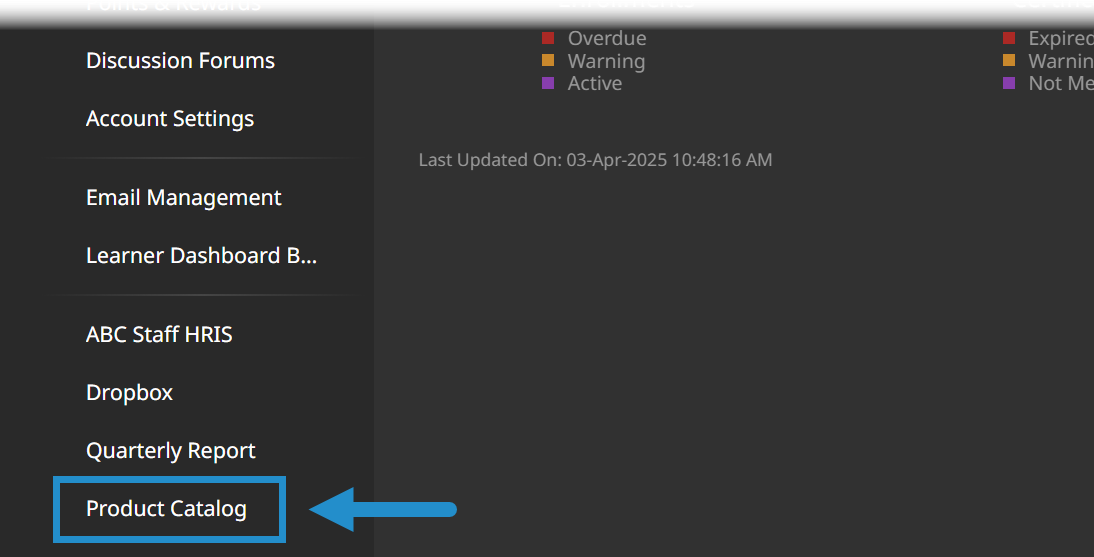
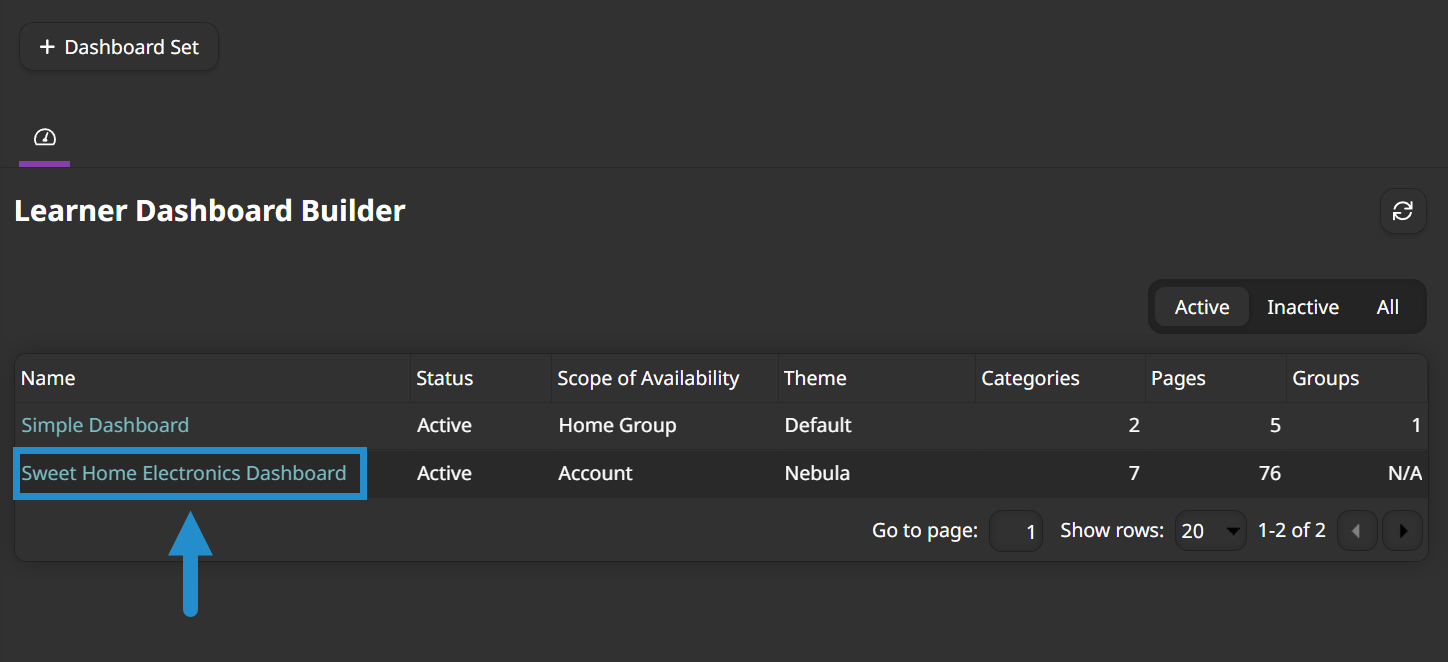
Navigate to the Learner Dashboard Builder.
Click the name of the dashboard you want to edit.
Click the name of the category where you want to add the custom menu item. Categories are collapsable sections used to organize your dashboard.
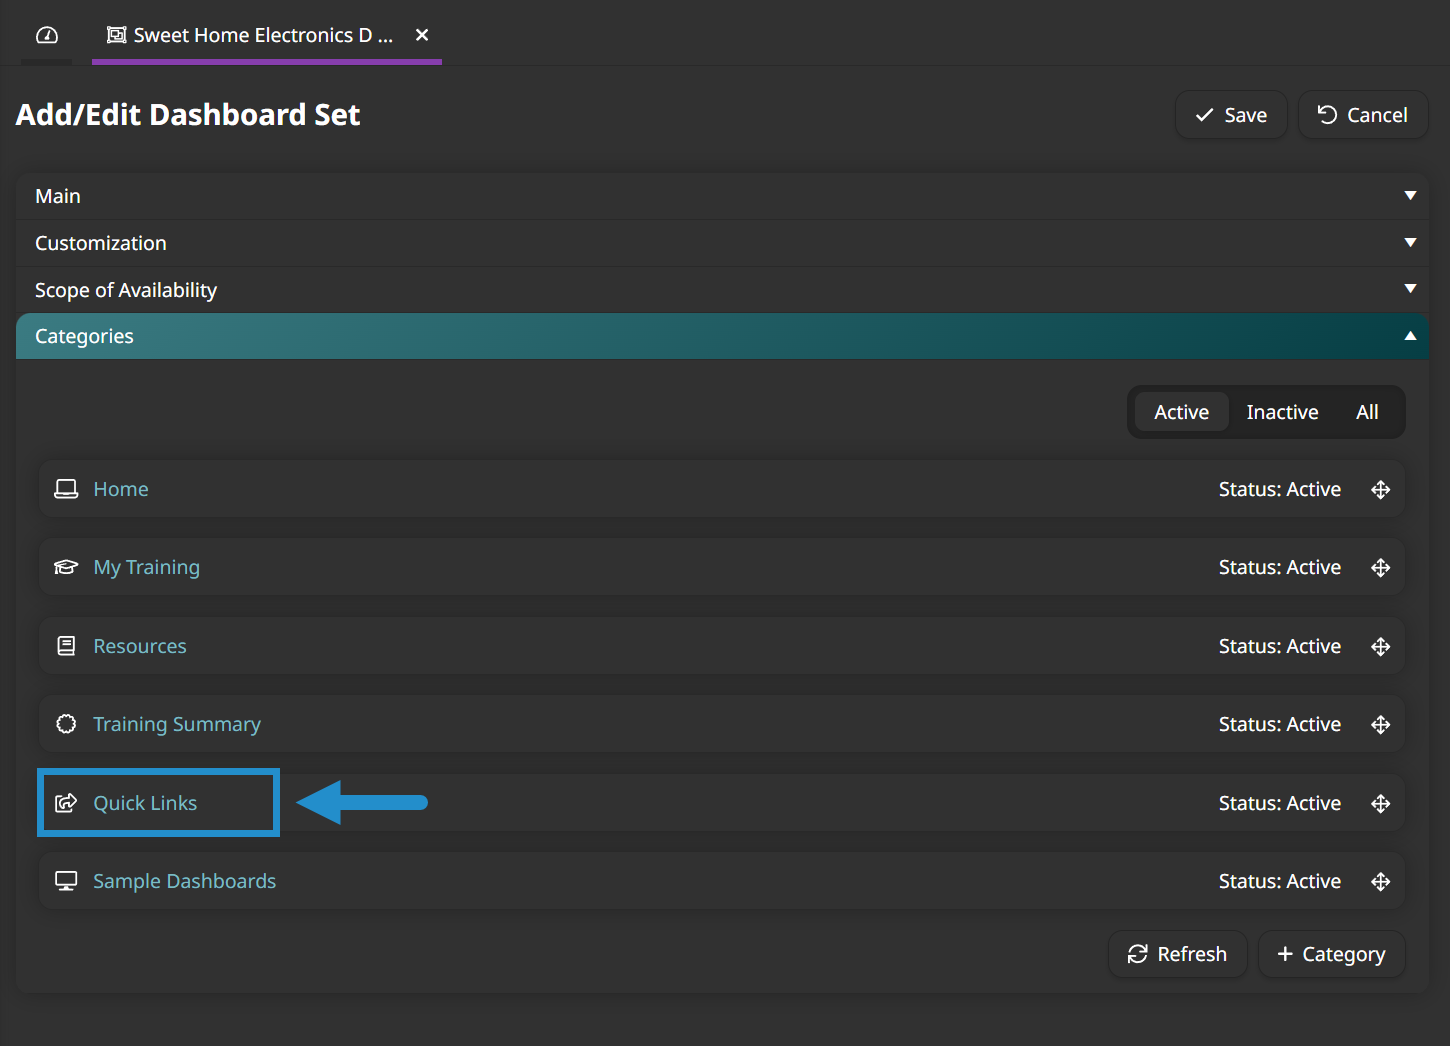
Click Page to add a new page.
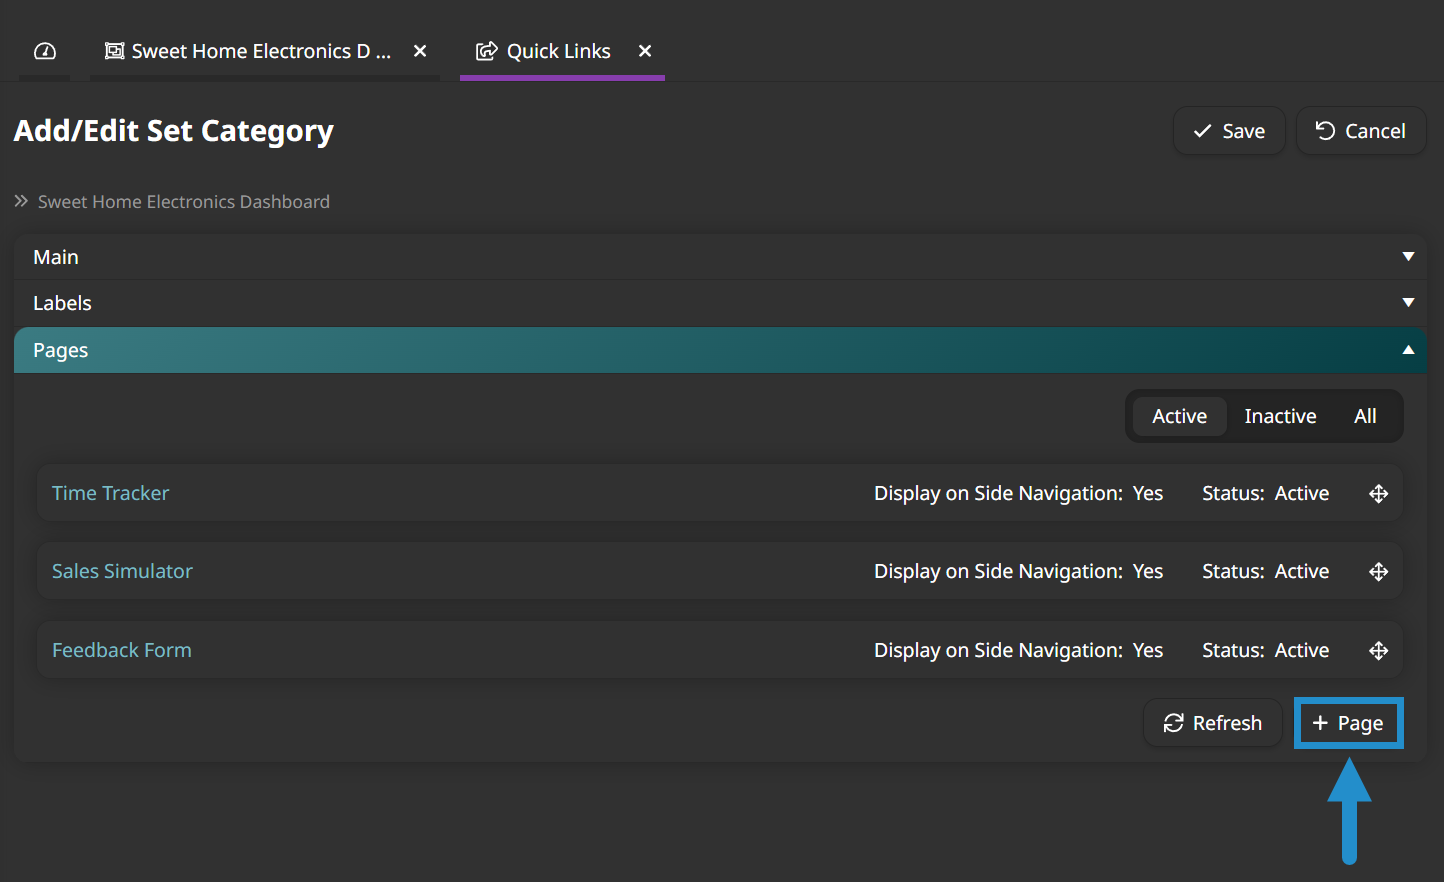
Enter a name for the custom menu item. This name won’t appear to learners.
In the Type dropdown, choose Custom Menu.
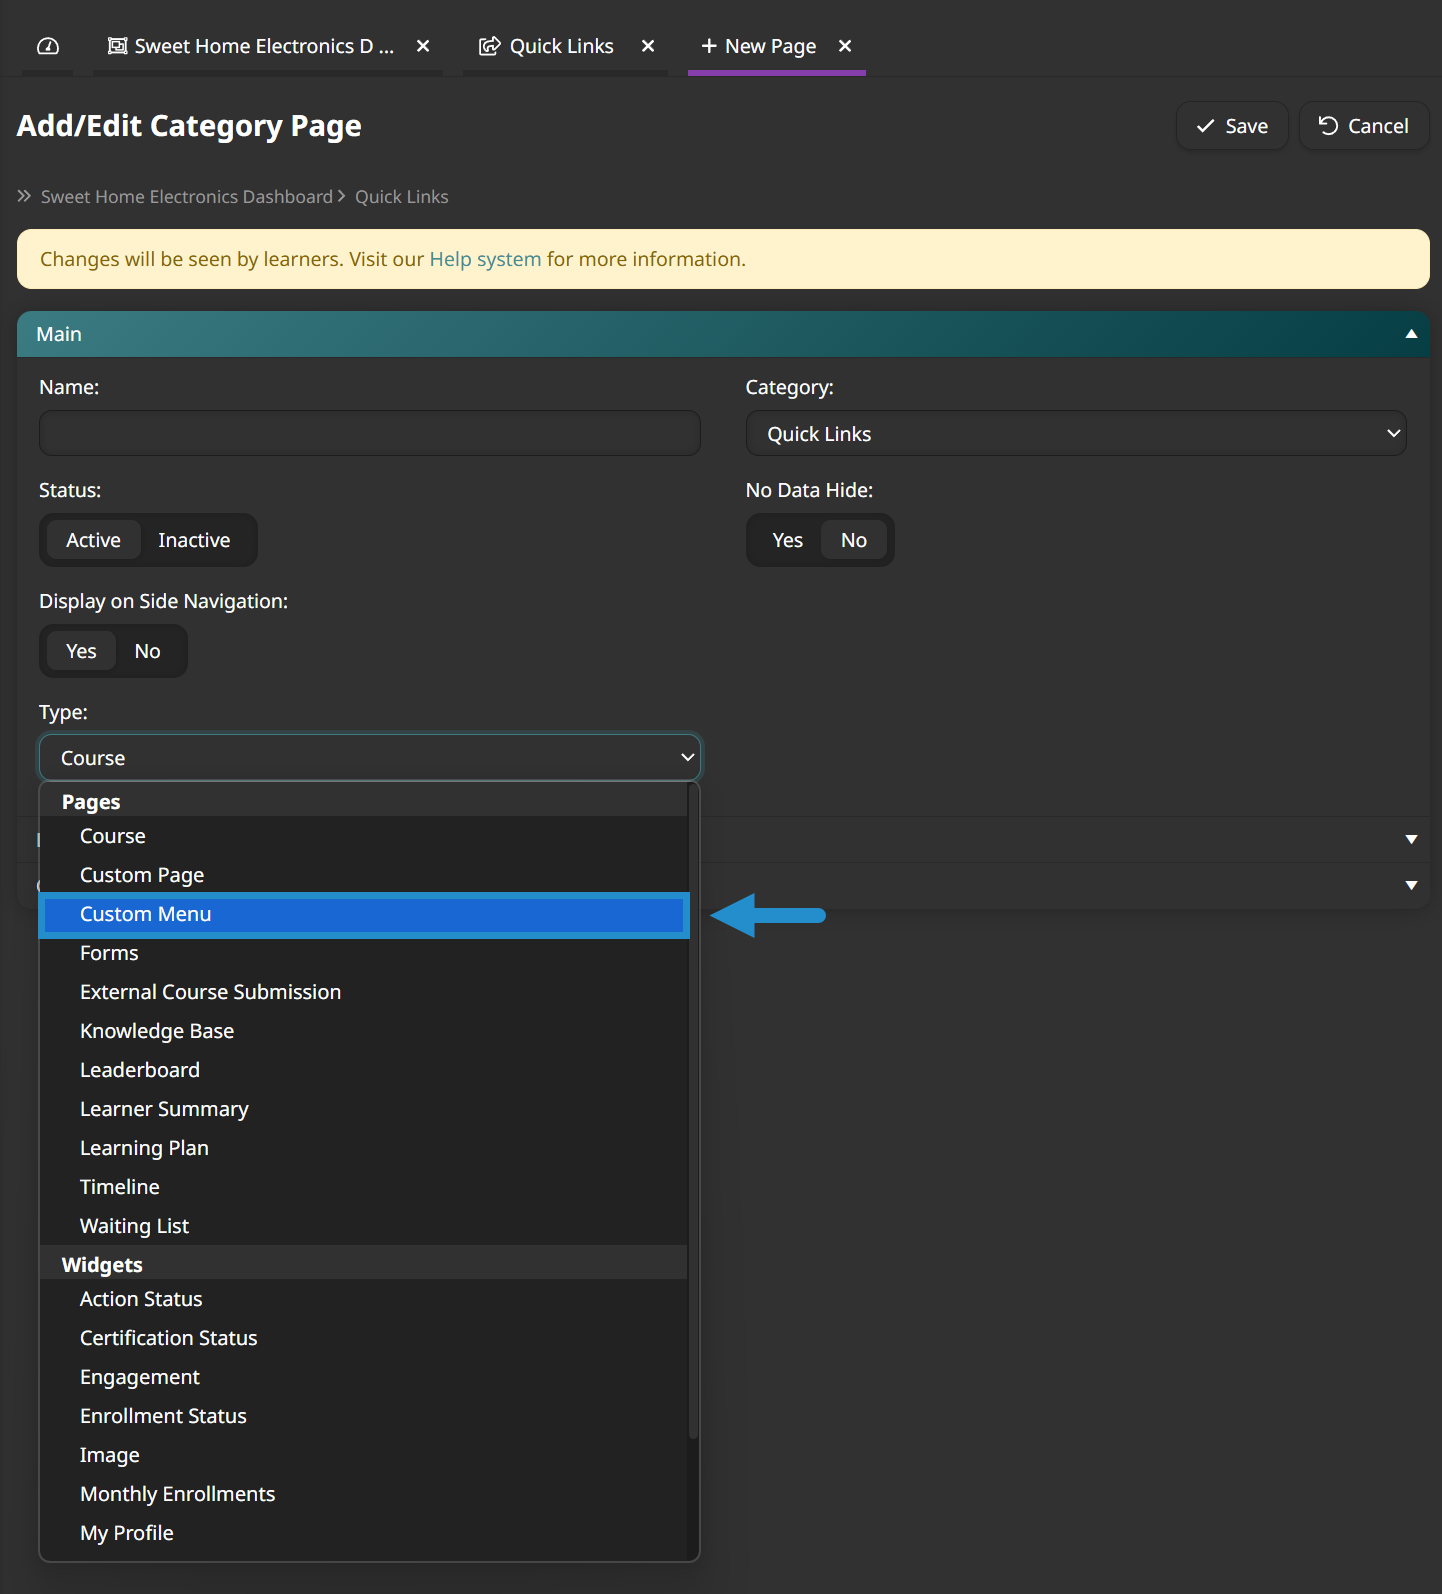
Add a label. The label will appear to learners, so pick something short that clearly identifies the link.

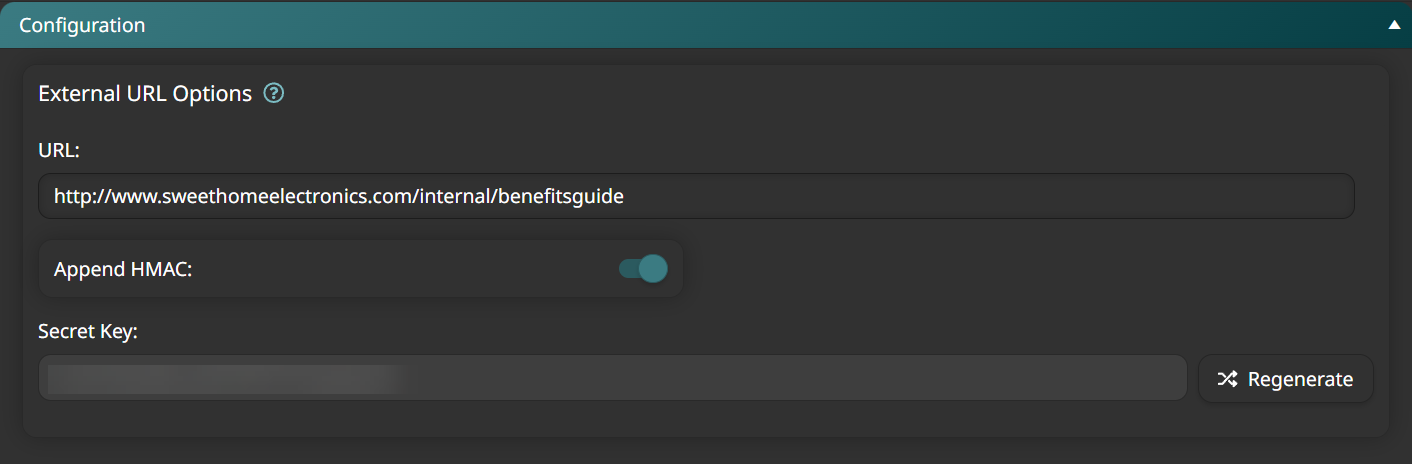
Enter the URL.
Click Save.
The link will appear as part of the Learner Dashboard.
As you can see, custom menu items in SmarterU LMS are a powerful feature that can elevate your admin and learner experiences. Whether you’re directing learners to important resources, external applications, or your file directory, well-placed links can streamline access and reduce friction.
Questions? Contact our Success Desk.