Reviewing an Action
If a user submits an action for confirmation, the action's status will be set to Review.
To review an action:
- From the Admin menu, select User Admin.
- Select Certifications.
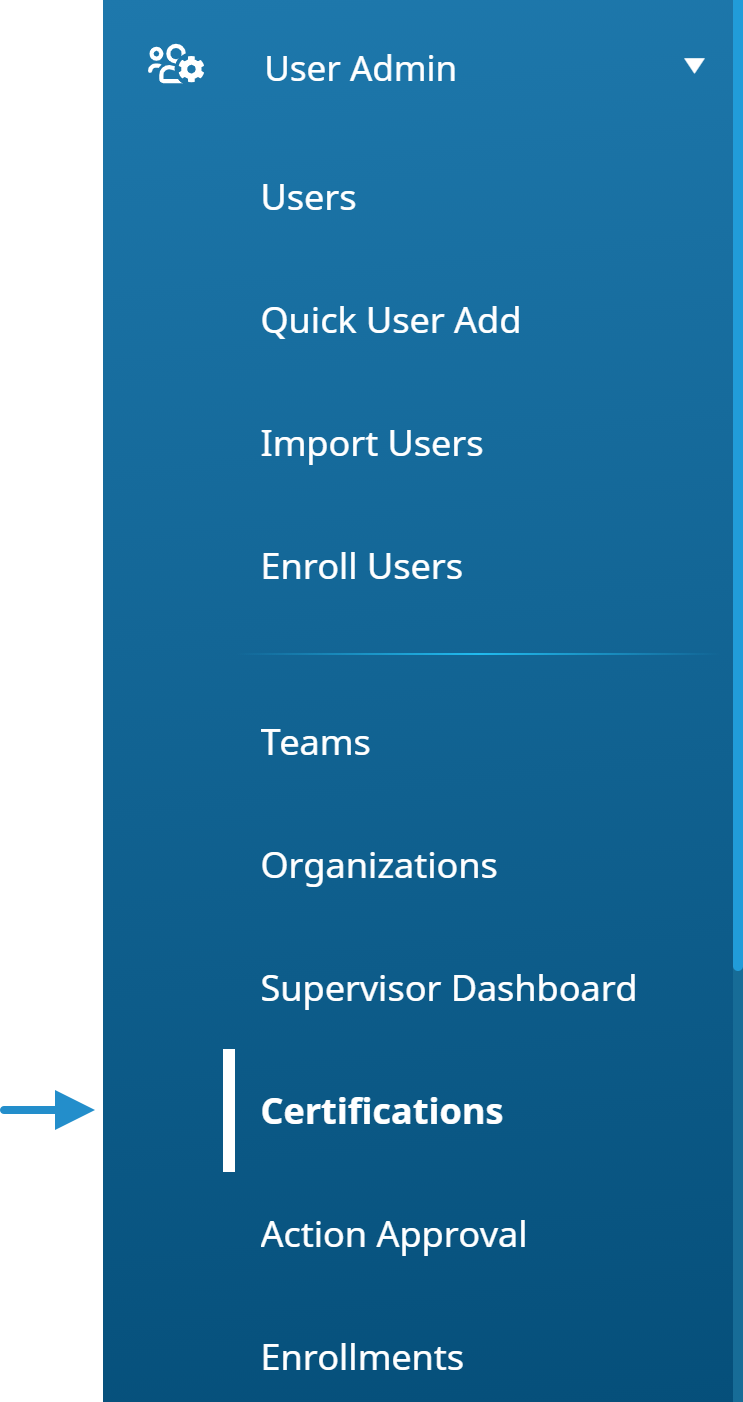
The Certifications Dashboard displays.
- Click Management.
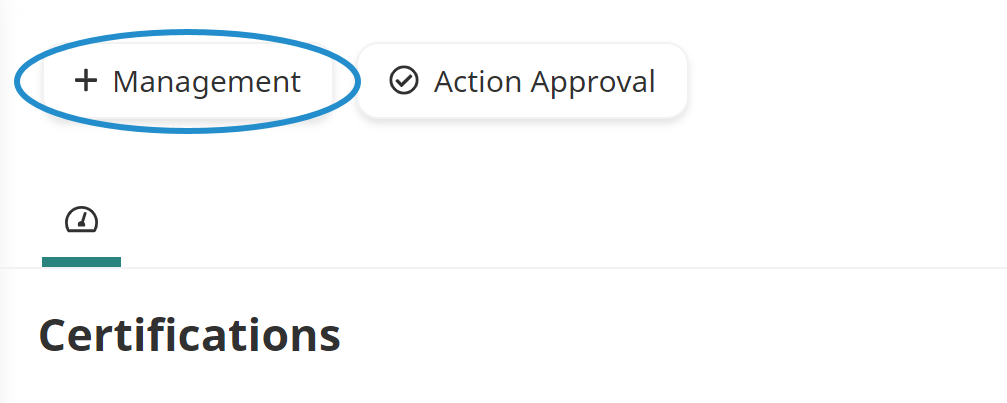
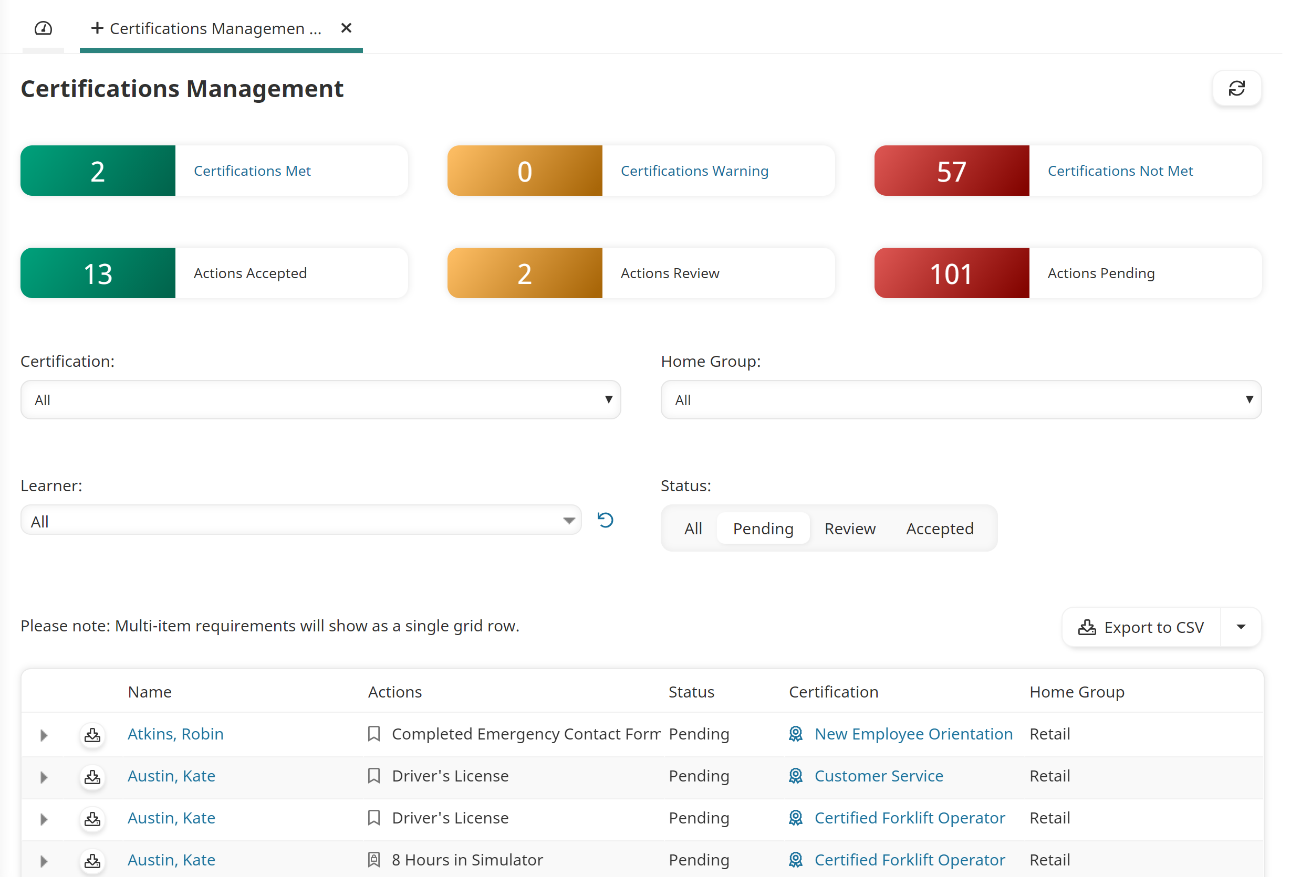
A new tab displays the Certifications Management workscreen. The grid displays all pending actions of users who you have permission to view.
 beside their name.
- To review actions submitted for confirmation, select the Review status.
- Click
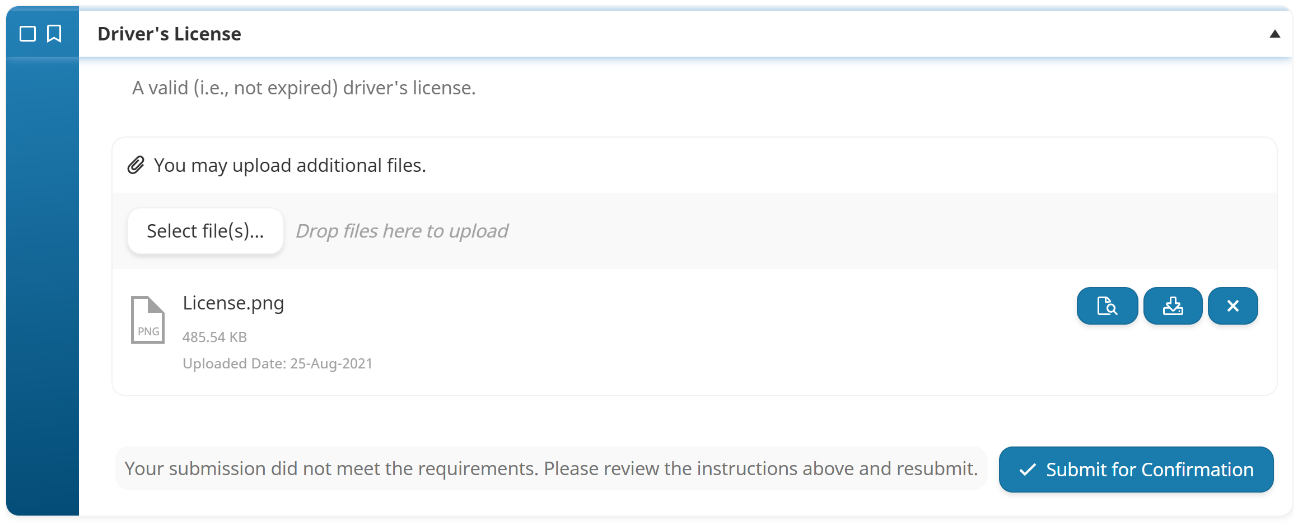
 beside the action you want to review. The row expands to display the action's details. If a single action displays, it indicates that the learner must complete the action. In the example below, the only action is "Driver's License"

If the Action column displays <Action1> or <Action2> or ..." it indicates that the learner only needs to complete one of the listed actions.
- Click
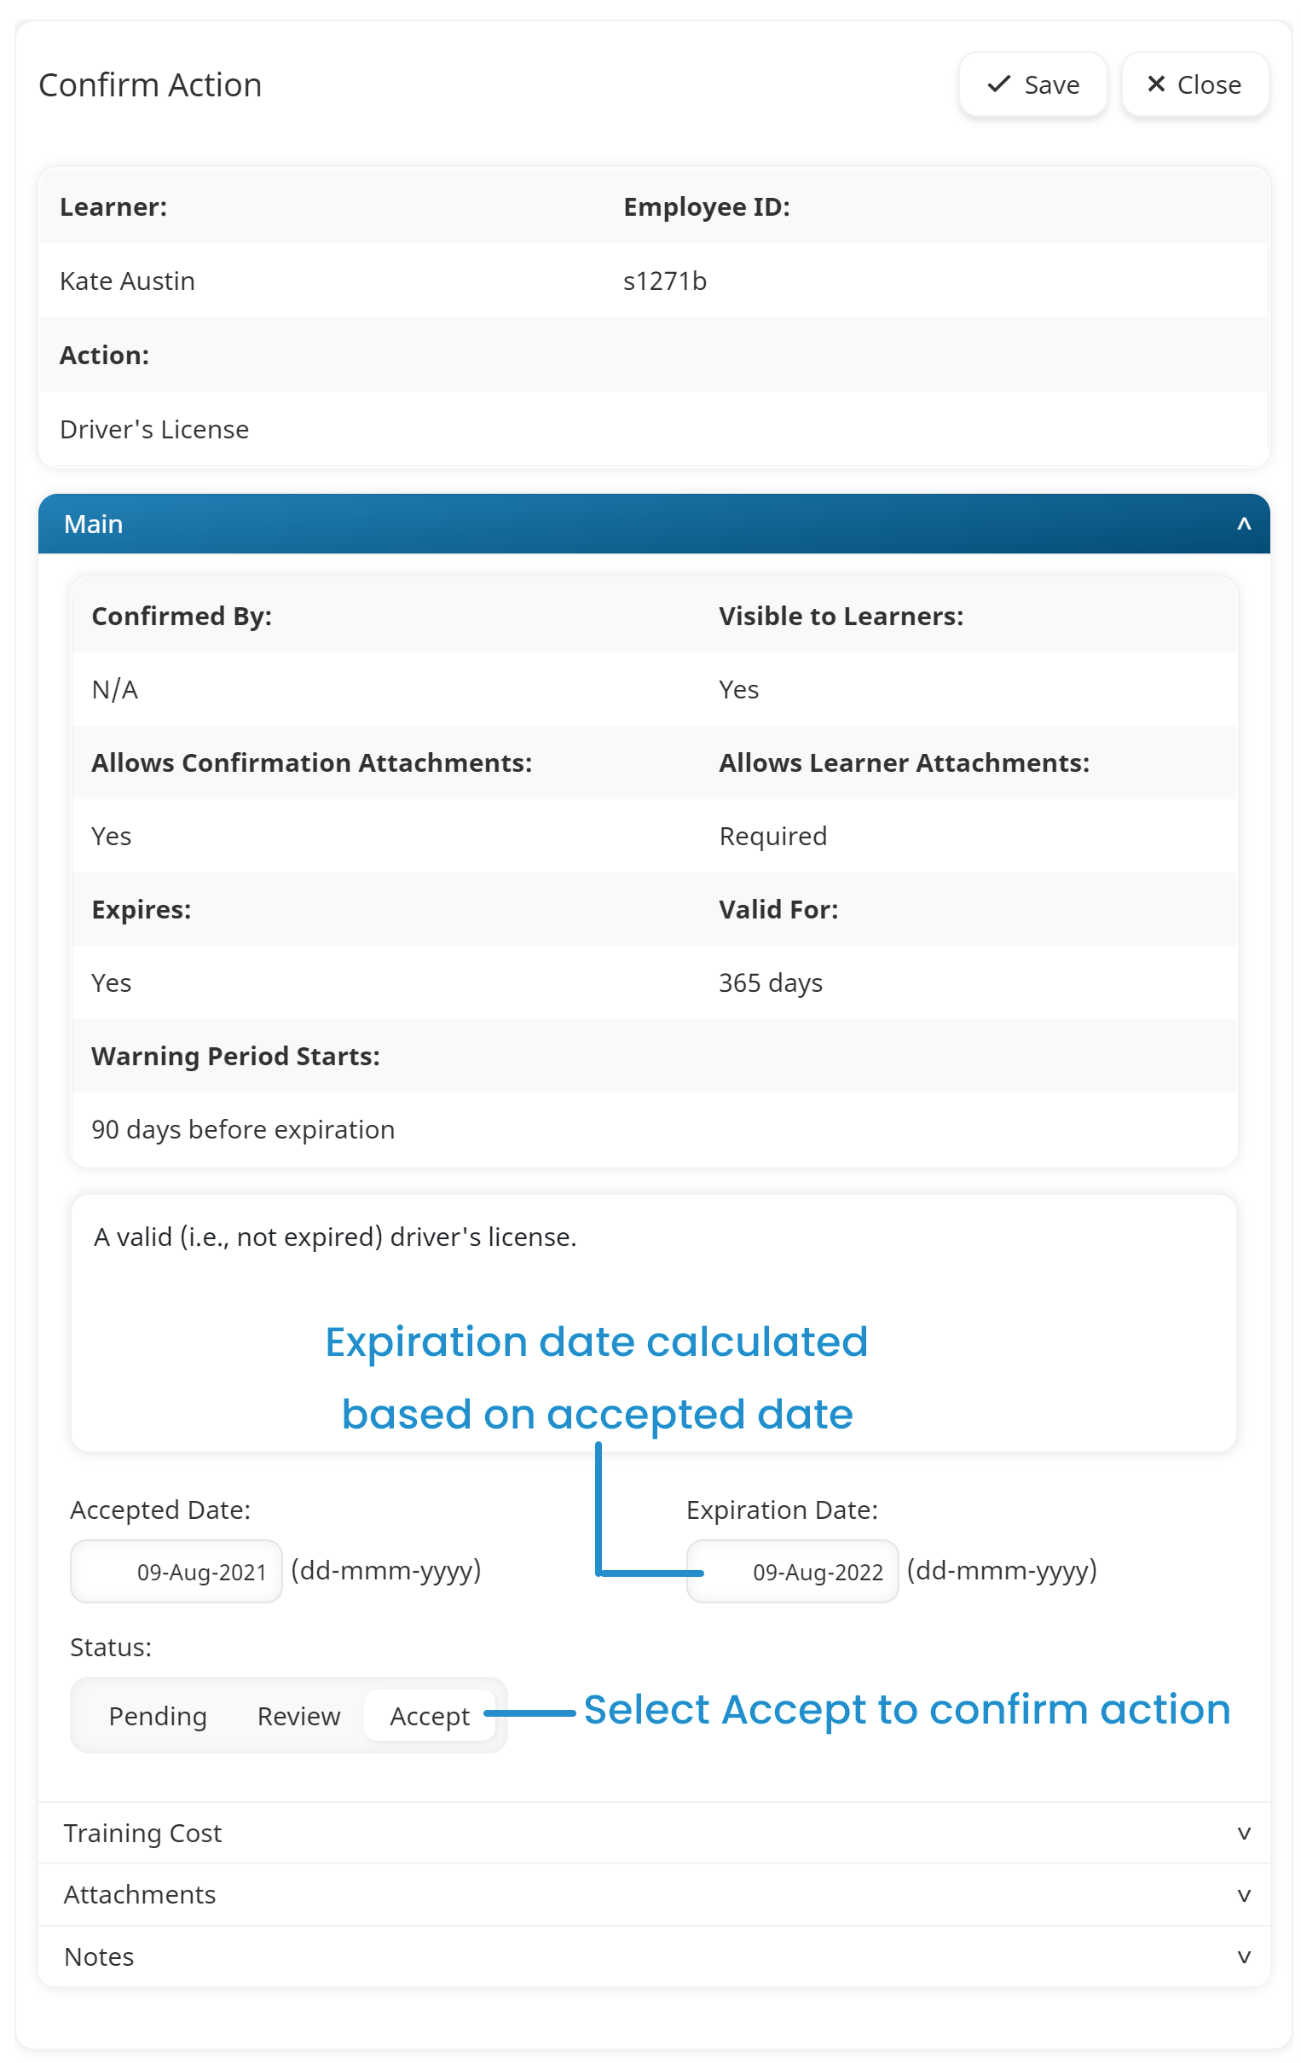
 the beside the action you want to review. The Confirm Action workscreen displays.
 - If the user uploaded attachments for the action, expand the Attachments accordion to review the files.
- Confirm or reject the action.
Confirming an Action
To confirm an action, do the following from the Confirm Action workscreen:
- In the Main accordion, select the Accepted status.
- Click in the Accepted Date field and select the date. If the action expires, the Expiration Date will be calculated based on the Accepted Date and how long the action is valid.
- If needed, complete the following accordions:
- Training Cost - This accordion is only applicable if your account's Training Cost Tracking setting is checked and you are an administrator or have the Edit Wages & Training Costs account permission.
- Attachments
- Notes
- Click Save.
- Click Close. The Confirm Action window closes.
Rejecting an Action
To reject an action, do the following from the Confirm Action workscreen:
- In the Main accordion, select the Pending status.
- Click Save.
- Click Close.
The Confirm Action window closes. When the learner views the details for the action, it includes a message stating that it did not meet the requirements. The learner will need to re-submit the action for confirmation after making the necessary corrections.
Main
The Main accordion of the Confirm Action workscreen displays information about the action and enables you to change the status.
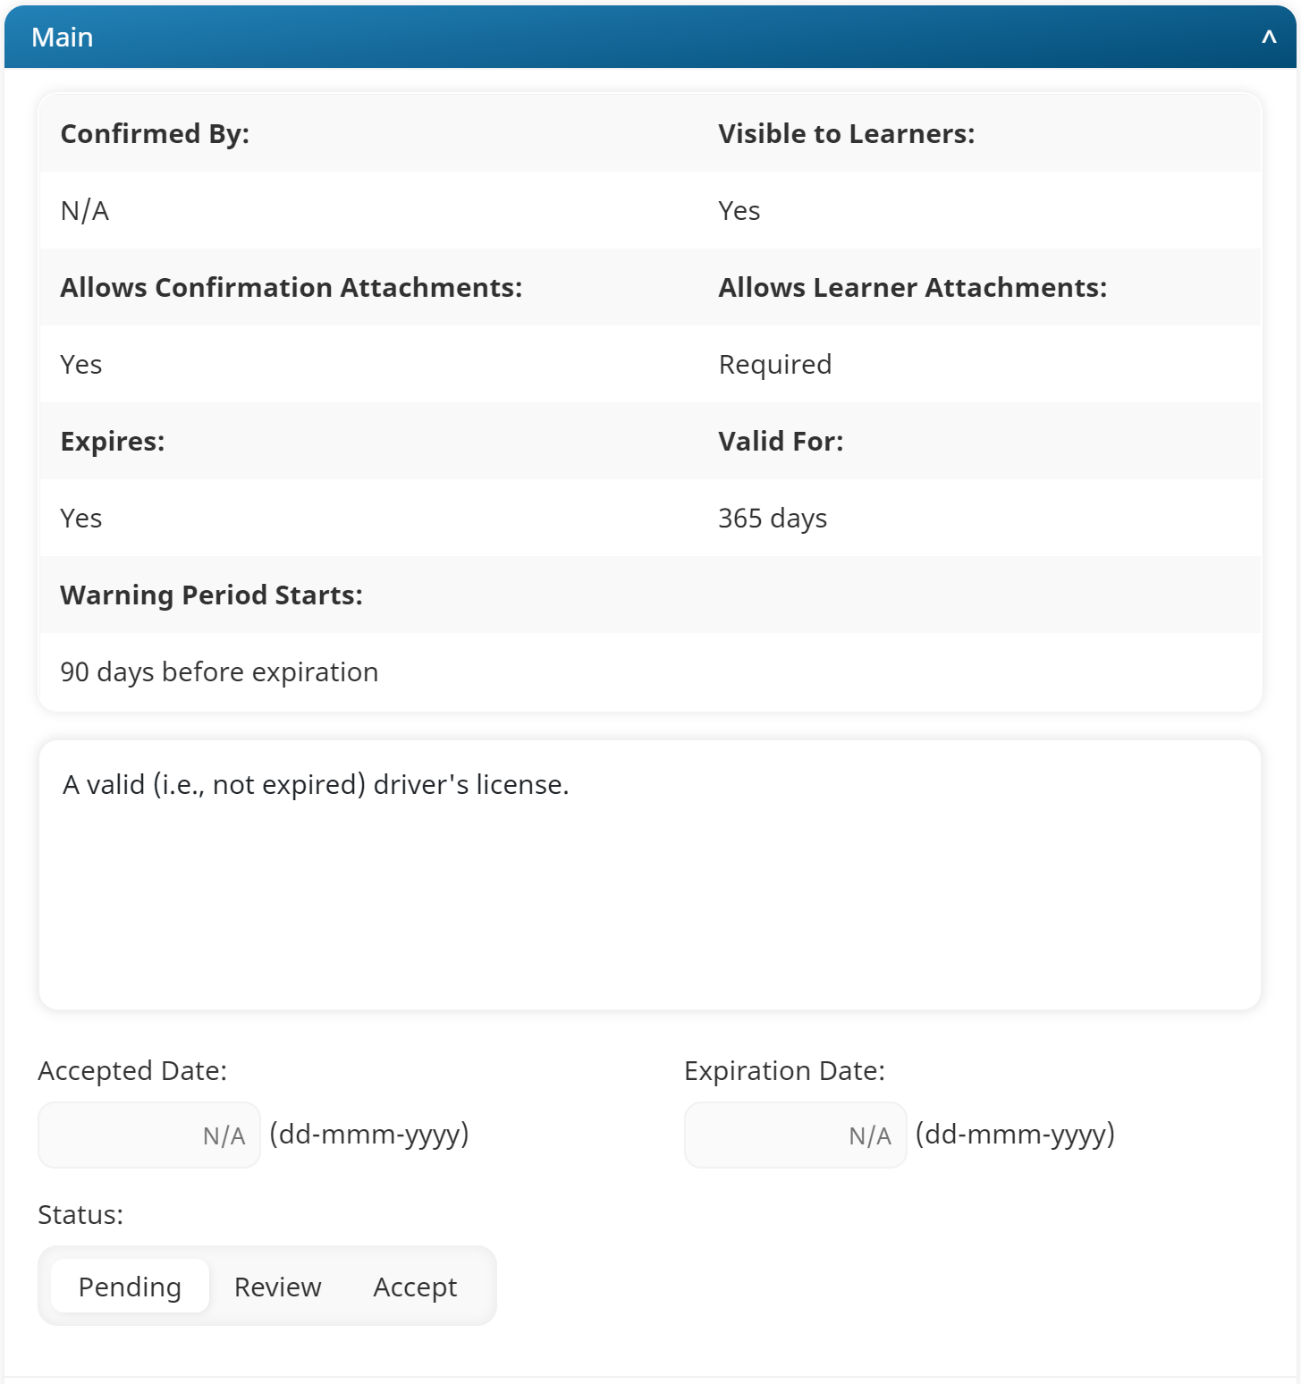
Accepted Date
This setting is only available when the status is set to Accept. Click the field to select the date that the action was accepted.
Expiration Date
This setting is only applicable if the action expires. The expiration date is calculated based on the selected Accepted Date.
Status
Indicates the action's status:
- Pending - The default status. Indicates that the learner needs to complete the action.
- Review - The learner has submitted the action and is waiting for confirmation.
- Accepted - The action has been confirmed.
Training Cost
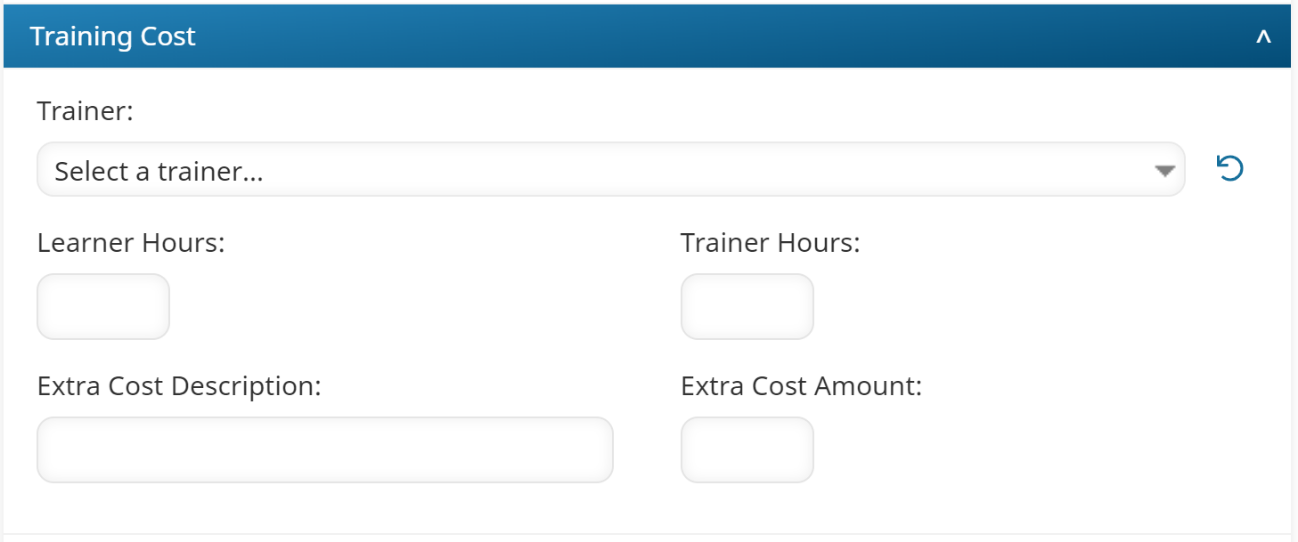
Trainer
Select the trainer associated with the action.
Learner Hours
Enter the number of hours the learner spent completing this action. The number of hours and the learner's wage at the time the action is accepted are used to calculate the training cost.
Trainer Hours
Enter the number of hours the selected trainer spent on this action. The number of hours and the trainer's wage at the time the action is accepted are used to calculate the training cost.
Extra Cost Description
Enter a description for any additional costs associated with this action.
Extra Cost Amount
Enter the amount of any additional costs associated with this action.
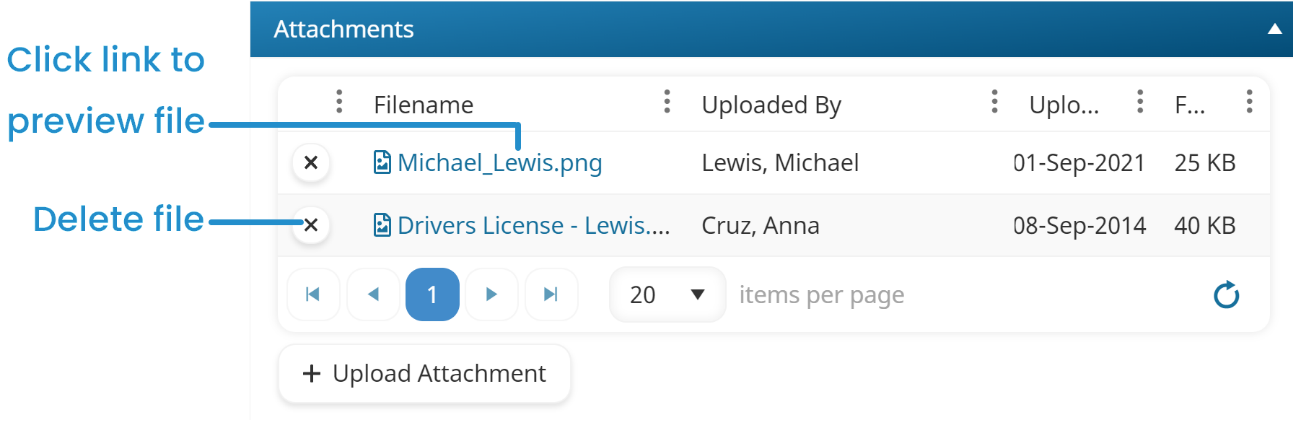
Attachments
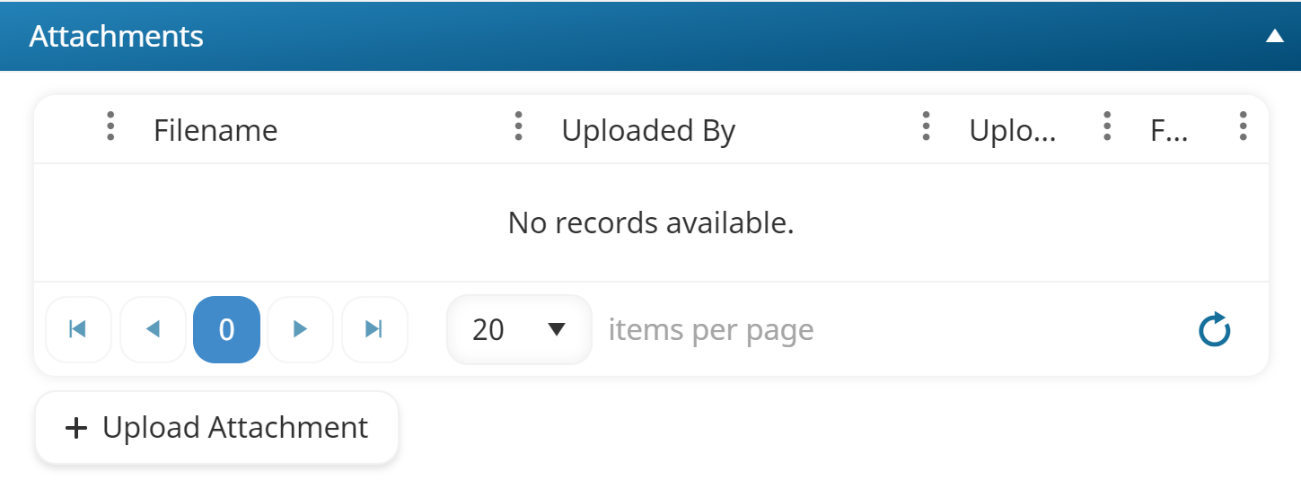
To upload a file for the action on behalf of the learner:
- Click Upload Attachment. Refer to Supported File Types for a list of supported file types.
- Navigate to the location of the file.
- Click Open.
If a file has already been uploaded for the action, you can preview the file by clicking its filename. To delete a file, click the X beside it.
Notes
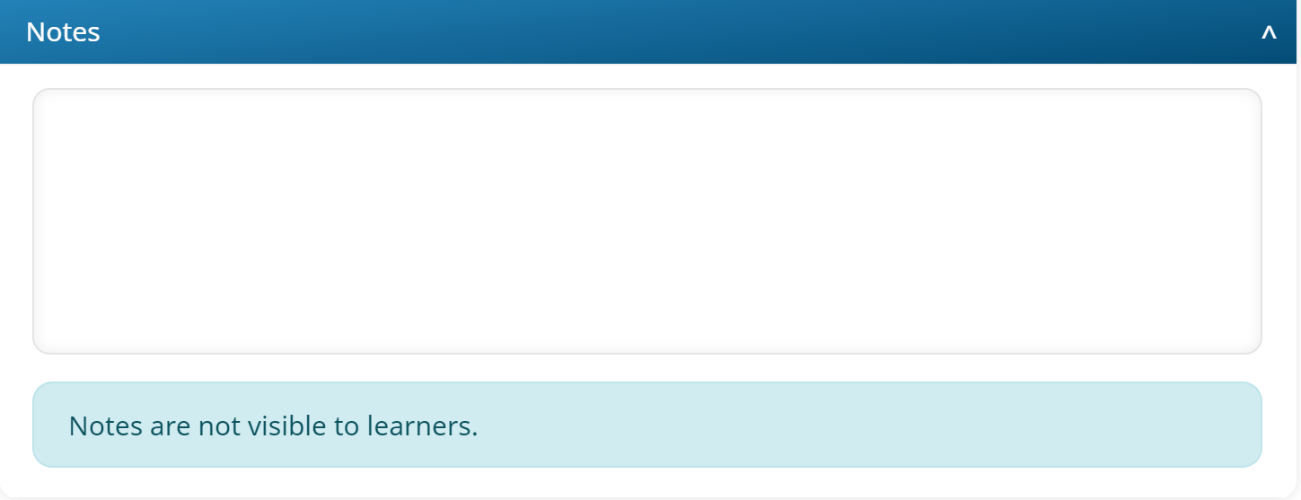
Enter any notes about the action. The learner will not be able to view the notes.