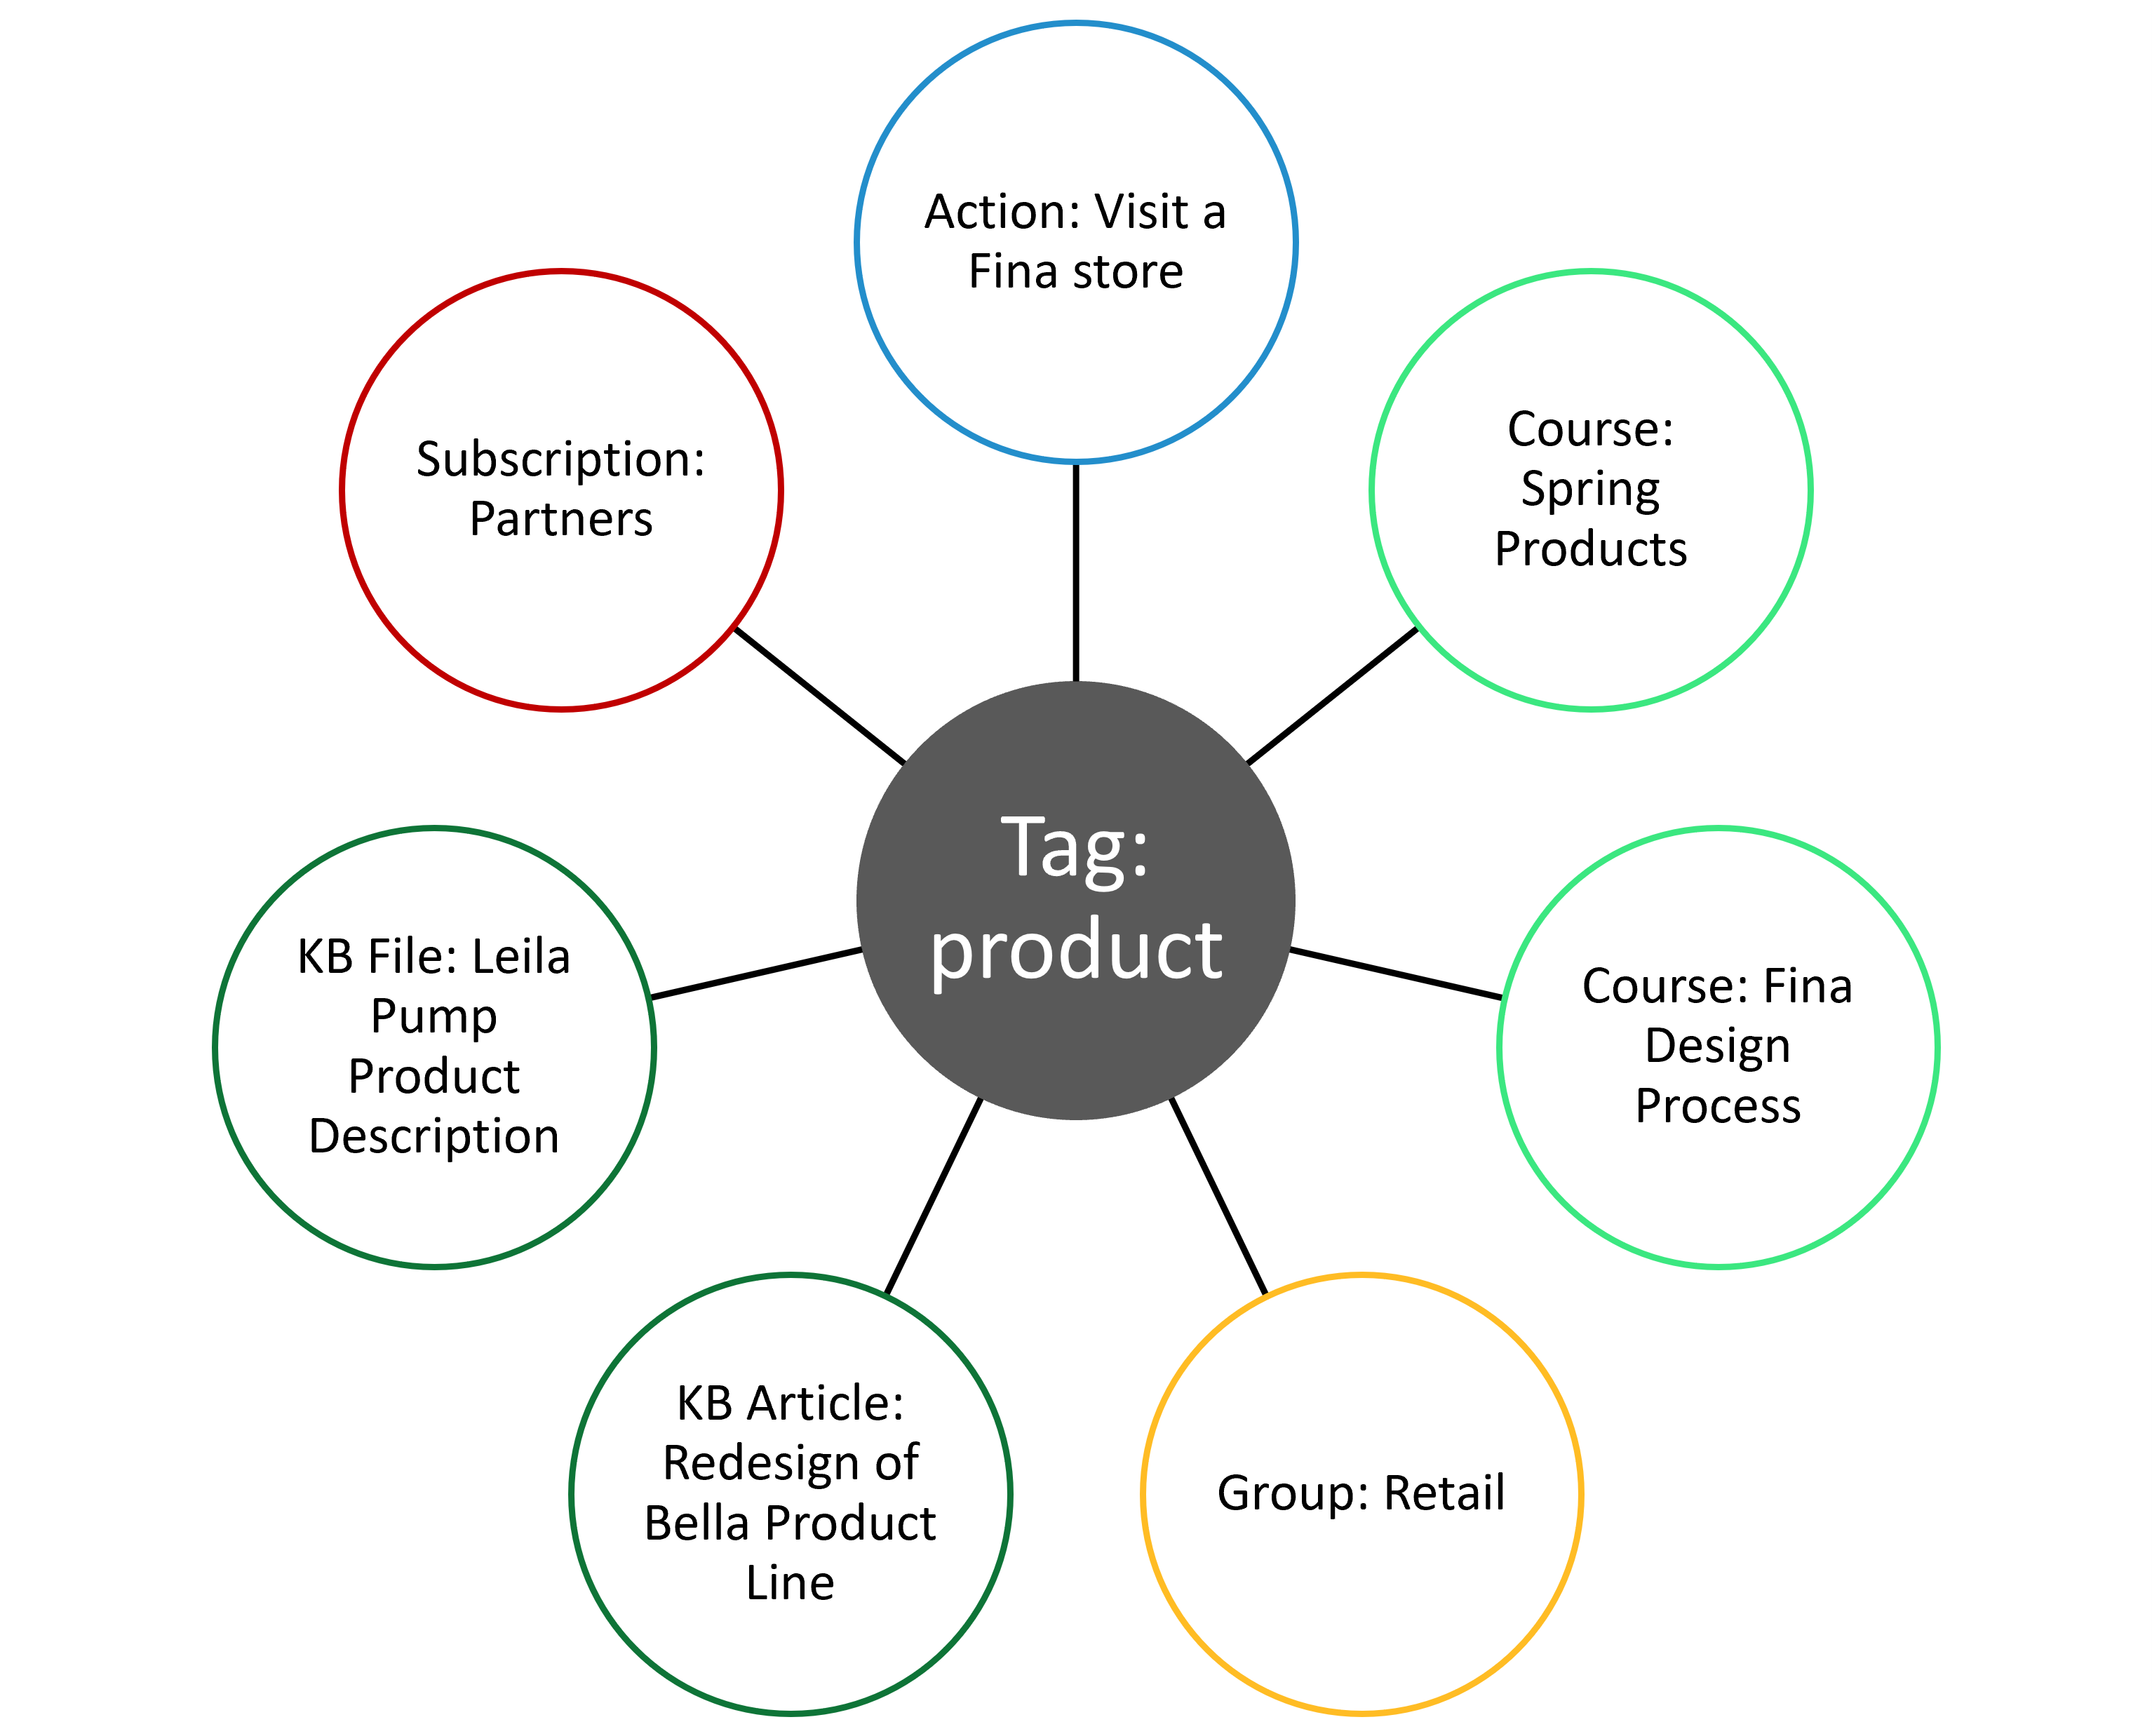
The Associations accordion of the Add/Edit Tag workscreen is where you can assign the tag to actions, courses, groups, knowledge base items (i.e., articles, files, and templates), and subscriptions. For example, Fina Shoes can associate the products tag with related objects.
By default, the Associations grid displays all objects. You can control the object displayed in the grid by clicking the button for the object.
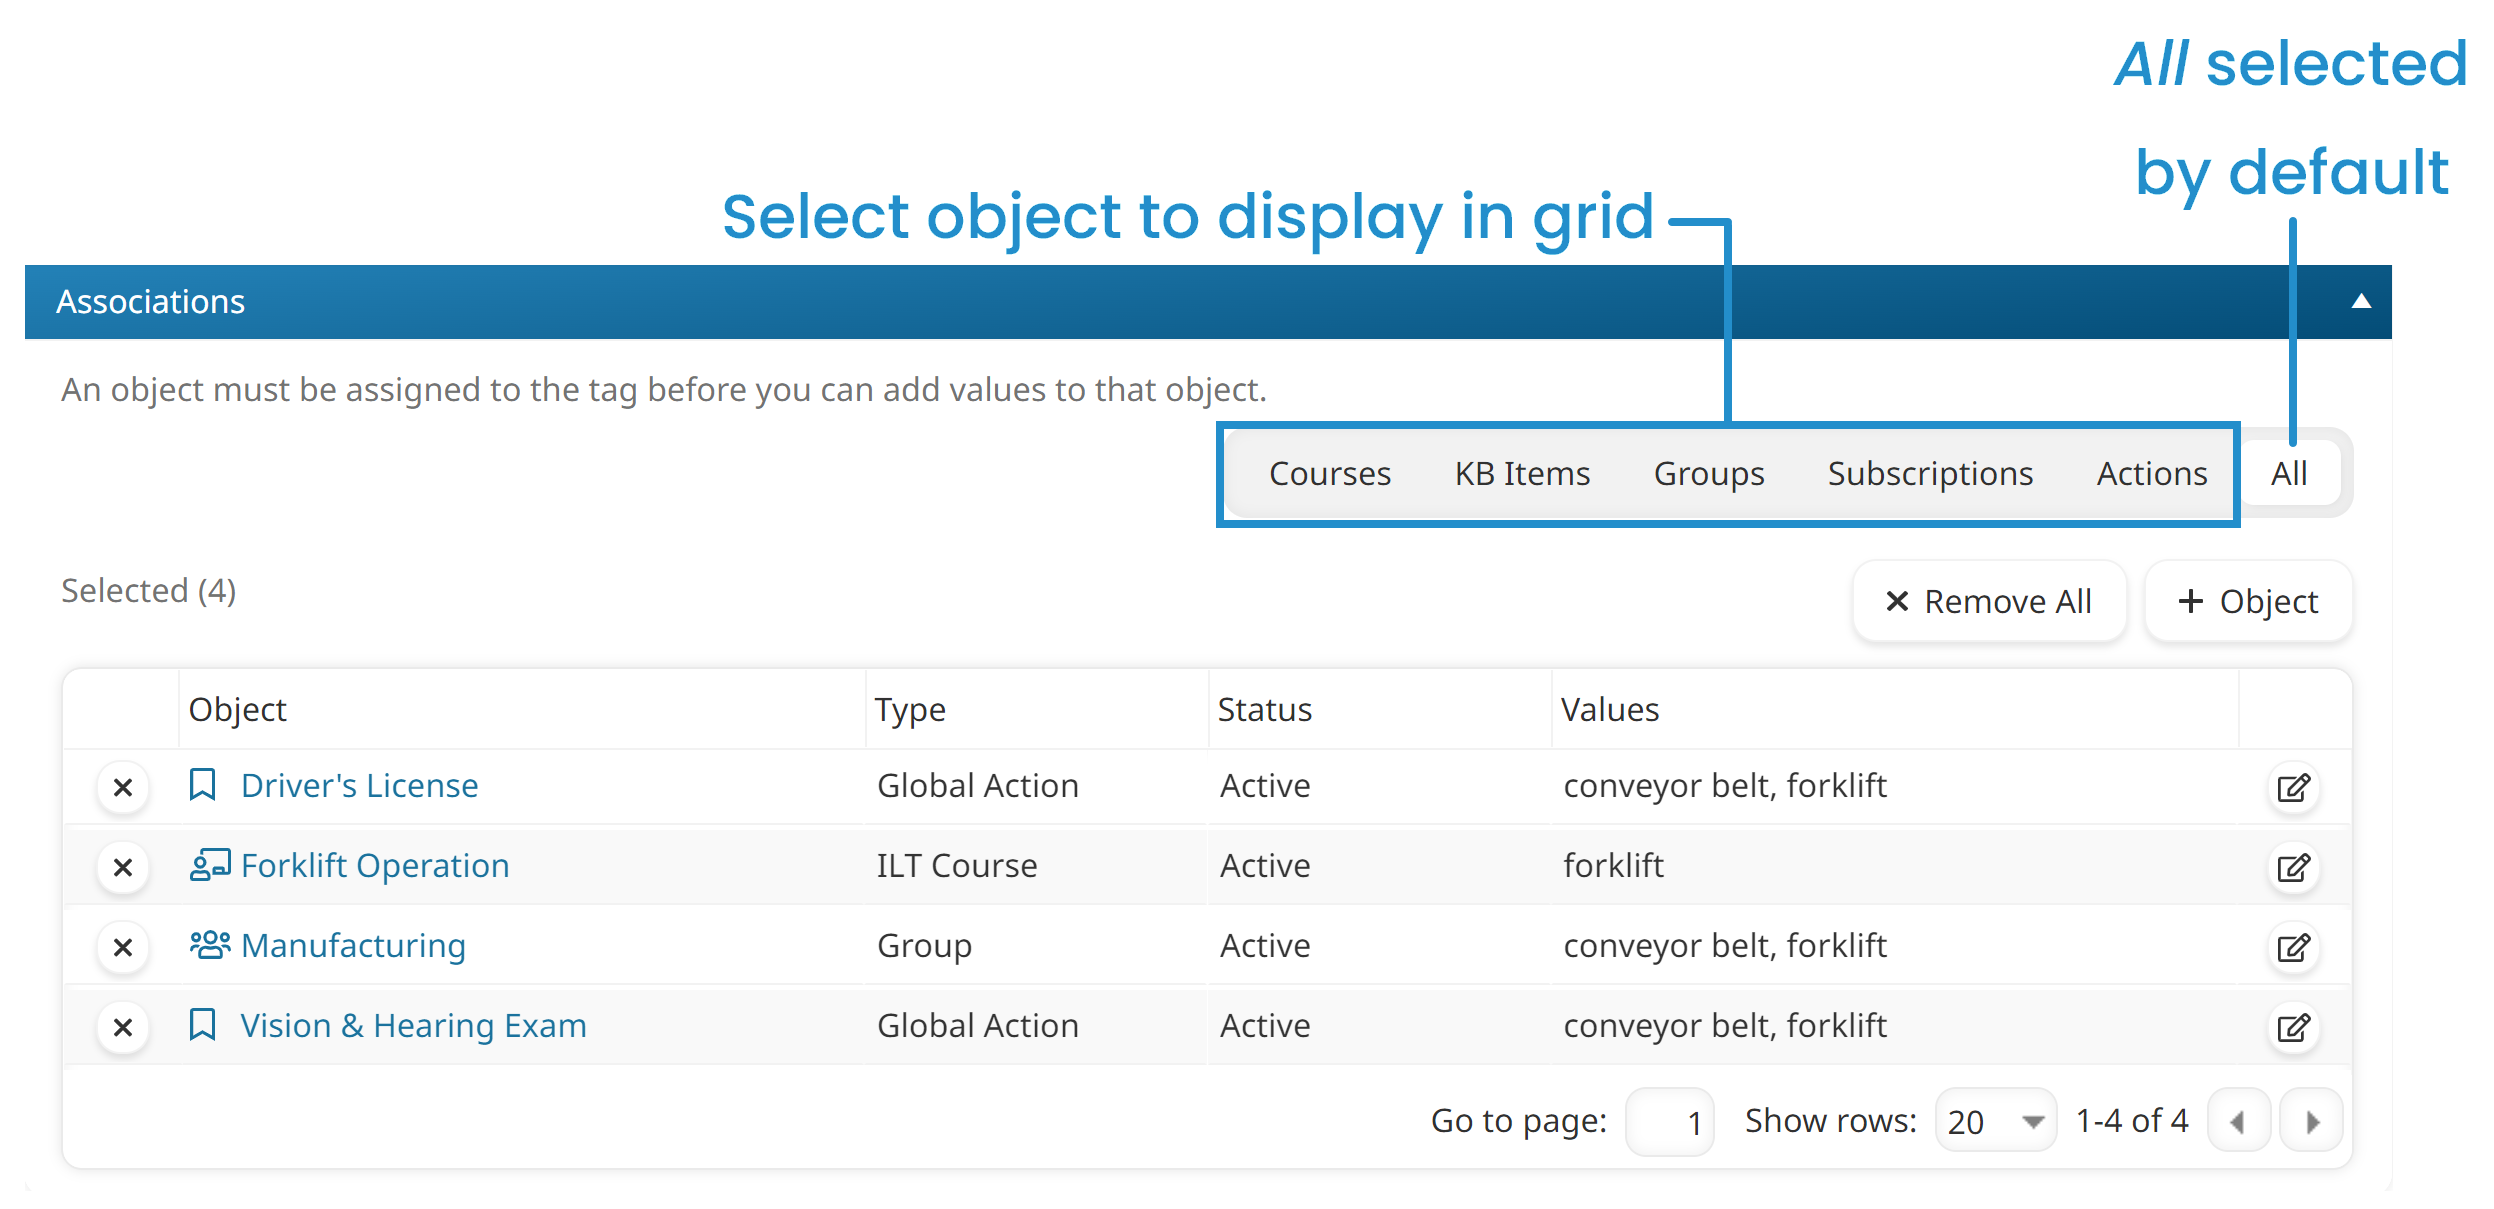
The number beside the Selected label indicates how many objects are displayed in the grid.

Associating Objects to a New Tag
By default, the Associations accordion displays all active courses, knowledge base items (i.e., articles and files), groups, and subscriptions in your account. You can control what's displayed in the grid by clicking the button for the object you want displayed.
To associate objects to a new tag:
- From the Add/Edit Tag workscreen, expand the Associations accordion. By default, the grid displays all objects.
- To associate an object to the tag, click the
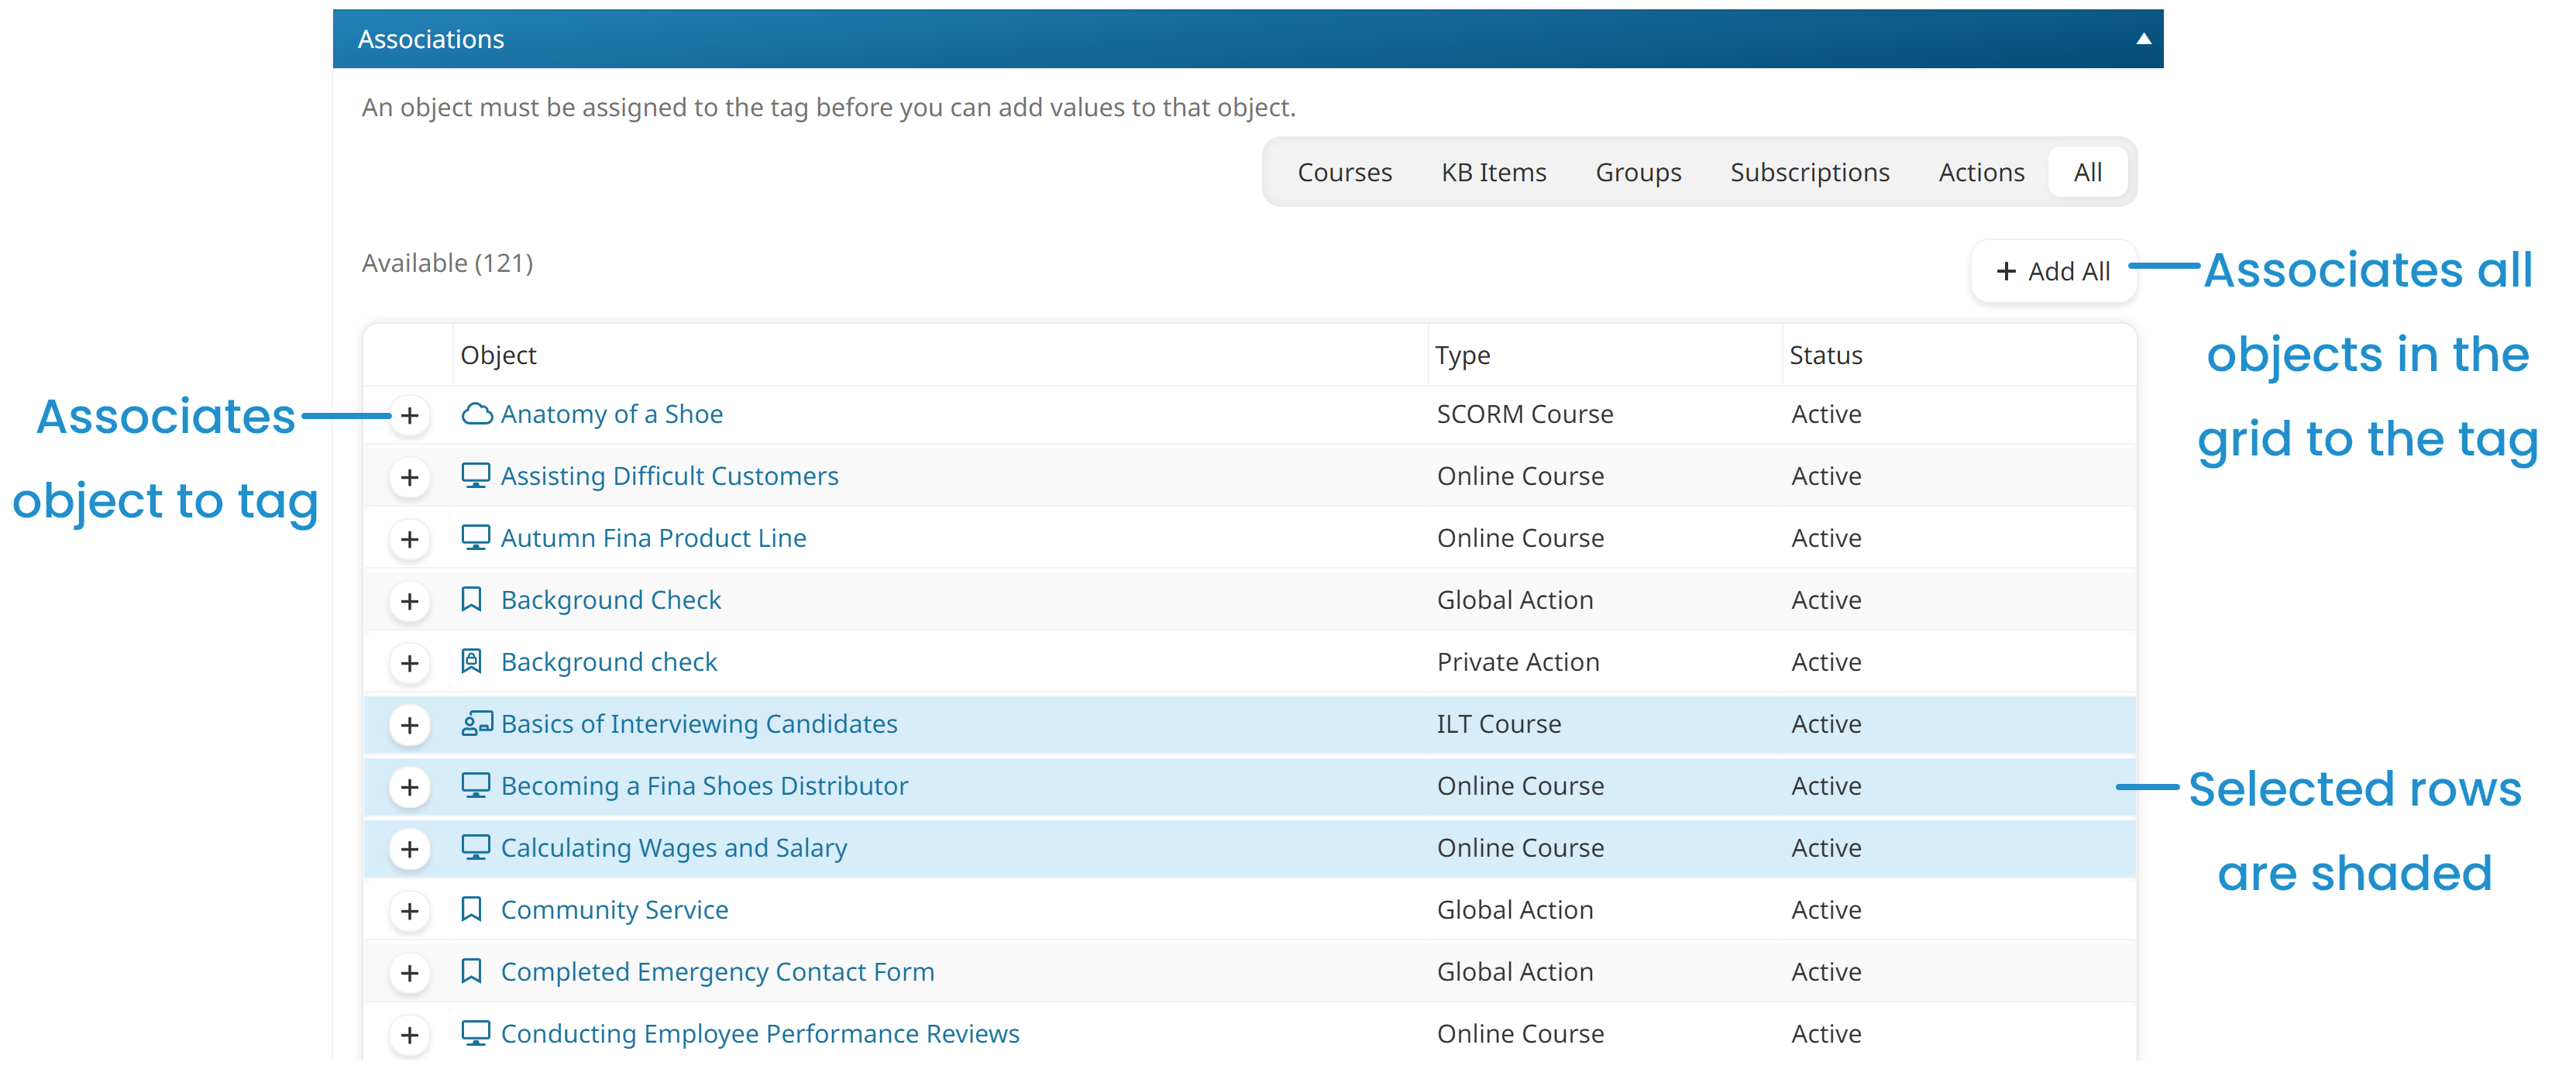
 beside the object's name. To associate all objects to the tag, click Add All. The selected object rows are shaded.
- Click Save.
After associating an object with a tag, you can also assign tag values to the object. This is an optional step from the Add/Edit Tag workscreen, but required if you assign the tag from the object-specific workscreen.
Associating Objects to an Existing Tag
To associate objects to an existing tag:
- From the Add/Edit Tag workscreen, expand the Associations accordion. By default, the grid displays all objects.
- Click Object.

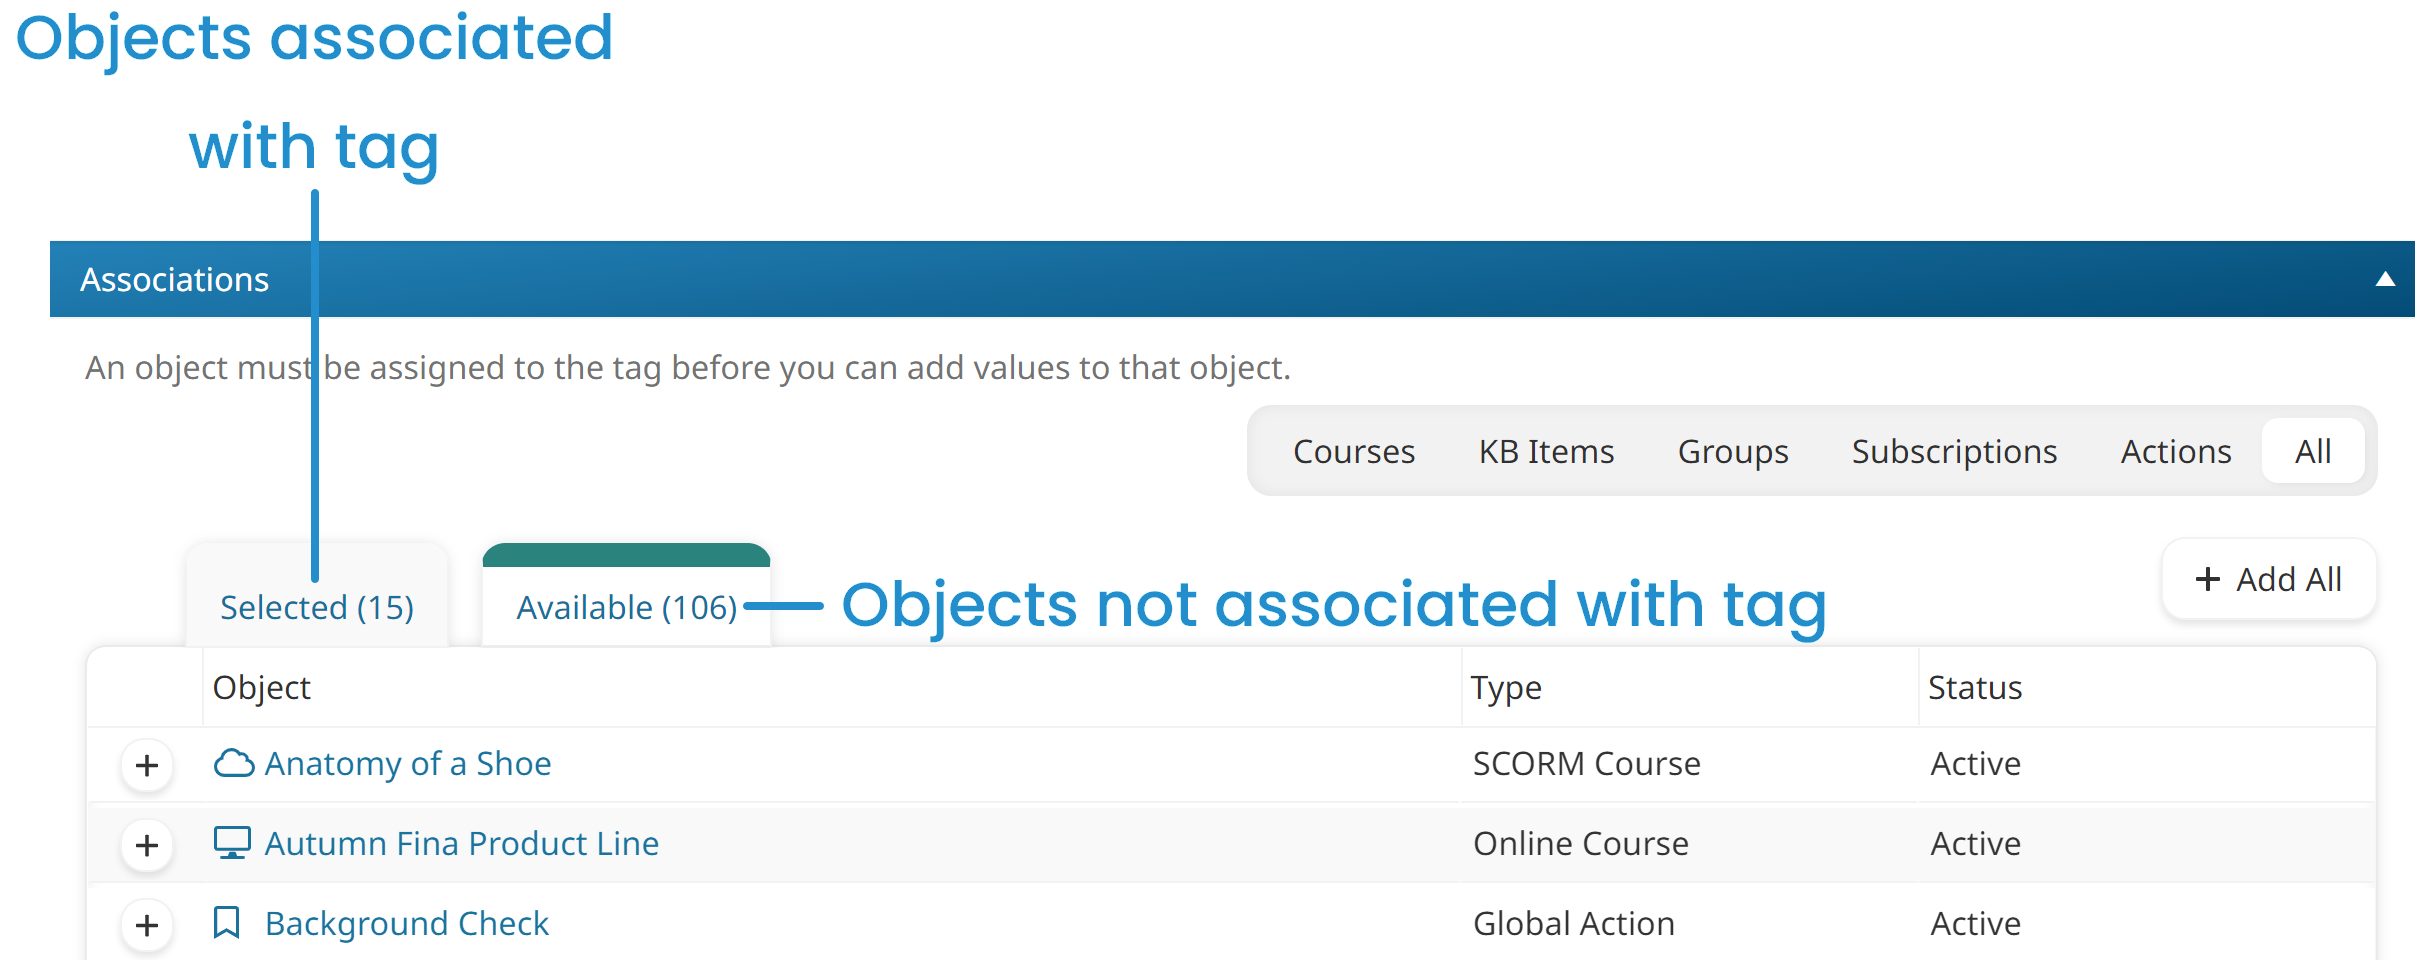
The Associations accordion displays two tabs: Selected and Available. The Selected tab displays objects previously assigned to the tag. The Available tab displays objects that are not assigned to the tag.
- From the Available tab, click the
 beside the object you want to assign to the tag. To assign all objects to the tag, click Add All. The selected rows are shaded.
 - Click Save.
After associating an object with a tag, you can also assign tag values to the object. This is an optional step from the Add/Edit Tag workscreen, but required if you assign the tag from the object-specific workscreen.
Removing Association Between Objects and a Tag
To remove the association between objects and a tag:
- From the Add/Edit Tag workscreen, expand the Associations accordion.
- Click the
 beside the object you want to remove from the tag. To remove all objects from the tag, click Remove All.
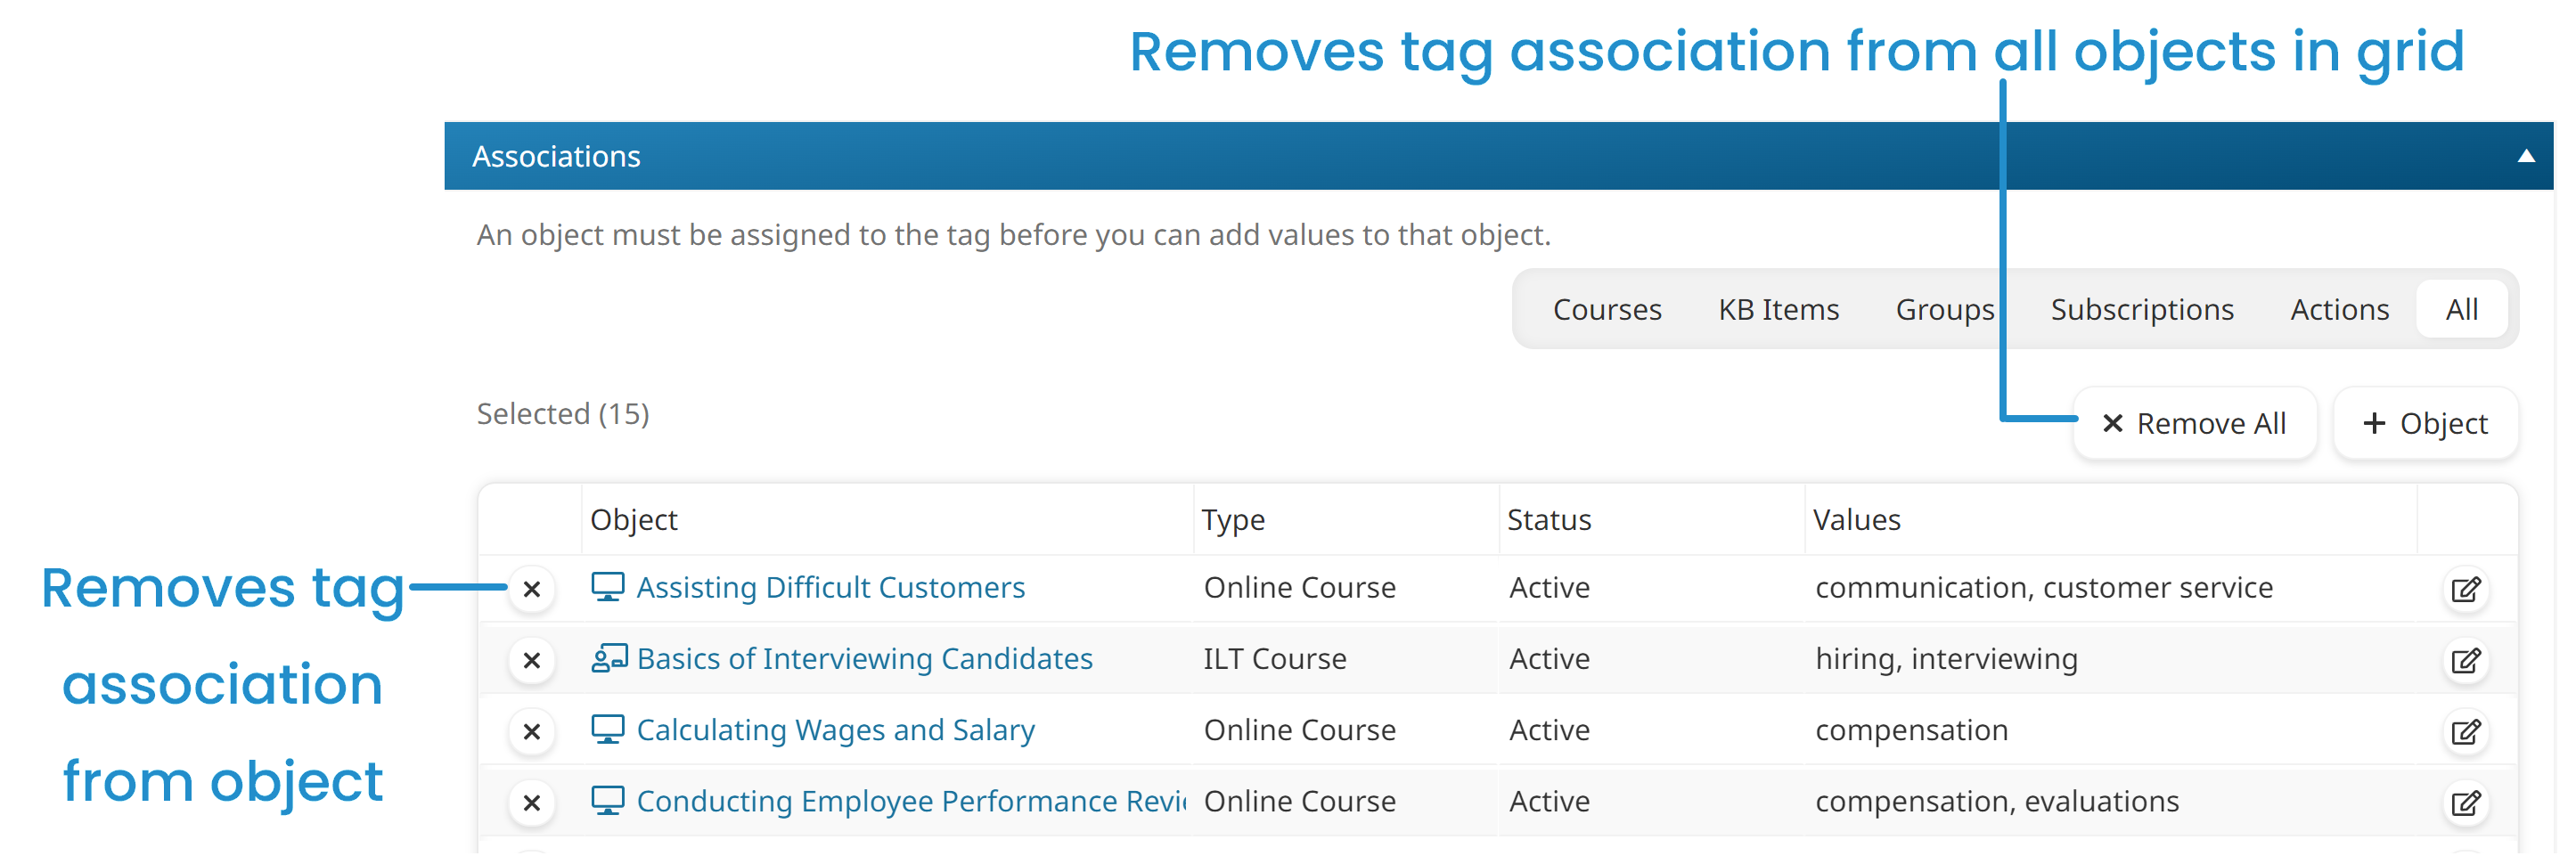
- Click Save.
Assigning Values to a Tag's Object
- Before you can assign values to a tag's objects, you must first associate the objects to the tag and click Save.
- Assigning values to a tag's objects is optional from the Add/Edit Tag workscreen.
- You may also assign tags and their values with objects from the Tags accordion on object-specific workscreens. If you assign tags from the object-specific workscreen, you must also assign at least one value to the tag.
Values further identify objects within the tag. For example, suppose the products tag has been associated with the 2018 Spring Products course. Values for the Spring Products course might include footwear, handbags, wallets, and umbrellas.
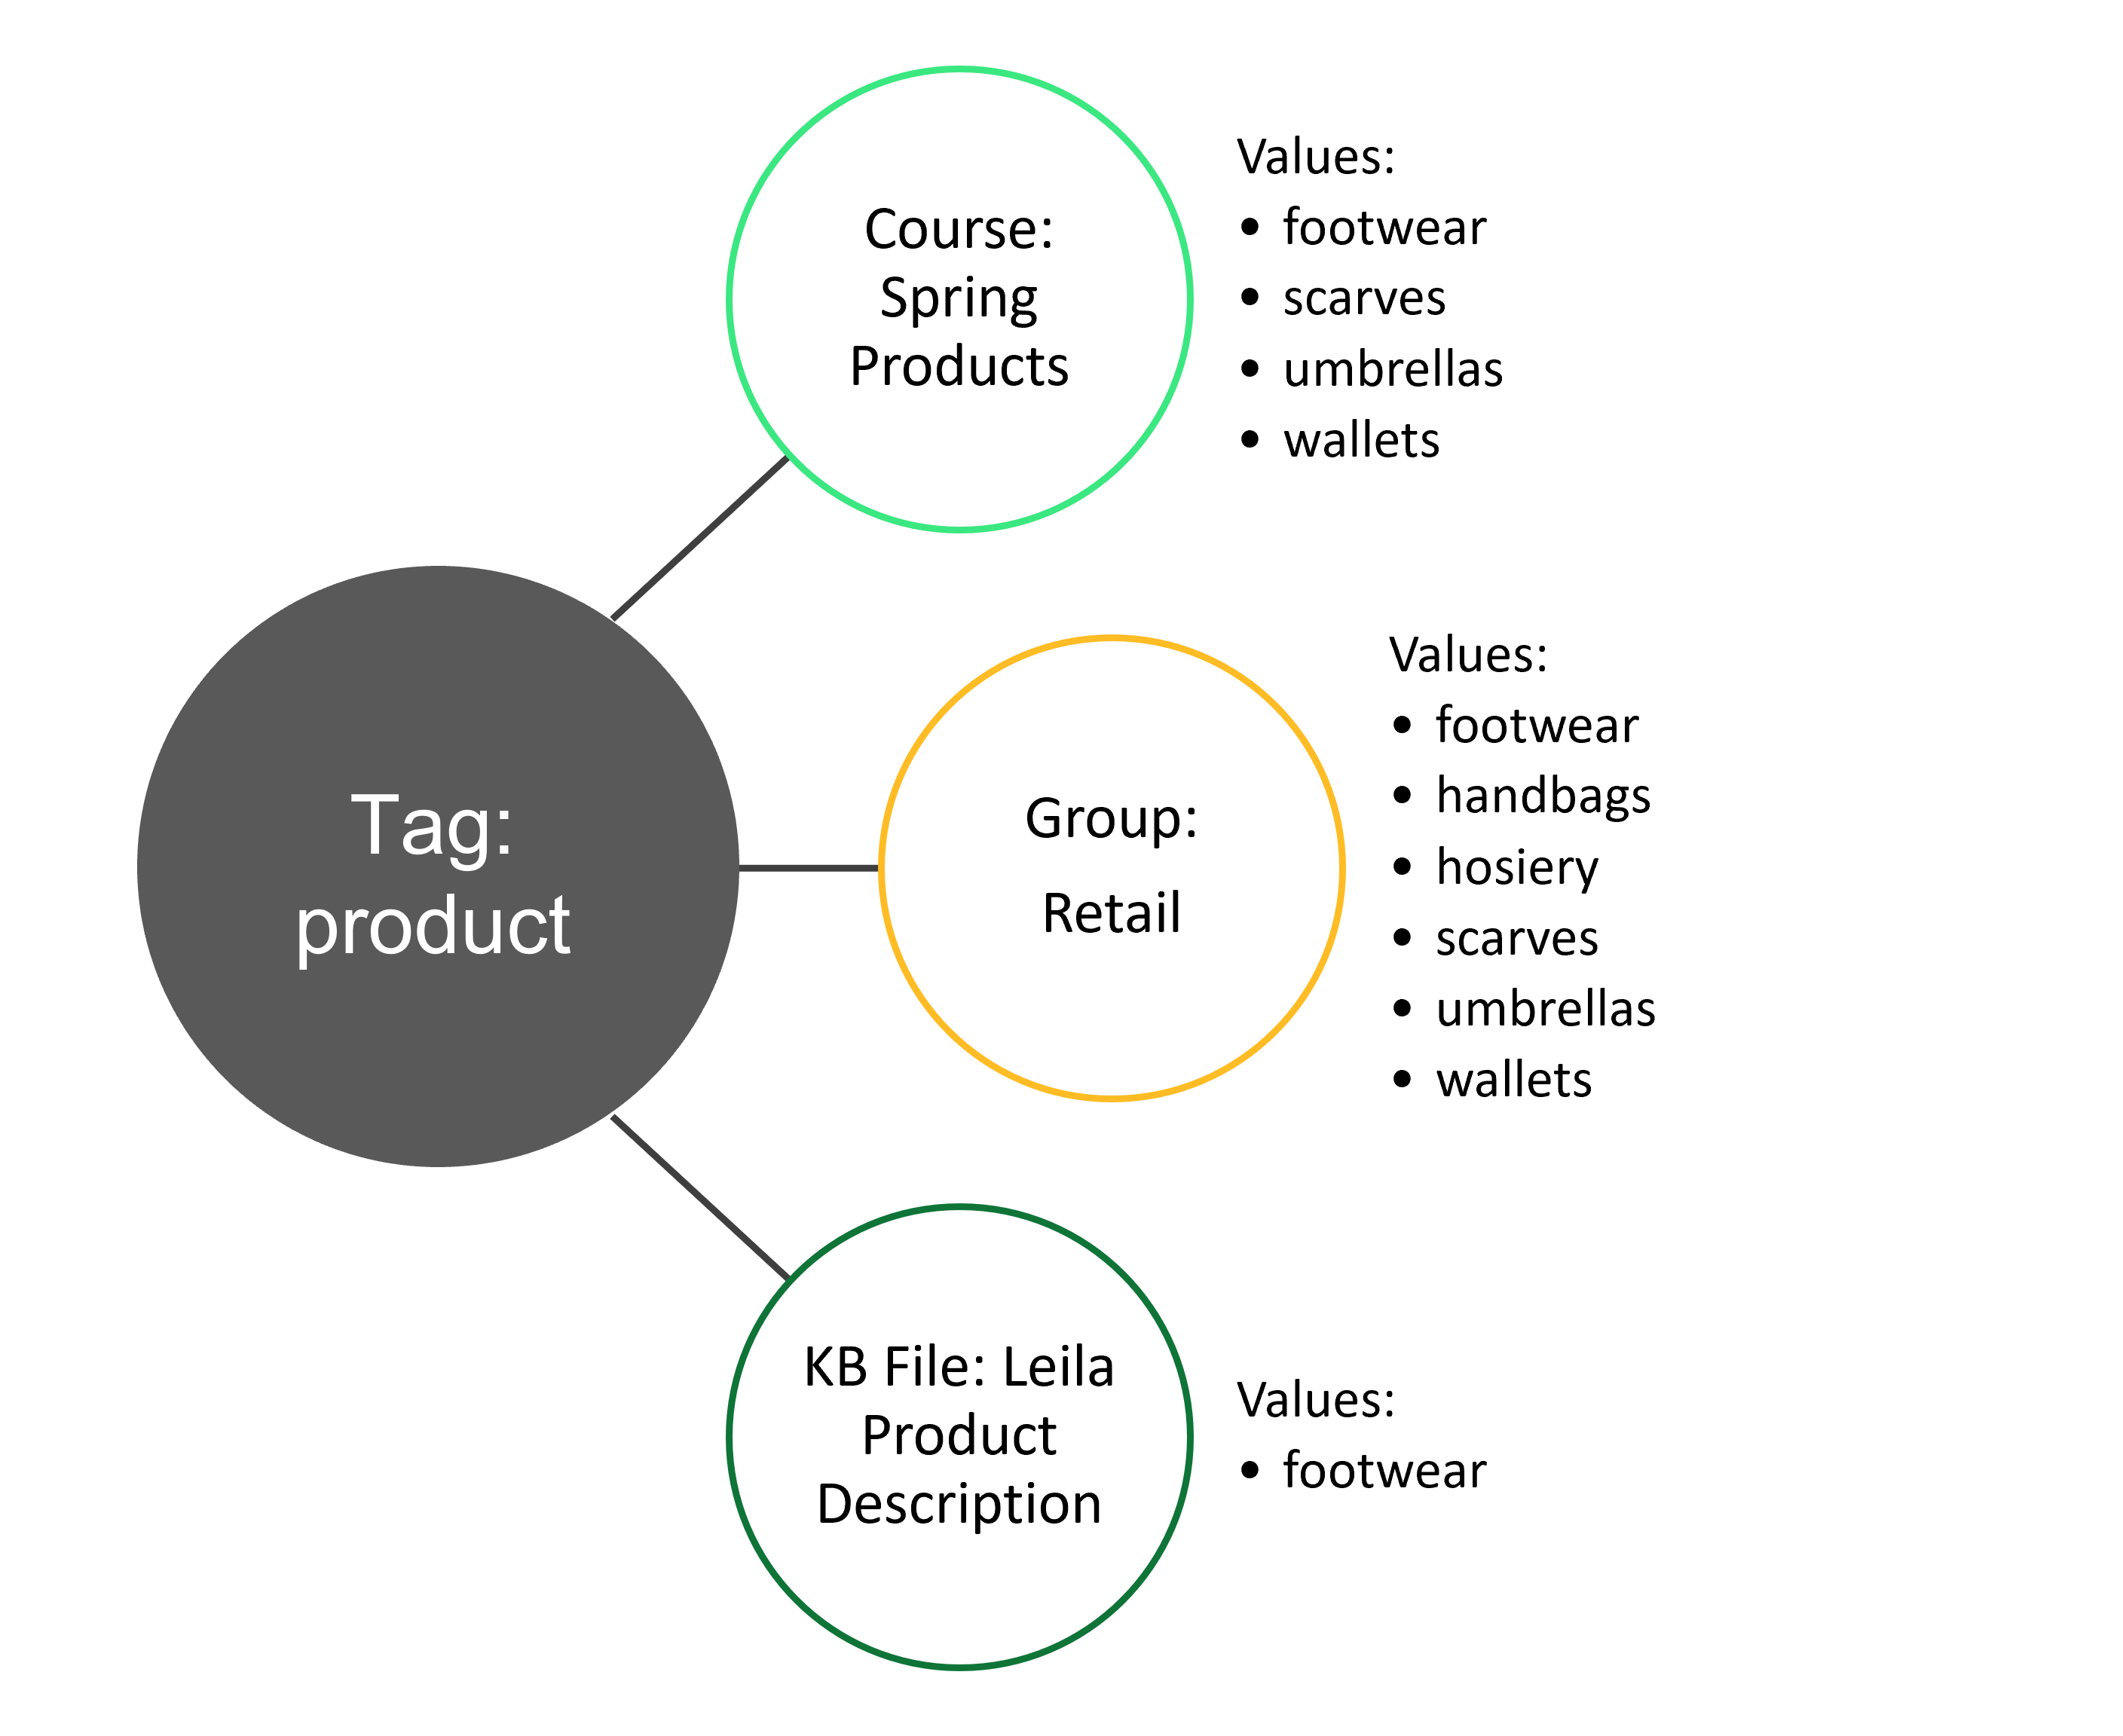
To assign values to a tag's object:
- From the Add/Edit Tag workscreen, expand the Associations accordion.
- Click the
 beside the object. A new panel displays for the selected object.
 - Click the Values field and select the pre-defined values you want to assign to the object.
If the tag allows users to add values, the list will also include other values that were previously specified for the tag. You can enter a new value and press ENTER after each value, or enter all the values (separated by a comma) then press ENTER.

- Click Apply Changes.
- Click Save.
Removing Values from a Tag's Object
To remove values from a tag's object:
- From the Add/Edit Tag workscreen, expand the Associations accordion.
- Click the
 beside the object. A new panel displays for the selected object.
 - Click the X beside the value you want to remove.

- Click Apply Changes.
- Click Save.